Confirming your GPU environment and setup
Overview
Teaching: 0 min
Exercises: 10 minQuestions
How to log on to a machine with GPUs, e.g. Argus
Does the machine have a NVIDIA GPU and is it working?
Validate CUDA is compatible with GPU Device Driver.
Is Visual Studio installed and running?
Objectives
Check setup requirements for CUDA testing
This training session is aimed at users on a Windows machine. Since many of the University students and staff are Mac users, we are providing very detailed instructions on how to work in a Windows environment. If you are very familiar with Windows (especially Windows 10) then you can skip to the 3rd session “Visual Studio Basics”.
Remotely logging into Argus (or any Win10 machine).
Our first step is logging into a machine with an available GPU. For this training session, we will only focus one popular setup: a Windows 10 machine with a NVIDIA GPU and Visual Studio installed as the IDE. If your own personal machine has this setup, this step is simple. If you are logging into machine on the University’s HPC, this is slightly more complicated.
The purpose of this section is to simplify the steps necessary to remotely logon to a Windows machine and run the appropriate tests to ensure the Windows environment is ready to execute GPU programs.
First you will need to logon to an Argus machine.. This will bring up a Windows 10 GUI environment. For those users who are experienced in ssh or know how to remotely login to a machine using the command line the following process will be different. And for those Mac users, the MS Windows commands and apps may take some getting use to.
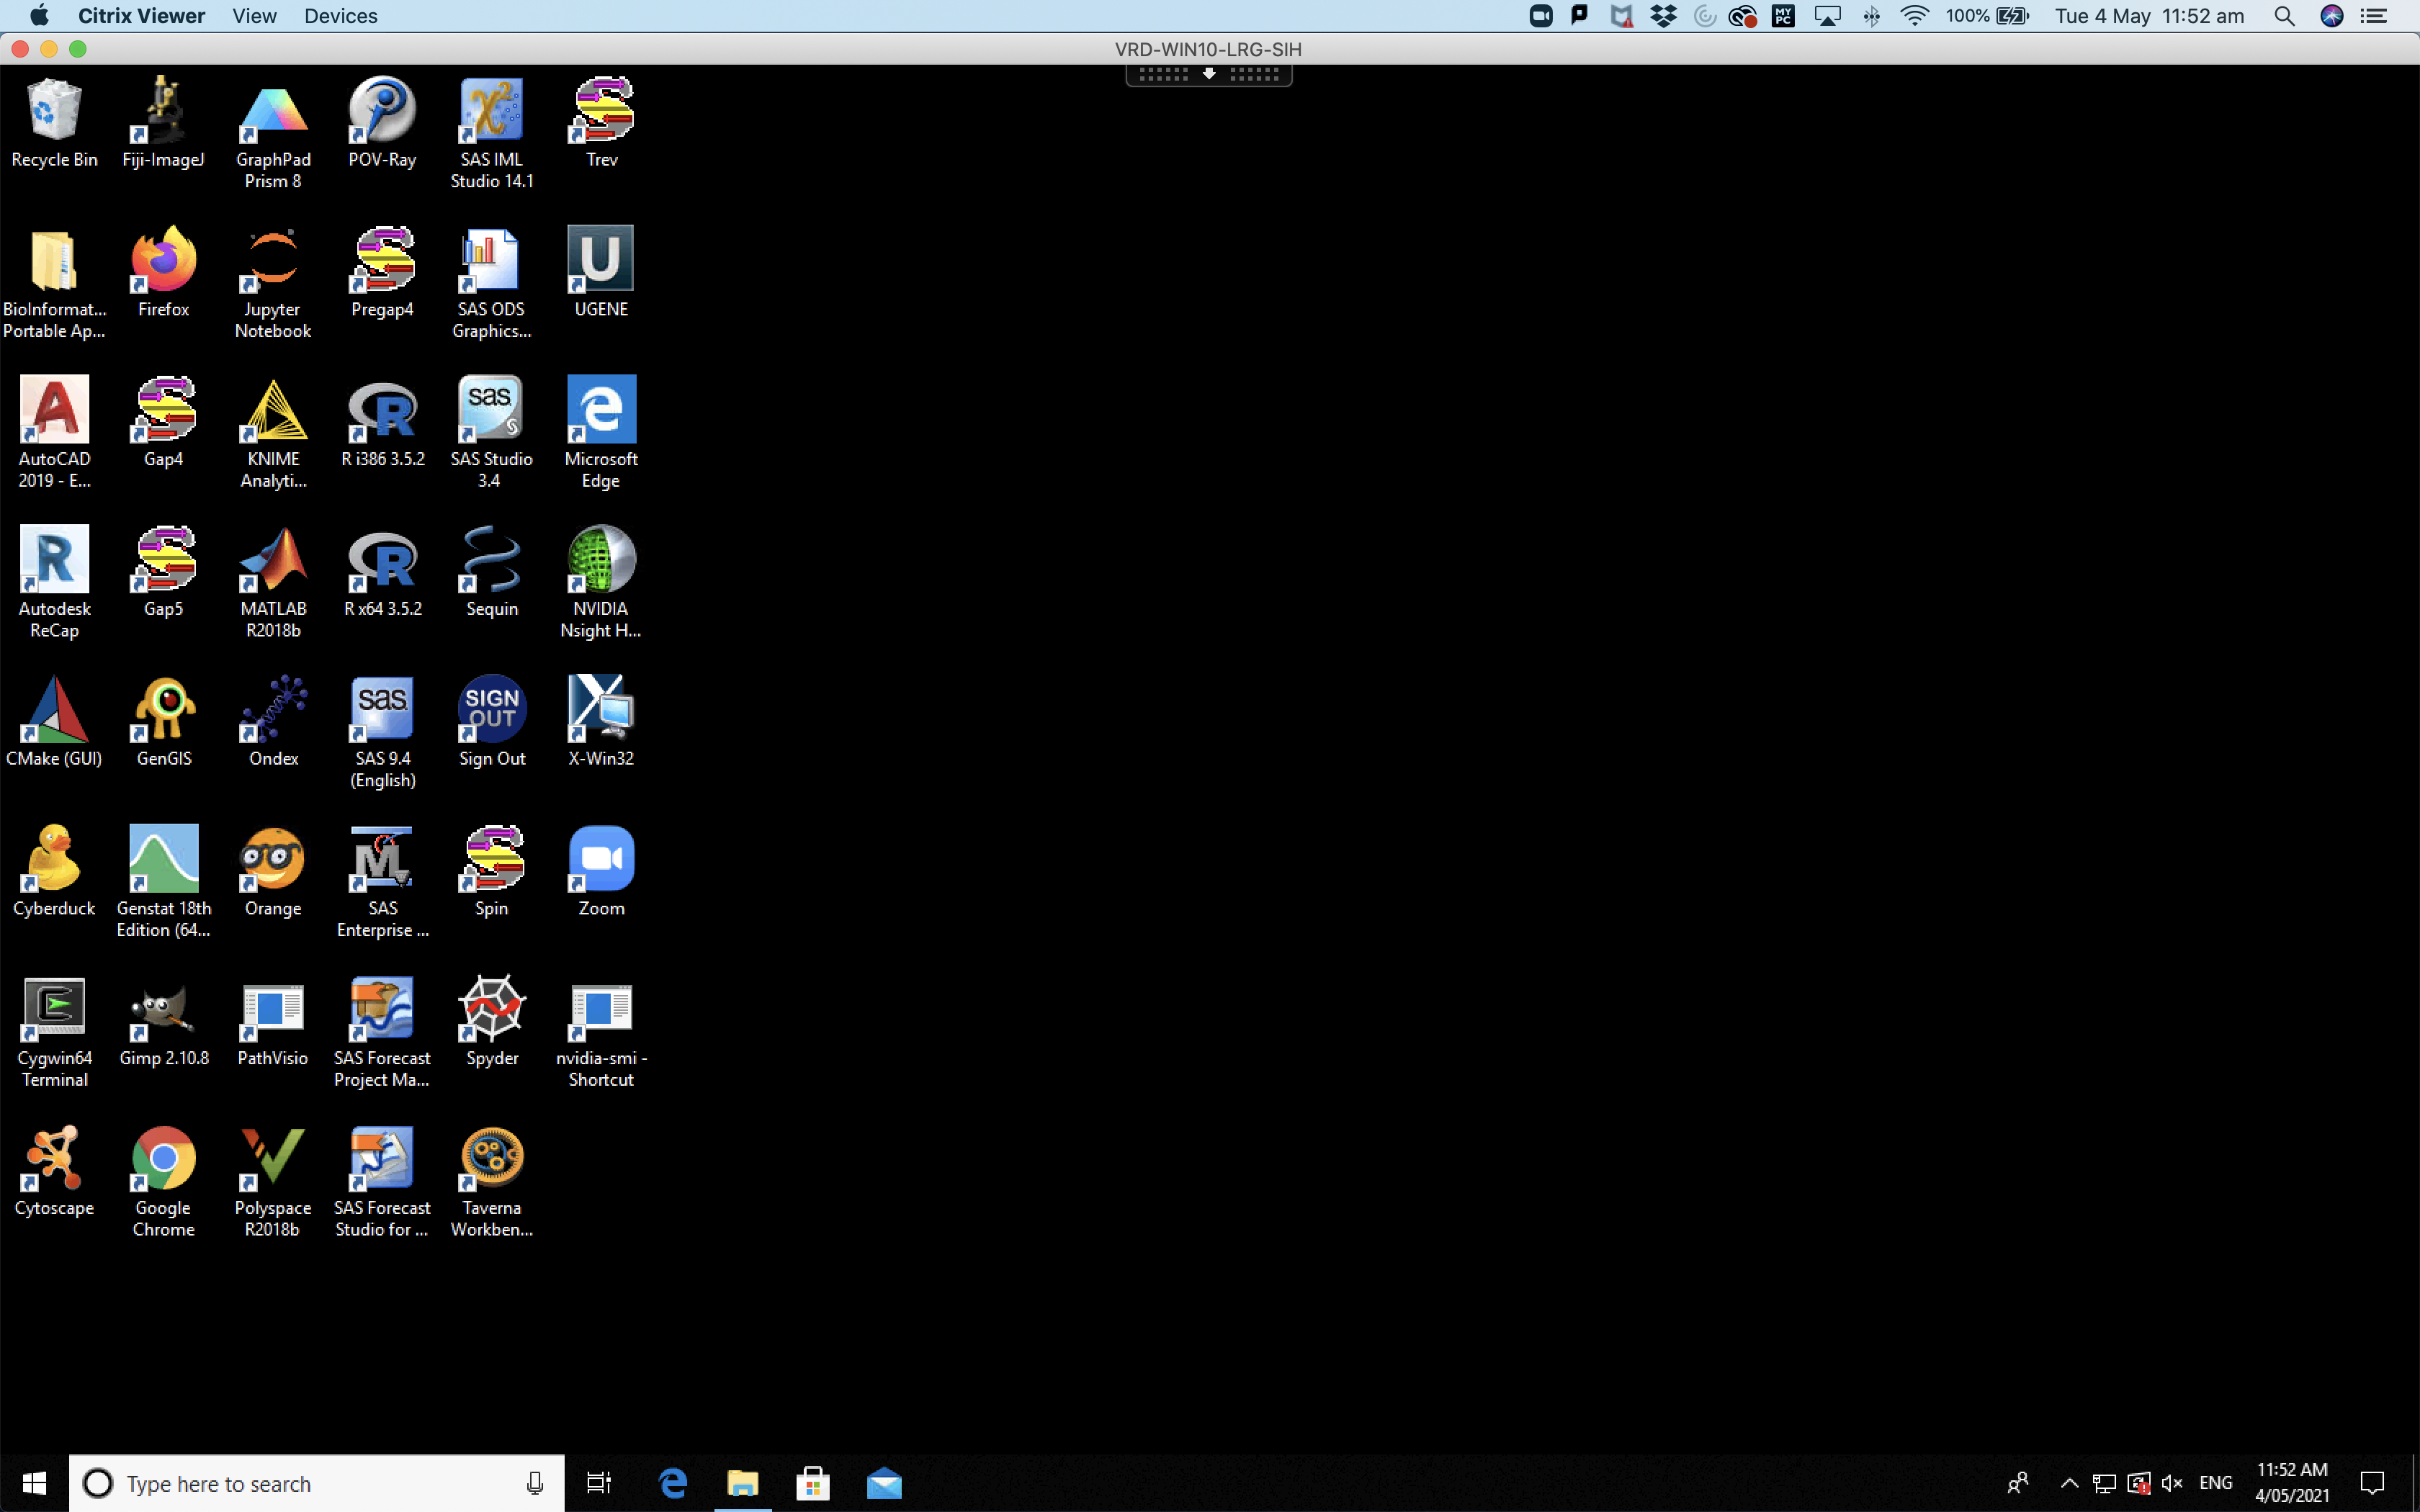
The picture below shows the Argus Windows GUI (also called the remote machine). Notice it looks similiar to a MacOS environment but there is a Windows icon in the bottom left corner. Also notice that there is an Apple icon in the top left since I am using my Mac to remotely logon to the Argus machine. In this setp, my Mac is the local computer and the Argus (Win10) machine is the remote computer.
Does your machine have a NVIDIA GPU
One of the first questions we need to answer is, does my machine have a GPU and is it a NVIDIA brand? There are two ways to validate the GPU installed on a Windows machine, 1) the task manager and 2) the device manager. Both applications are used heavily by Windows users so we will cover both methods in detail so are users get exposure to both of these common Windows apps.
Using the Task Manager
The Task Manager is an application that most Windows users are familiar with. It will tell the user how the machine is performing and if an application is stalled, this is where a Windows user will go to kill a “hung” process.
To reach the task manager on a LOCAL Windows machine, a user would normally hit the Ctrl-Alt-Del keys (all three keys at the same time). But we are remotely connected to the Argus machine, so these key strokes entered on our local machine will NOT control the remote machine for the following reasons: 1) If you are on a local Mac, these keys often don’t exist on the keyboard or have different functions. So we can’t even locate the “Ctrl”, “Alt” and “Del” keys. 2) If you are on a local Windows machine, hitting these 3 keys will bring up the task manager for your local machine NOT the remote machine (Argus).
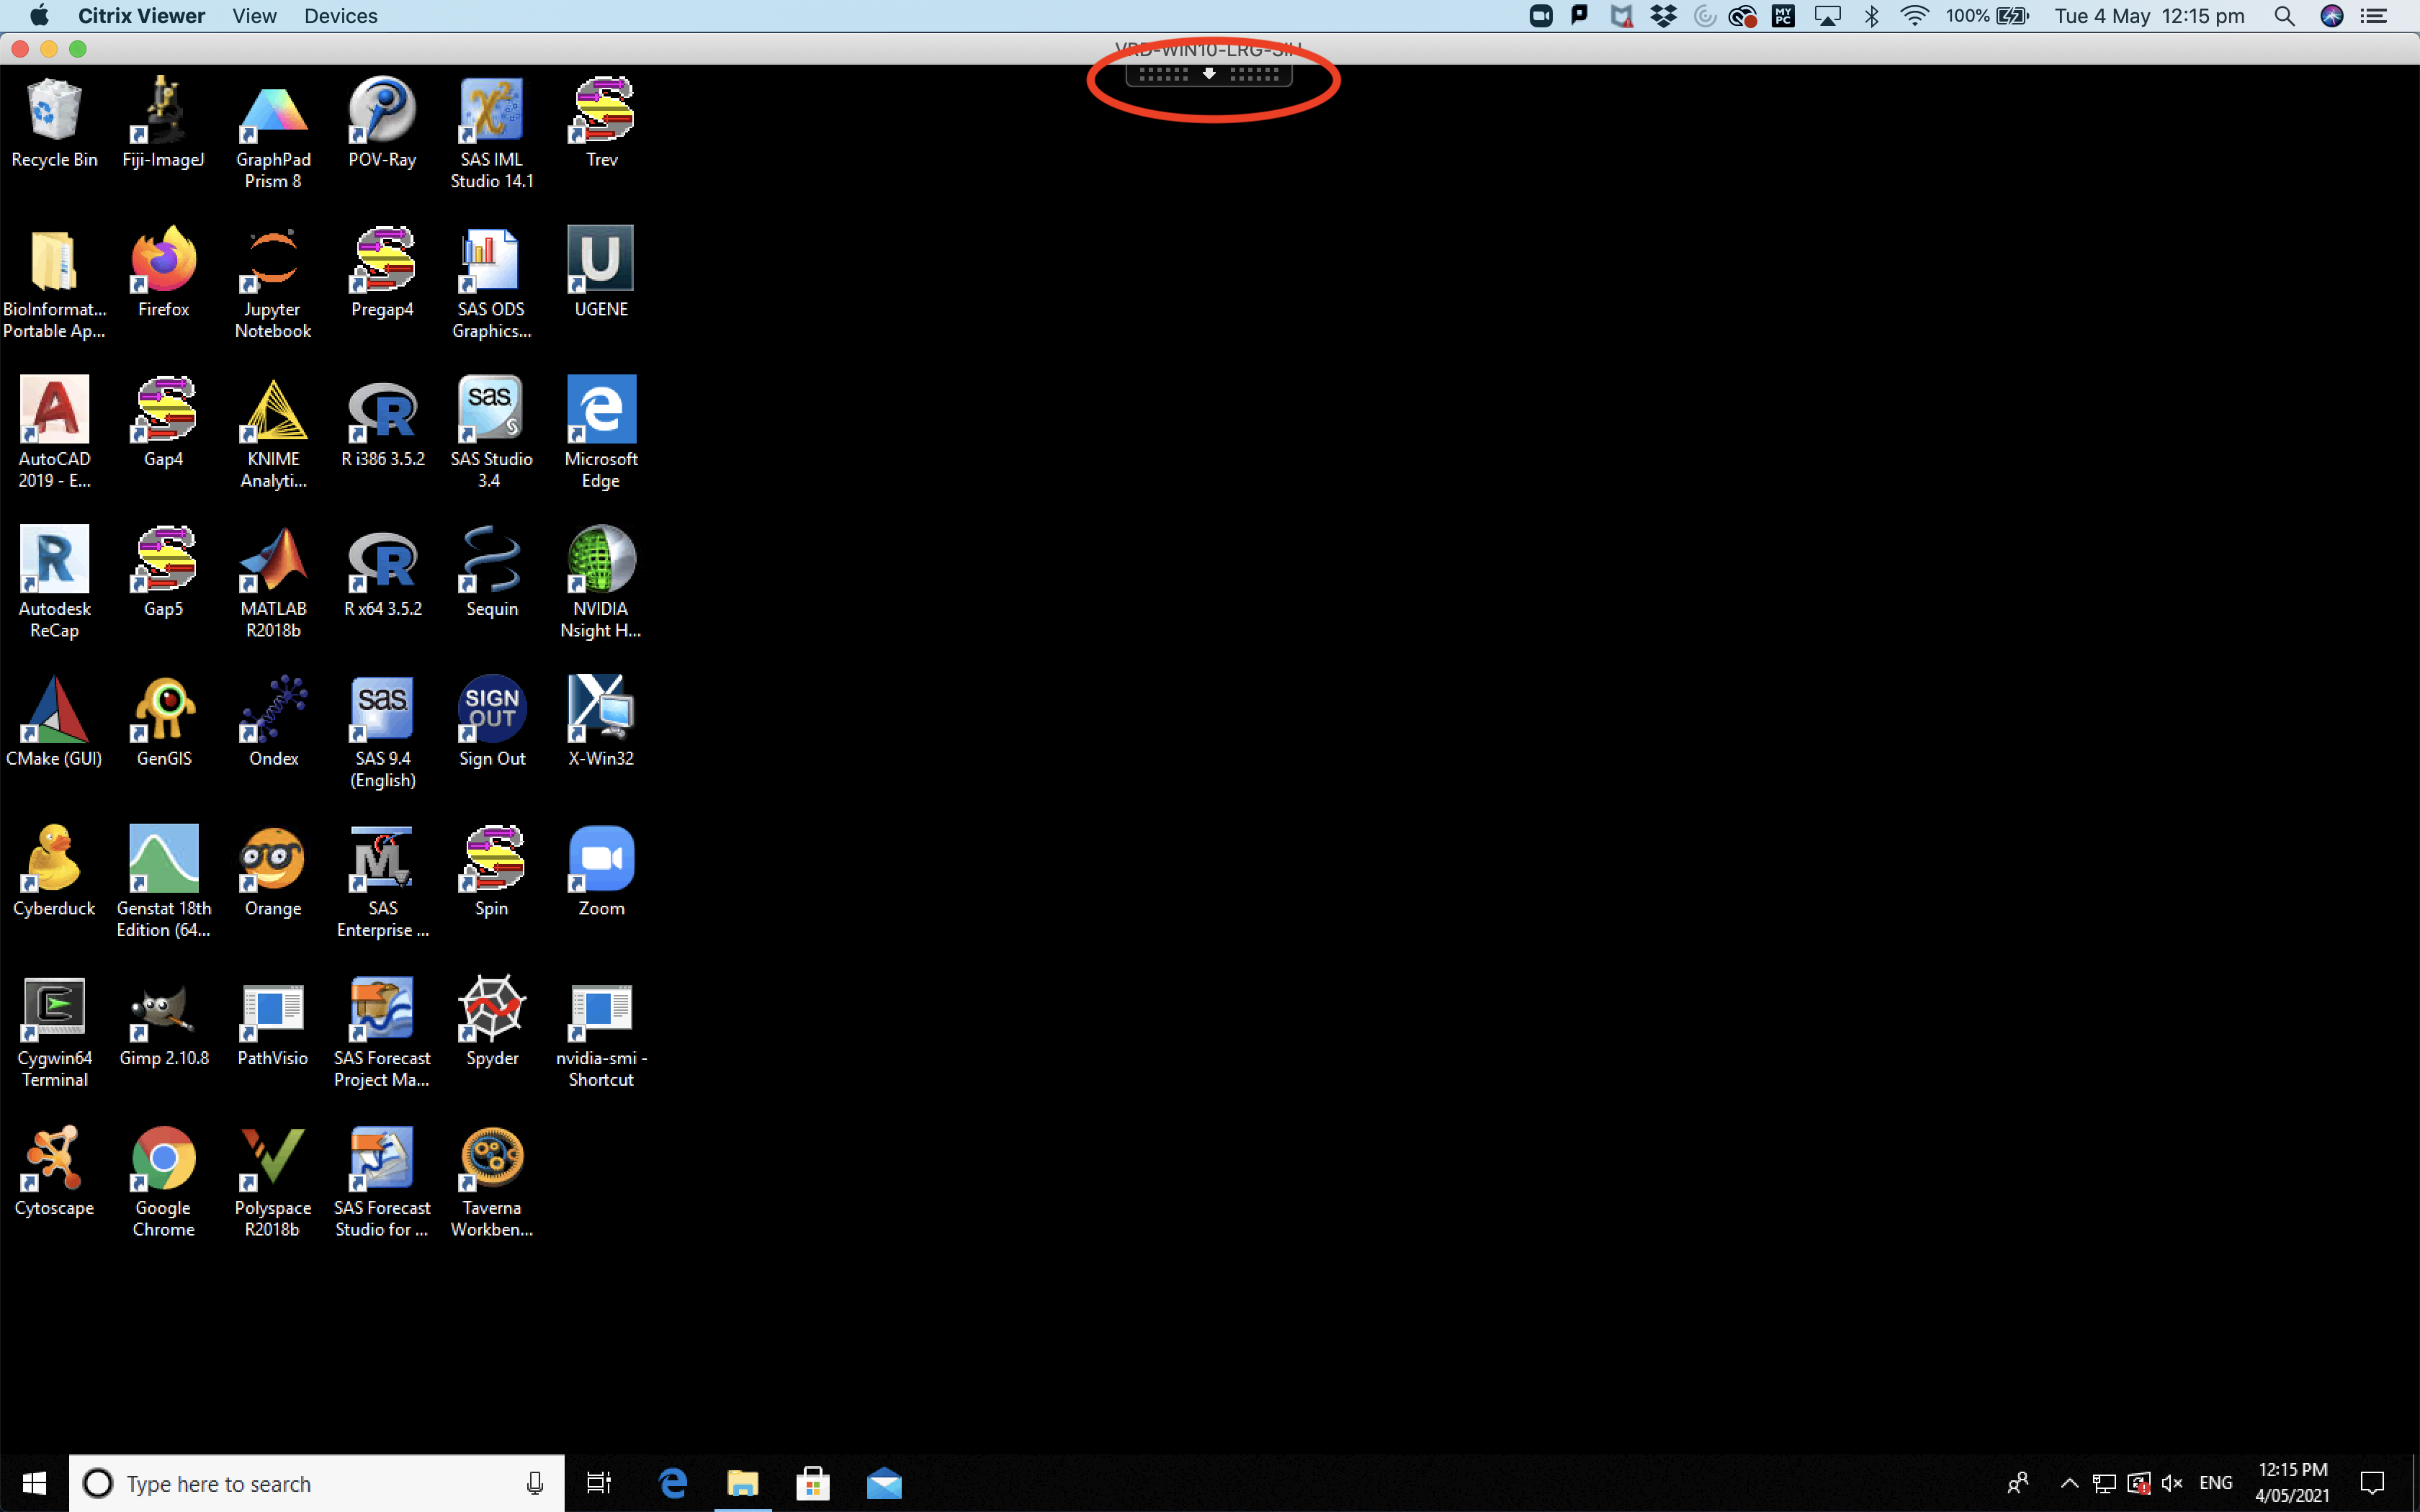
To reach the “Task Manager” on the remote machine, Argus, we must click on the XenDesktop Toolbar (see red circle in the picture below). This is a common toolbar for Citrix remote connections.
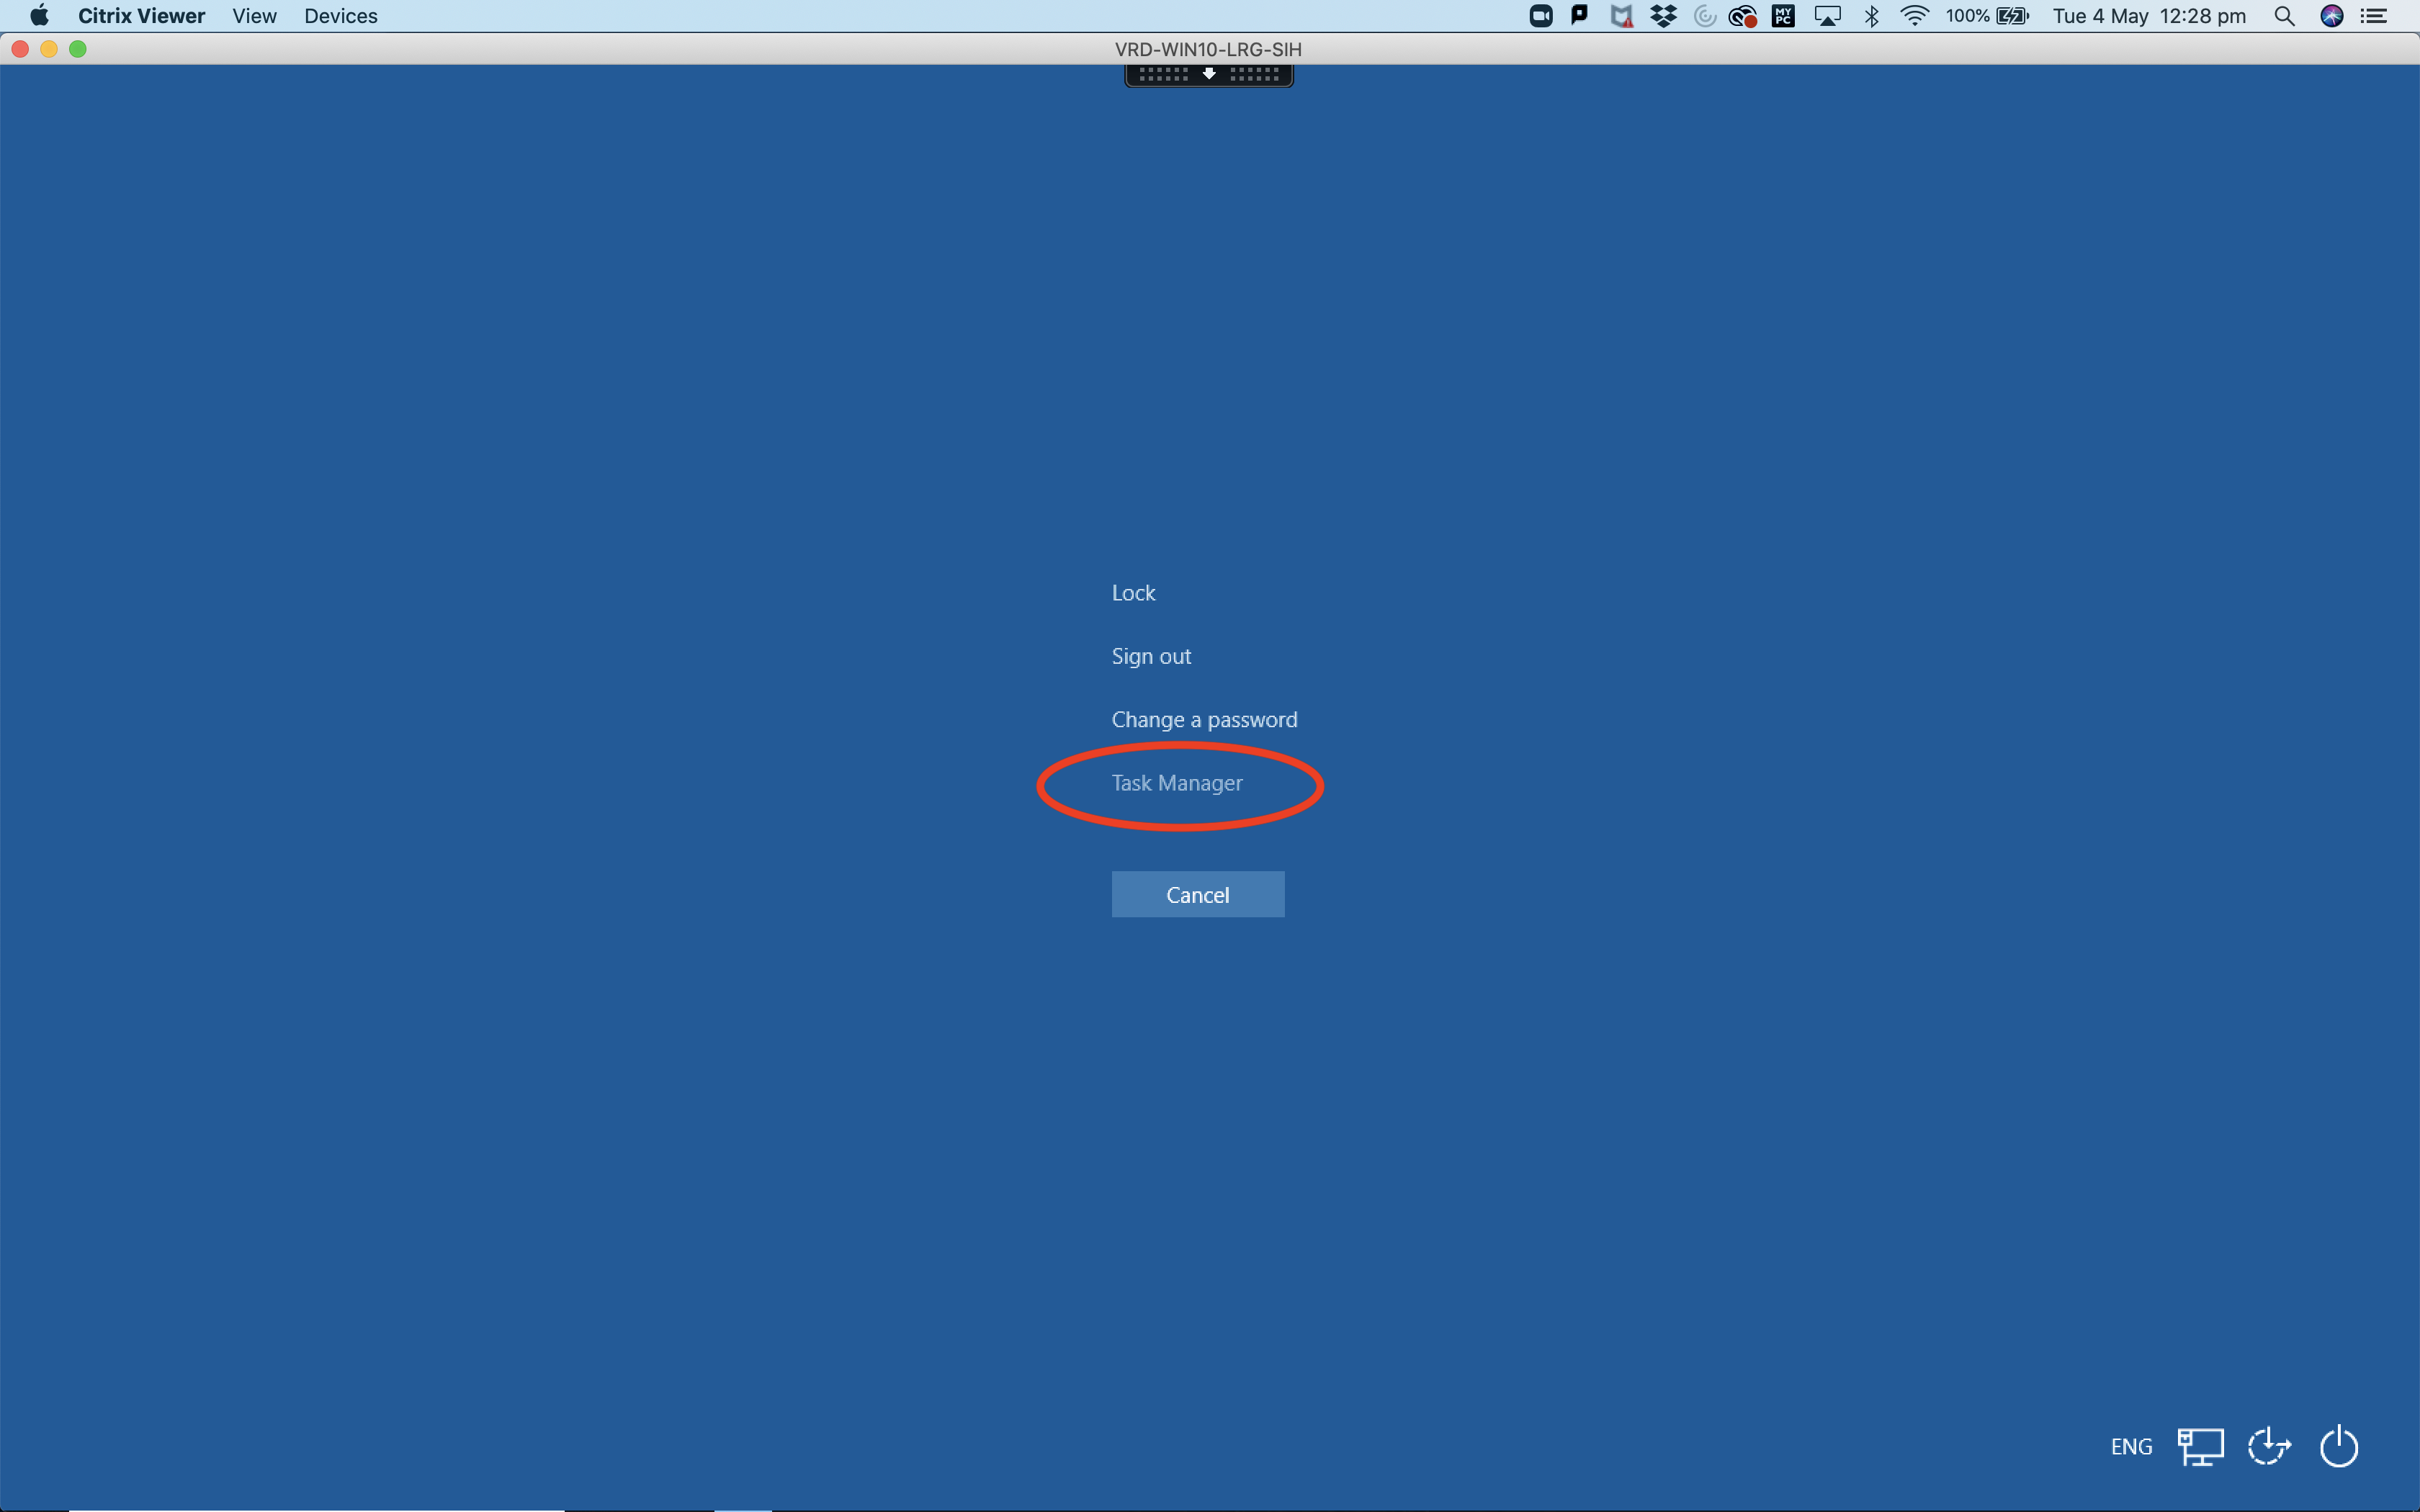
Once you click on the drop-down, the following picture will appear and you will have access to the “Ctrl-Alt-Del” key strokes (see red circle in the picture below). Clicking on this icon will send the “Ctrl-Alt_Del” signal to the remote Argus machine.

Once you click on “Ctrl-Alt-Del”, a blue screen will appear and then you can click on the “Task Manager” item (see red circle in picture below).
Once you click on “Task Manager” you should return to the Windows desktop and the the task manager will appear in a window just like the picture below.
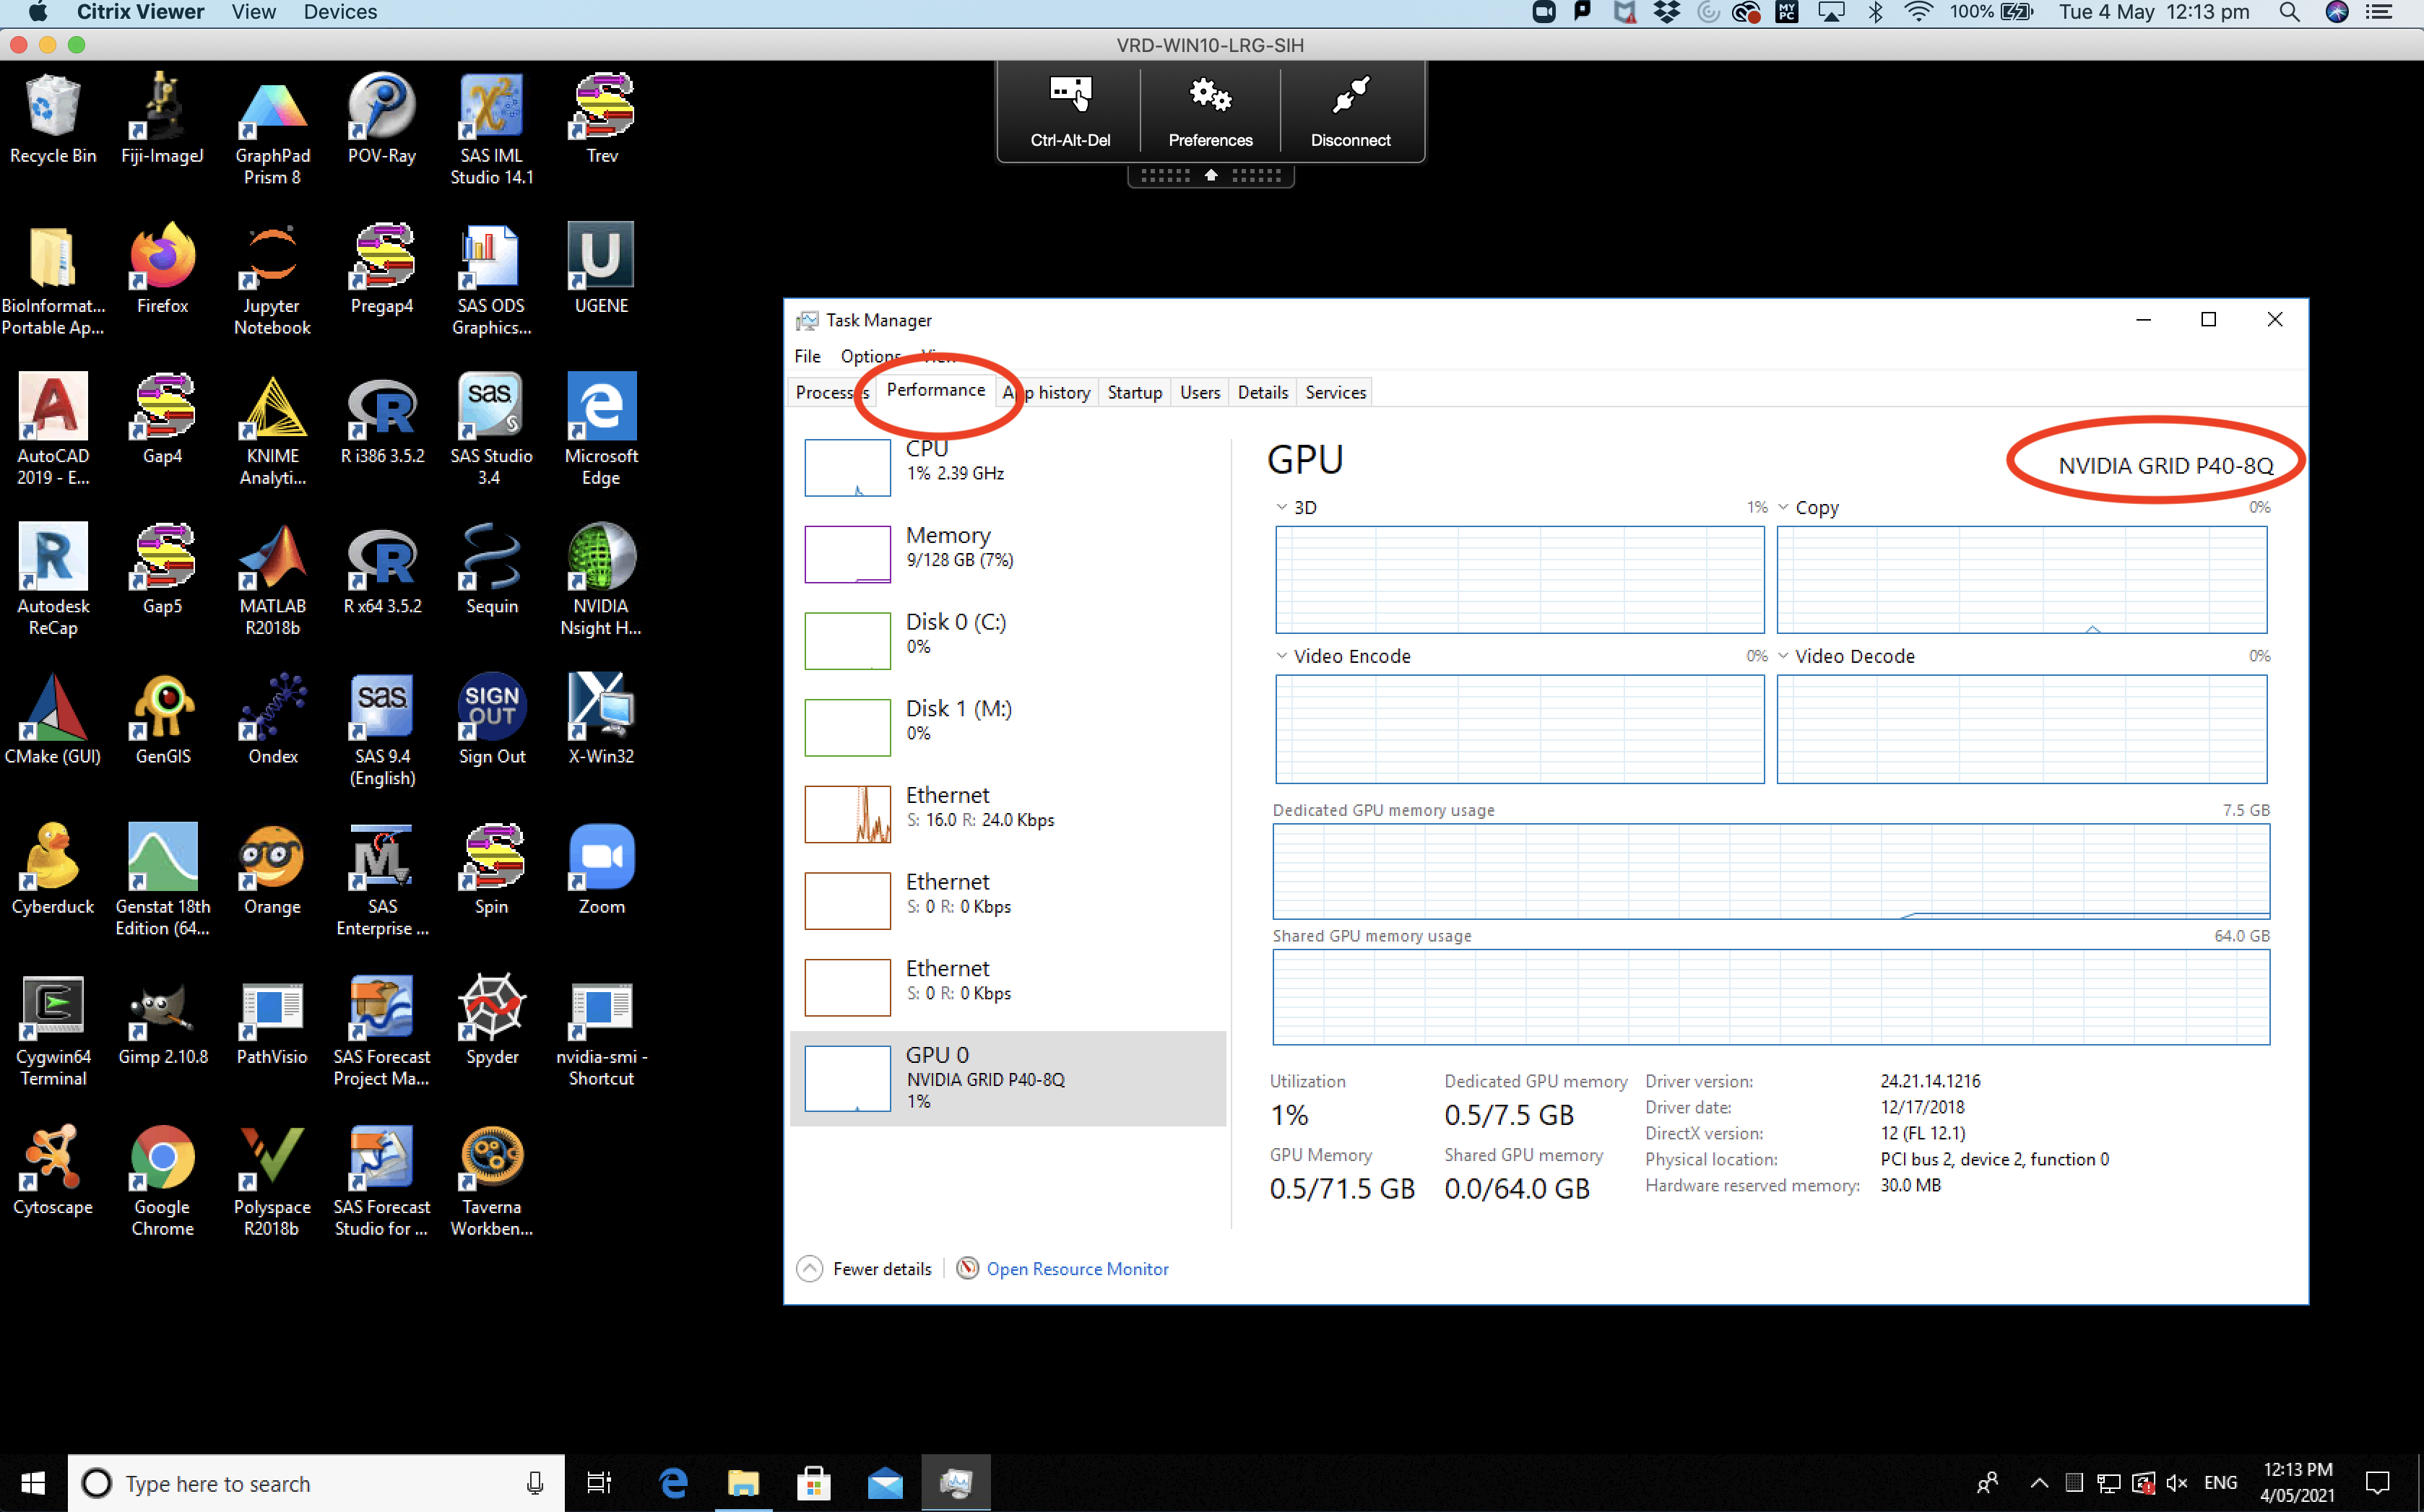
Make sure you are on the correct tab within the task manager, “Performance”. If not, click on the “Performance” tab (see left most red circle in picture above).
Now we should be able to see the GPU installed on the machine and what type of GPU it is. On the Argus machine we have a NVIDIA GRID P40 8Q (see the right most red circle in picture above). We have now confirmed that we have a GPU and it is a NVIDIA brand, YAY! If you want to skip the next step (Using the device manager to detect what GPU you have installed) you can.
Using the Device Manager
Reaching the “Device Manager” is another common task on a Windows machine. So in this section, we will cover how to check the GPU and it’s type using this common Windows application. The device manager can also be used to tell users what devices are attached to their computer and also if the devices are working properly.
There are several ways to reach the device manager. The following is the most reliable way to reach the device manager across different versions of Windows.
First locate the Windows search bar. It is located in the bottom left of the screen next to the Windows icon. See the red circle in the picture below.
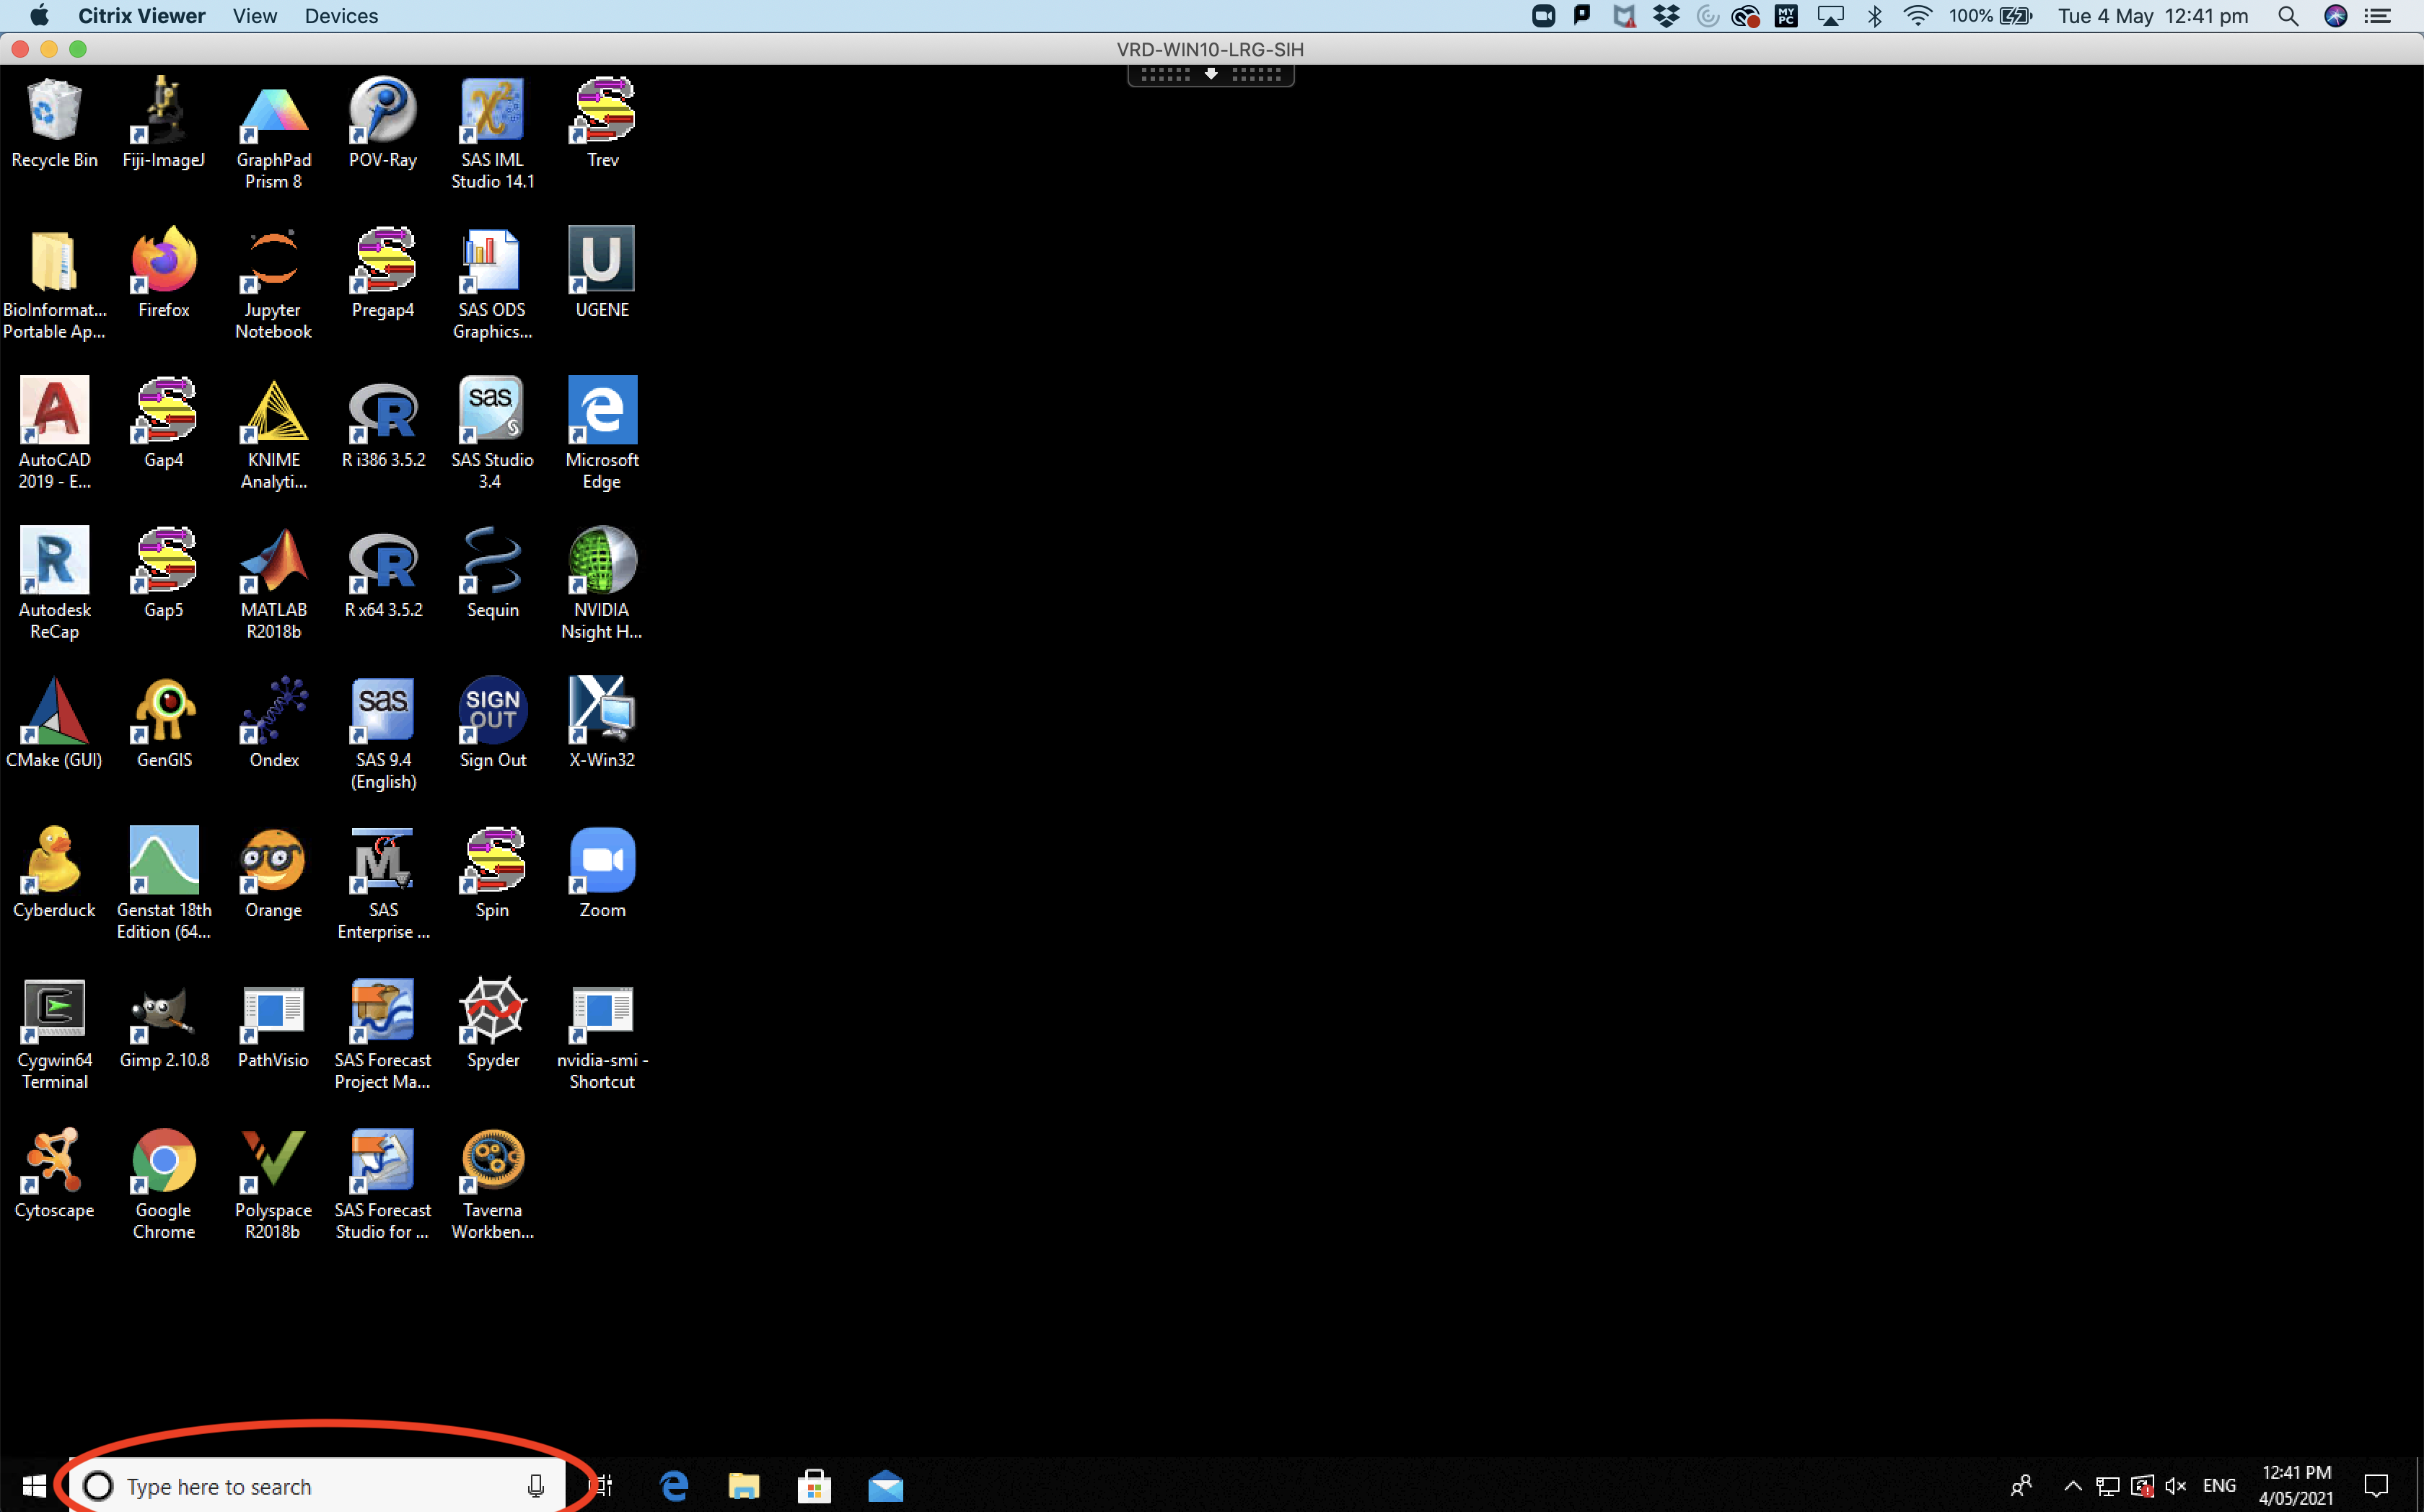
In the Windows search bar, type the words “device manager” and a selection will appear above the search bar. For details see the picture below.
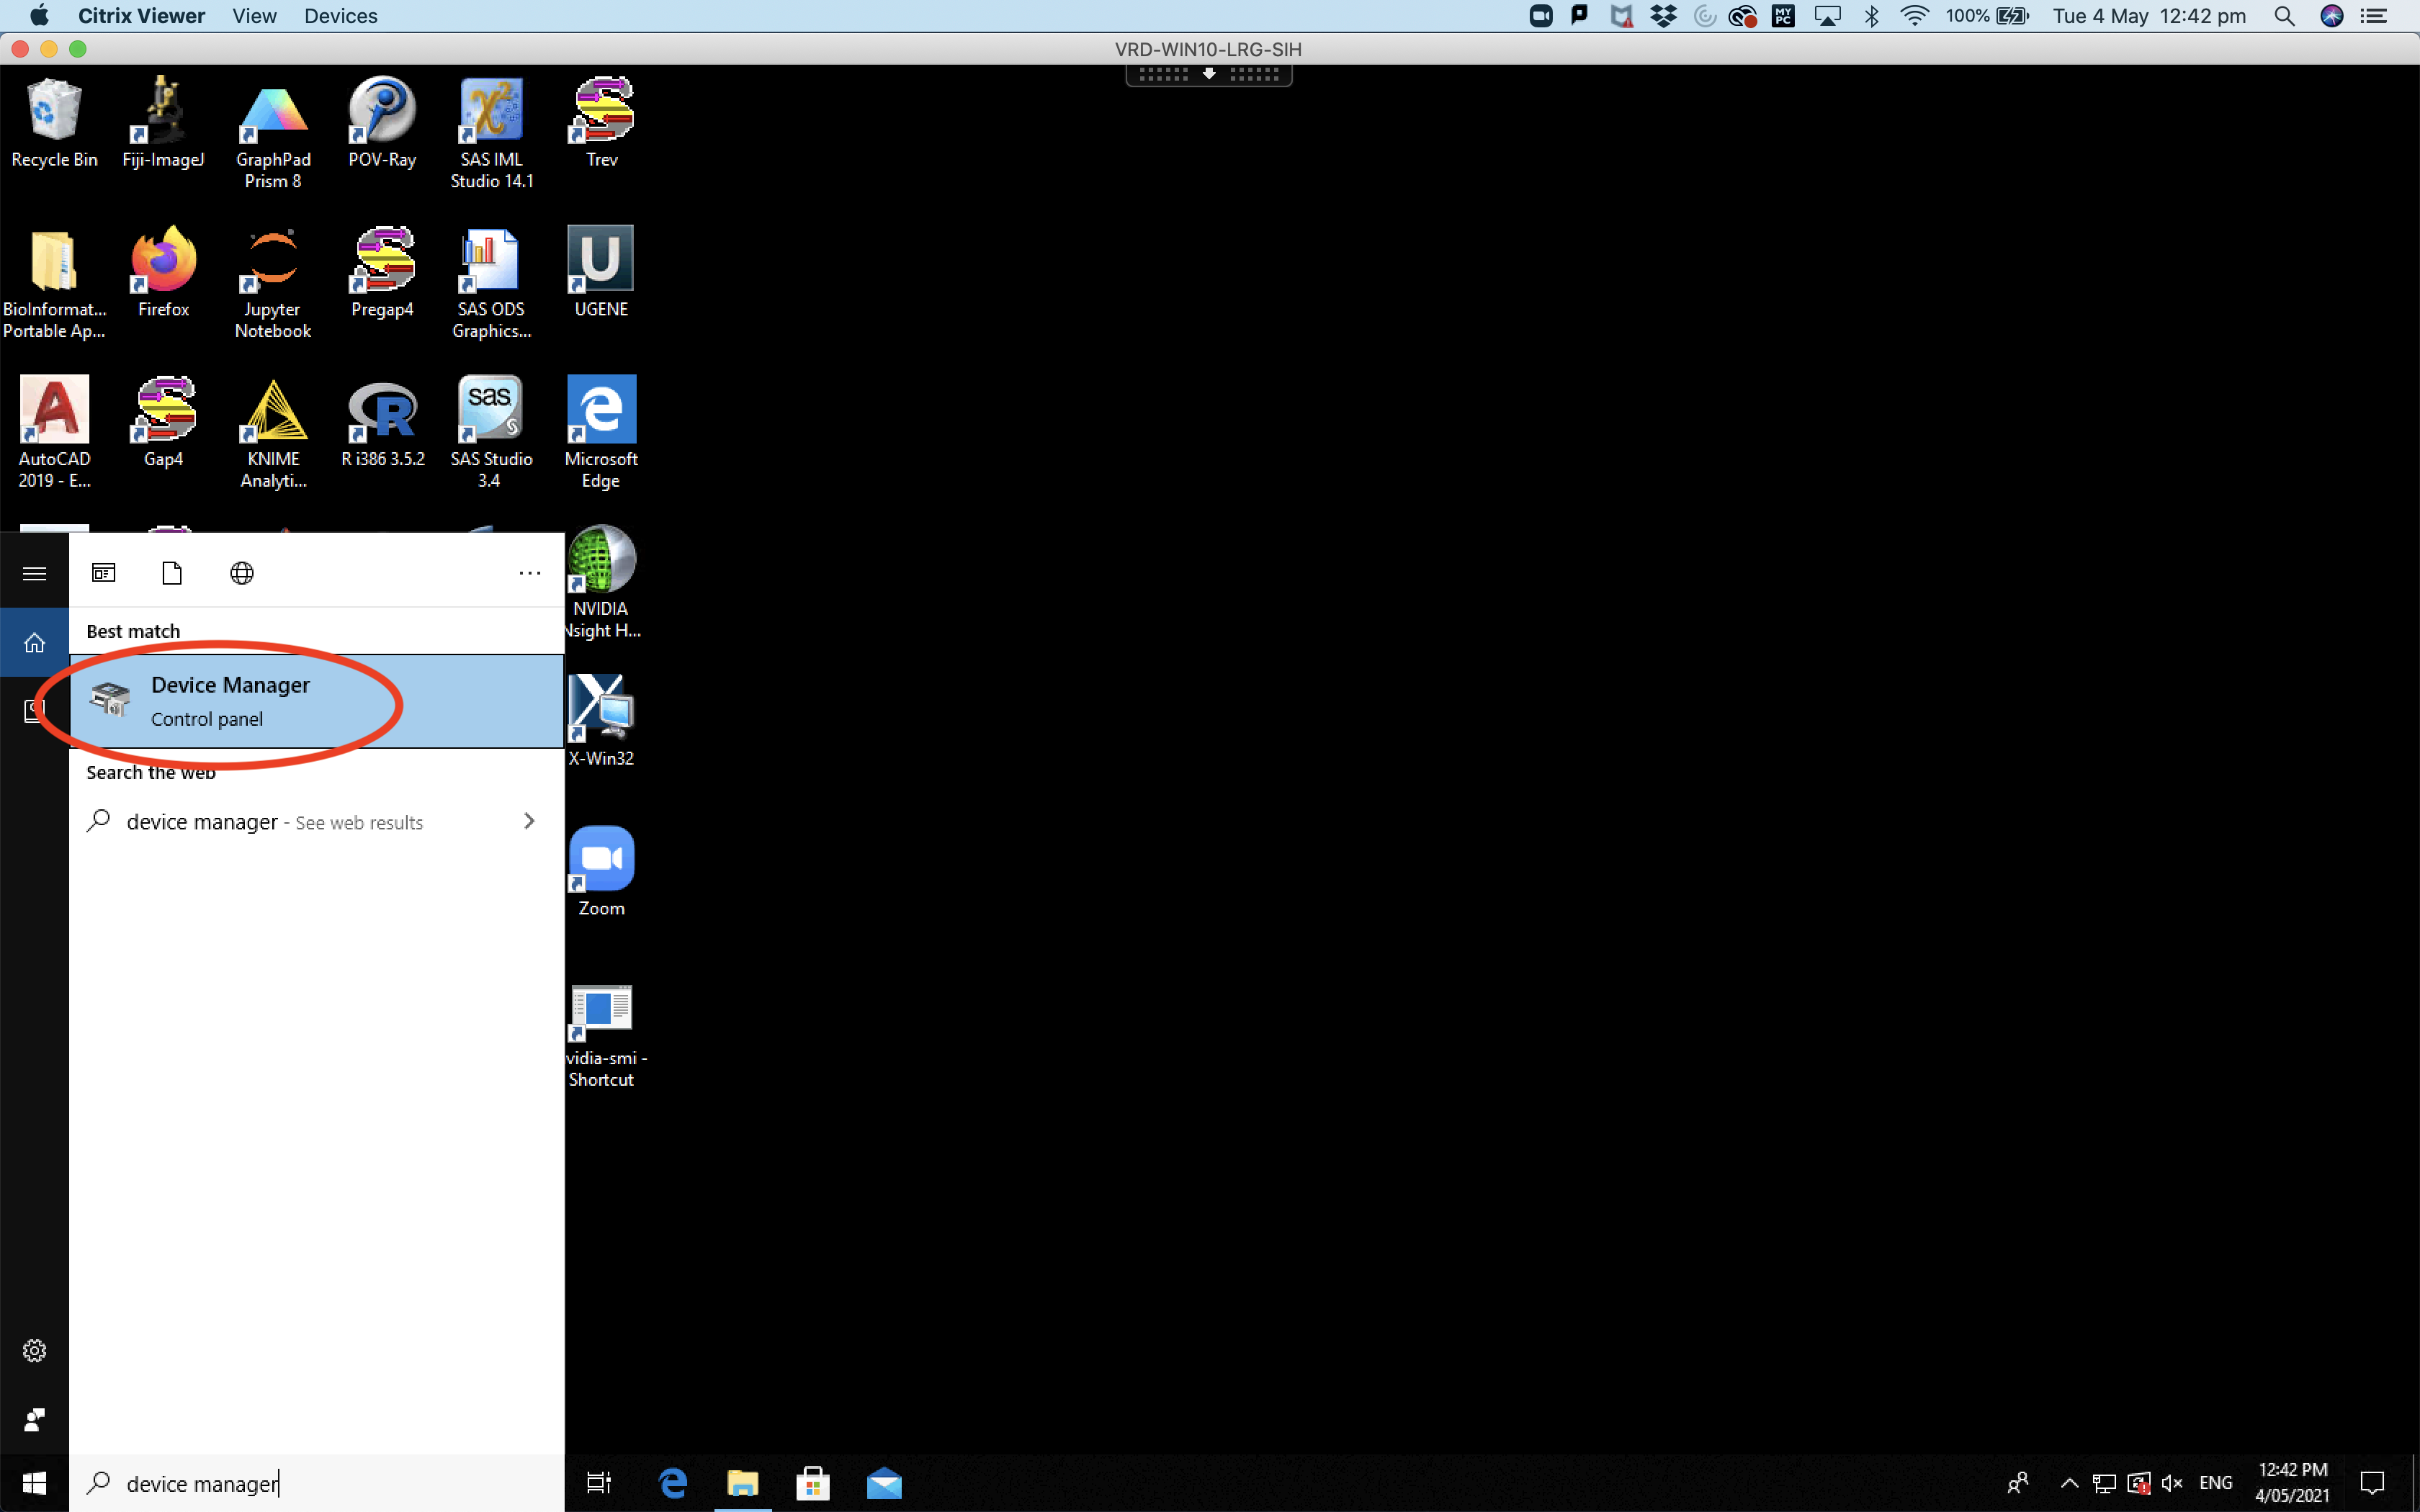
Now click on the device manager in the results windows. See the red circle in the picture above. After you click on the “device manager” a second window will appear with the device manager details (see picture below).

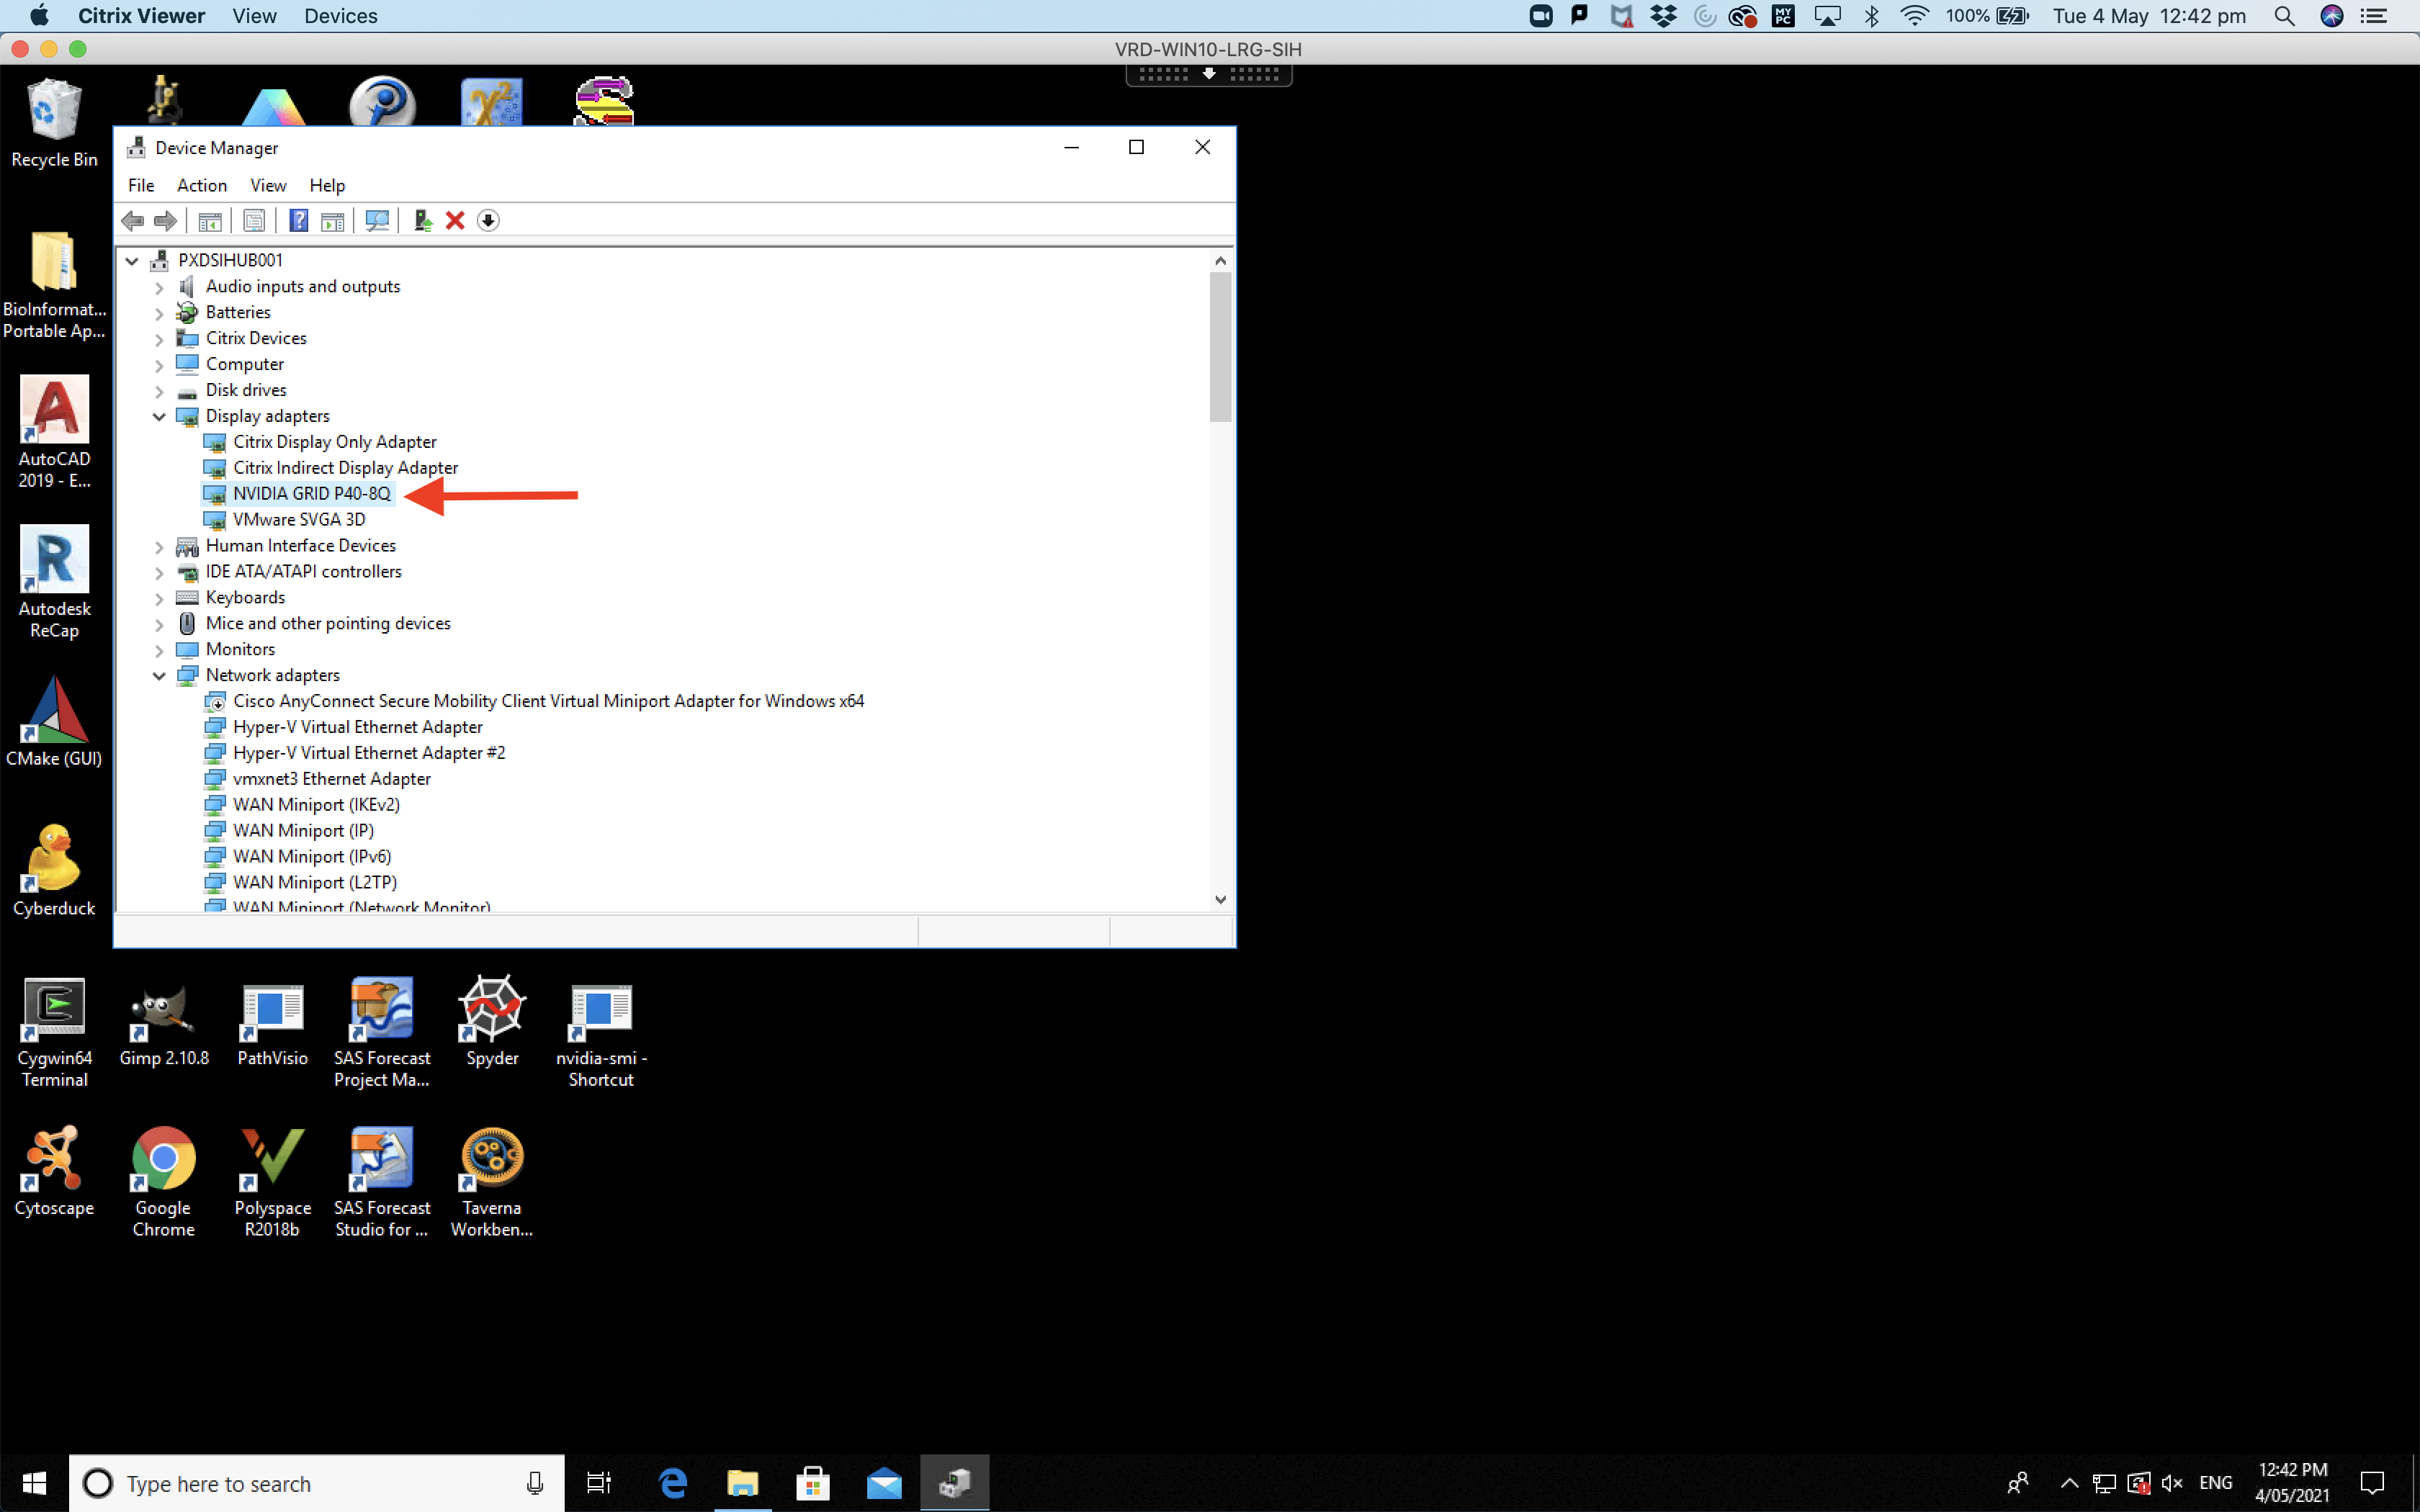
GPUs can be used independently for calculations but they were originally created to help speed up displays. In the device manager, the GPU will be located under the “display adapters”. If you click on display adapters and expand the list (see picture below) then the list of devices will appear and any GPUs should also appear in the list. For Argus, you should see “NVIDIA GPU P40-8Q” in the list under “Display adapters” (see the red arrow in the picture below).
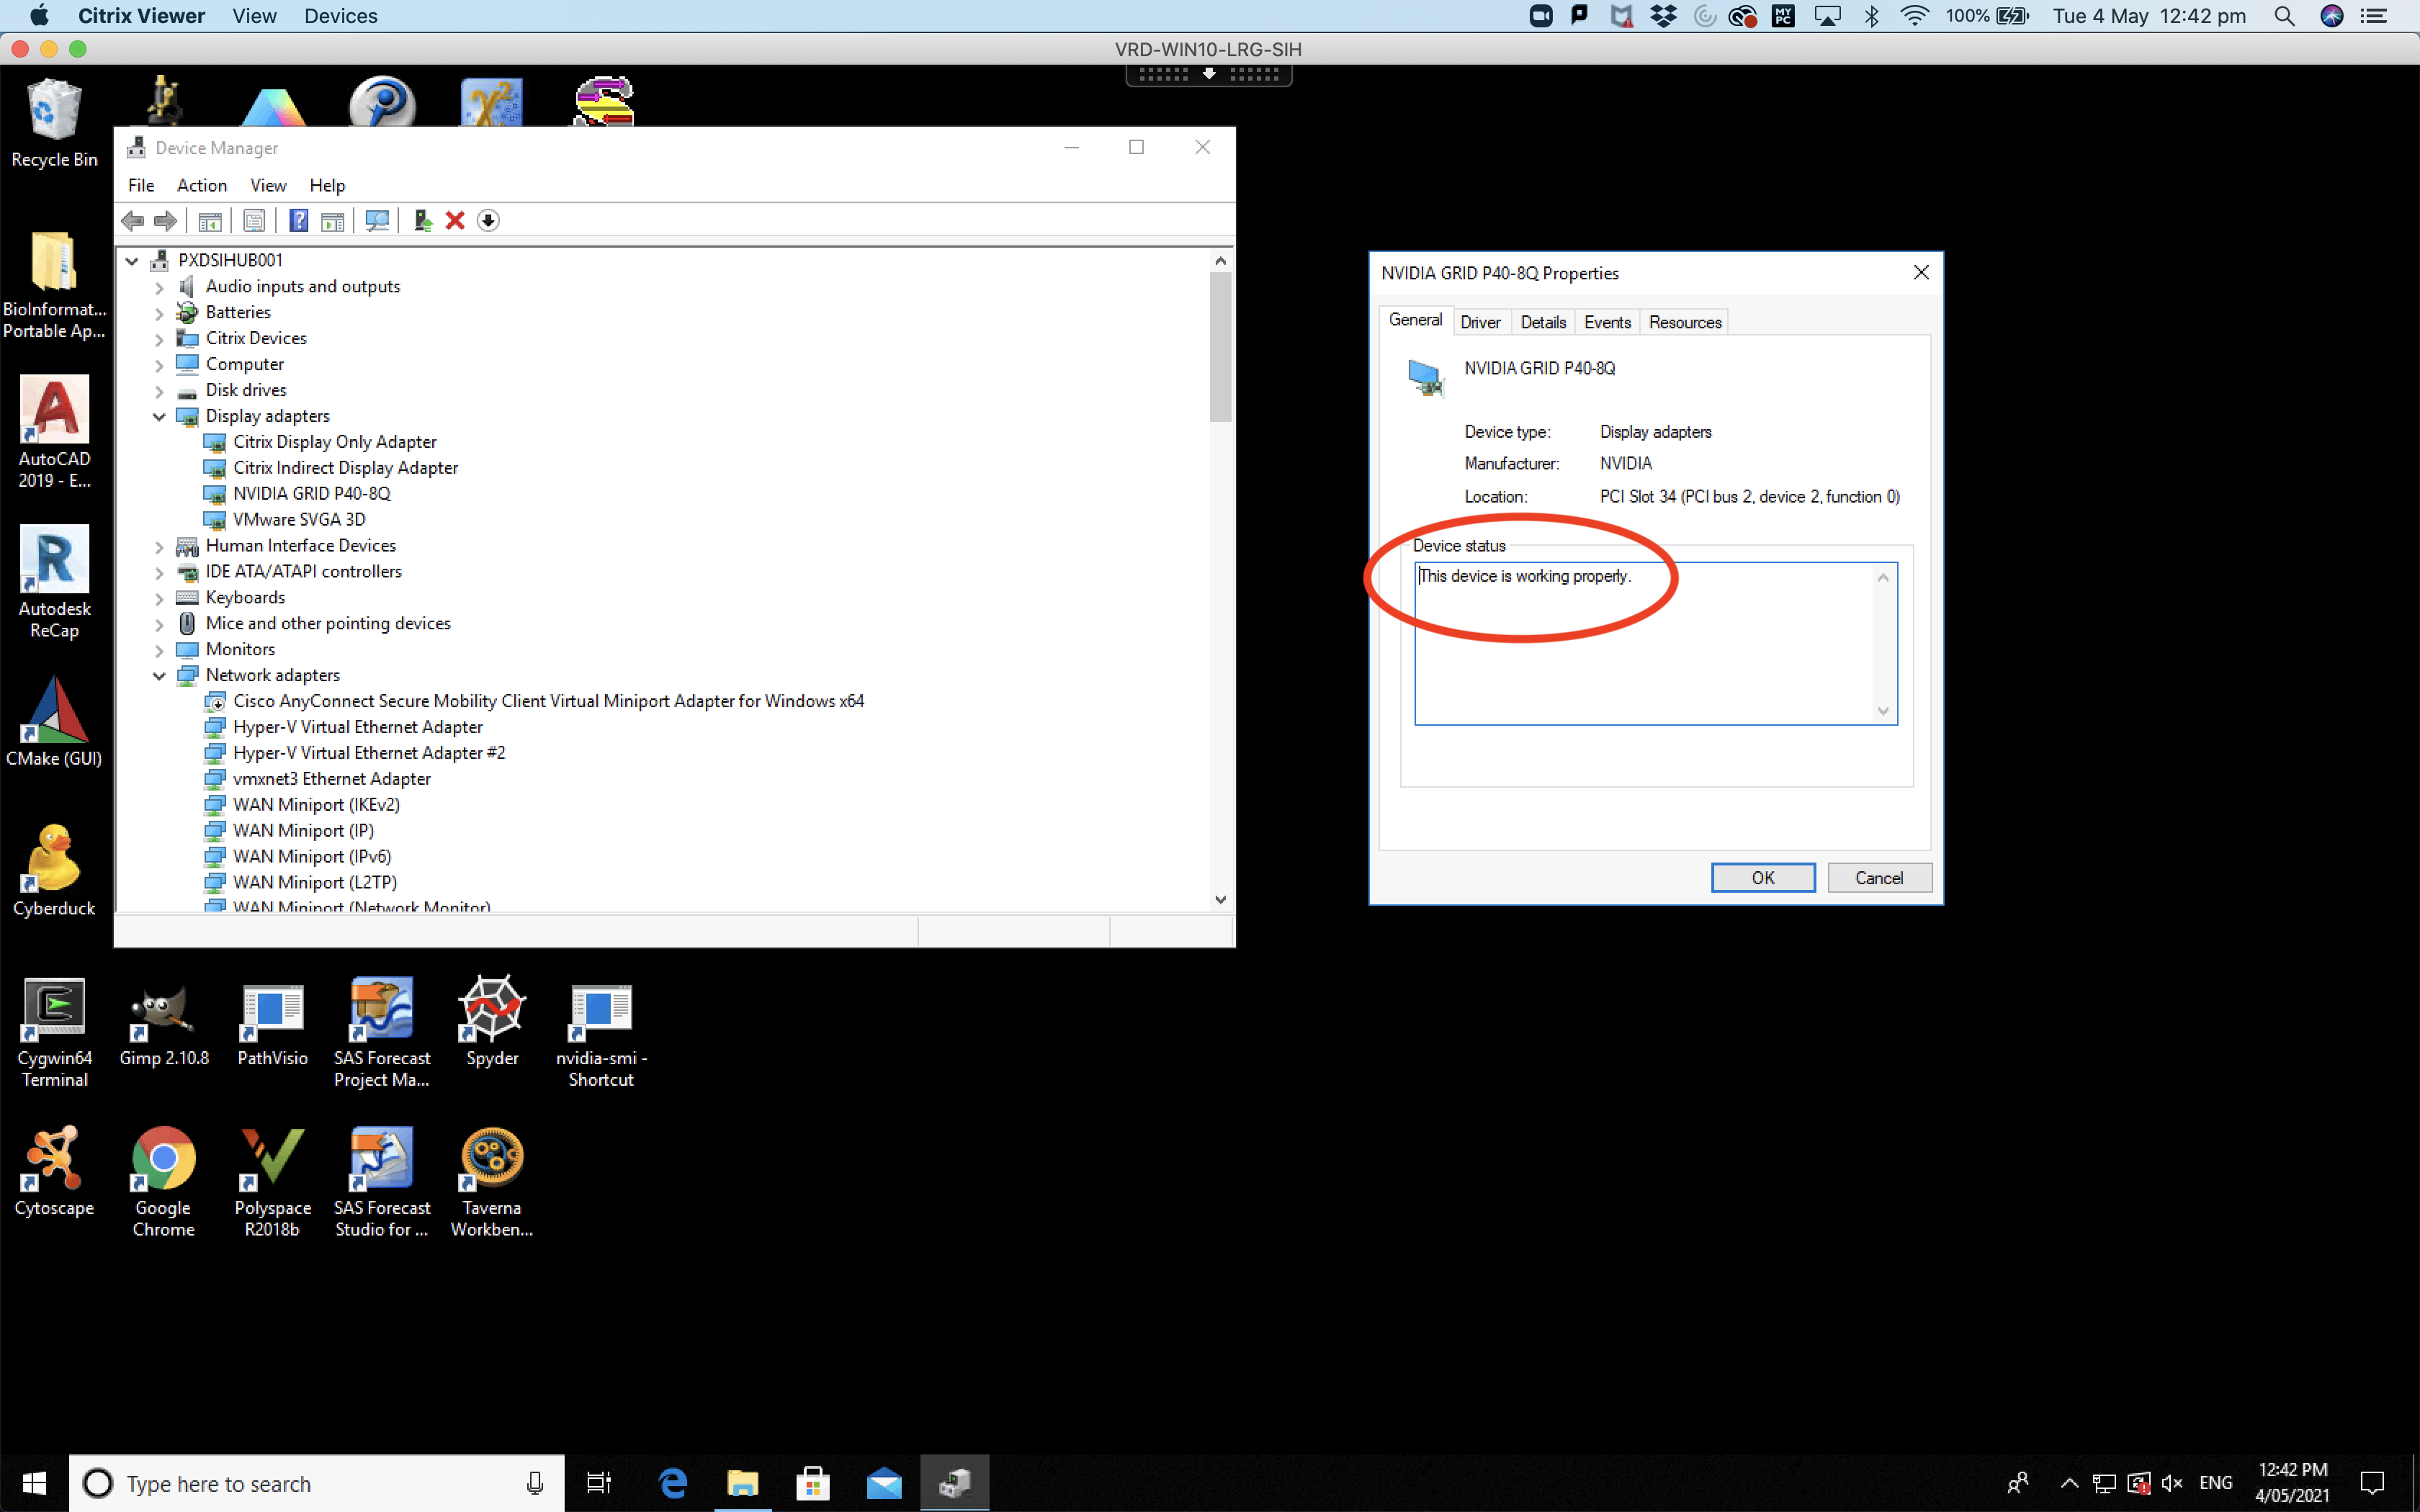
If you click on “NVIDIA GRID P40-8Q”, a window will appear giving you the details of the GPU (see picture below). Please ensure that the device is running properly by checking the status in the “device status” window (see red circle in the picture below). The status should read “This device is working properly”.
We have now confirmed a GPU is installed on the machine and GPU hardware is working properly.
Validating CUDA is compatible with the GPU device driver
It is critical for you to ensure that the GPU device driver version matches or exceeds your CUDA Toolkit version. The table below shows the minimum GPU device driver needed for each CUDA version.
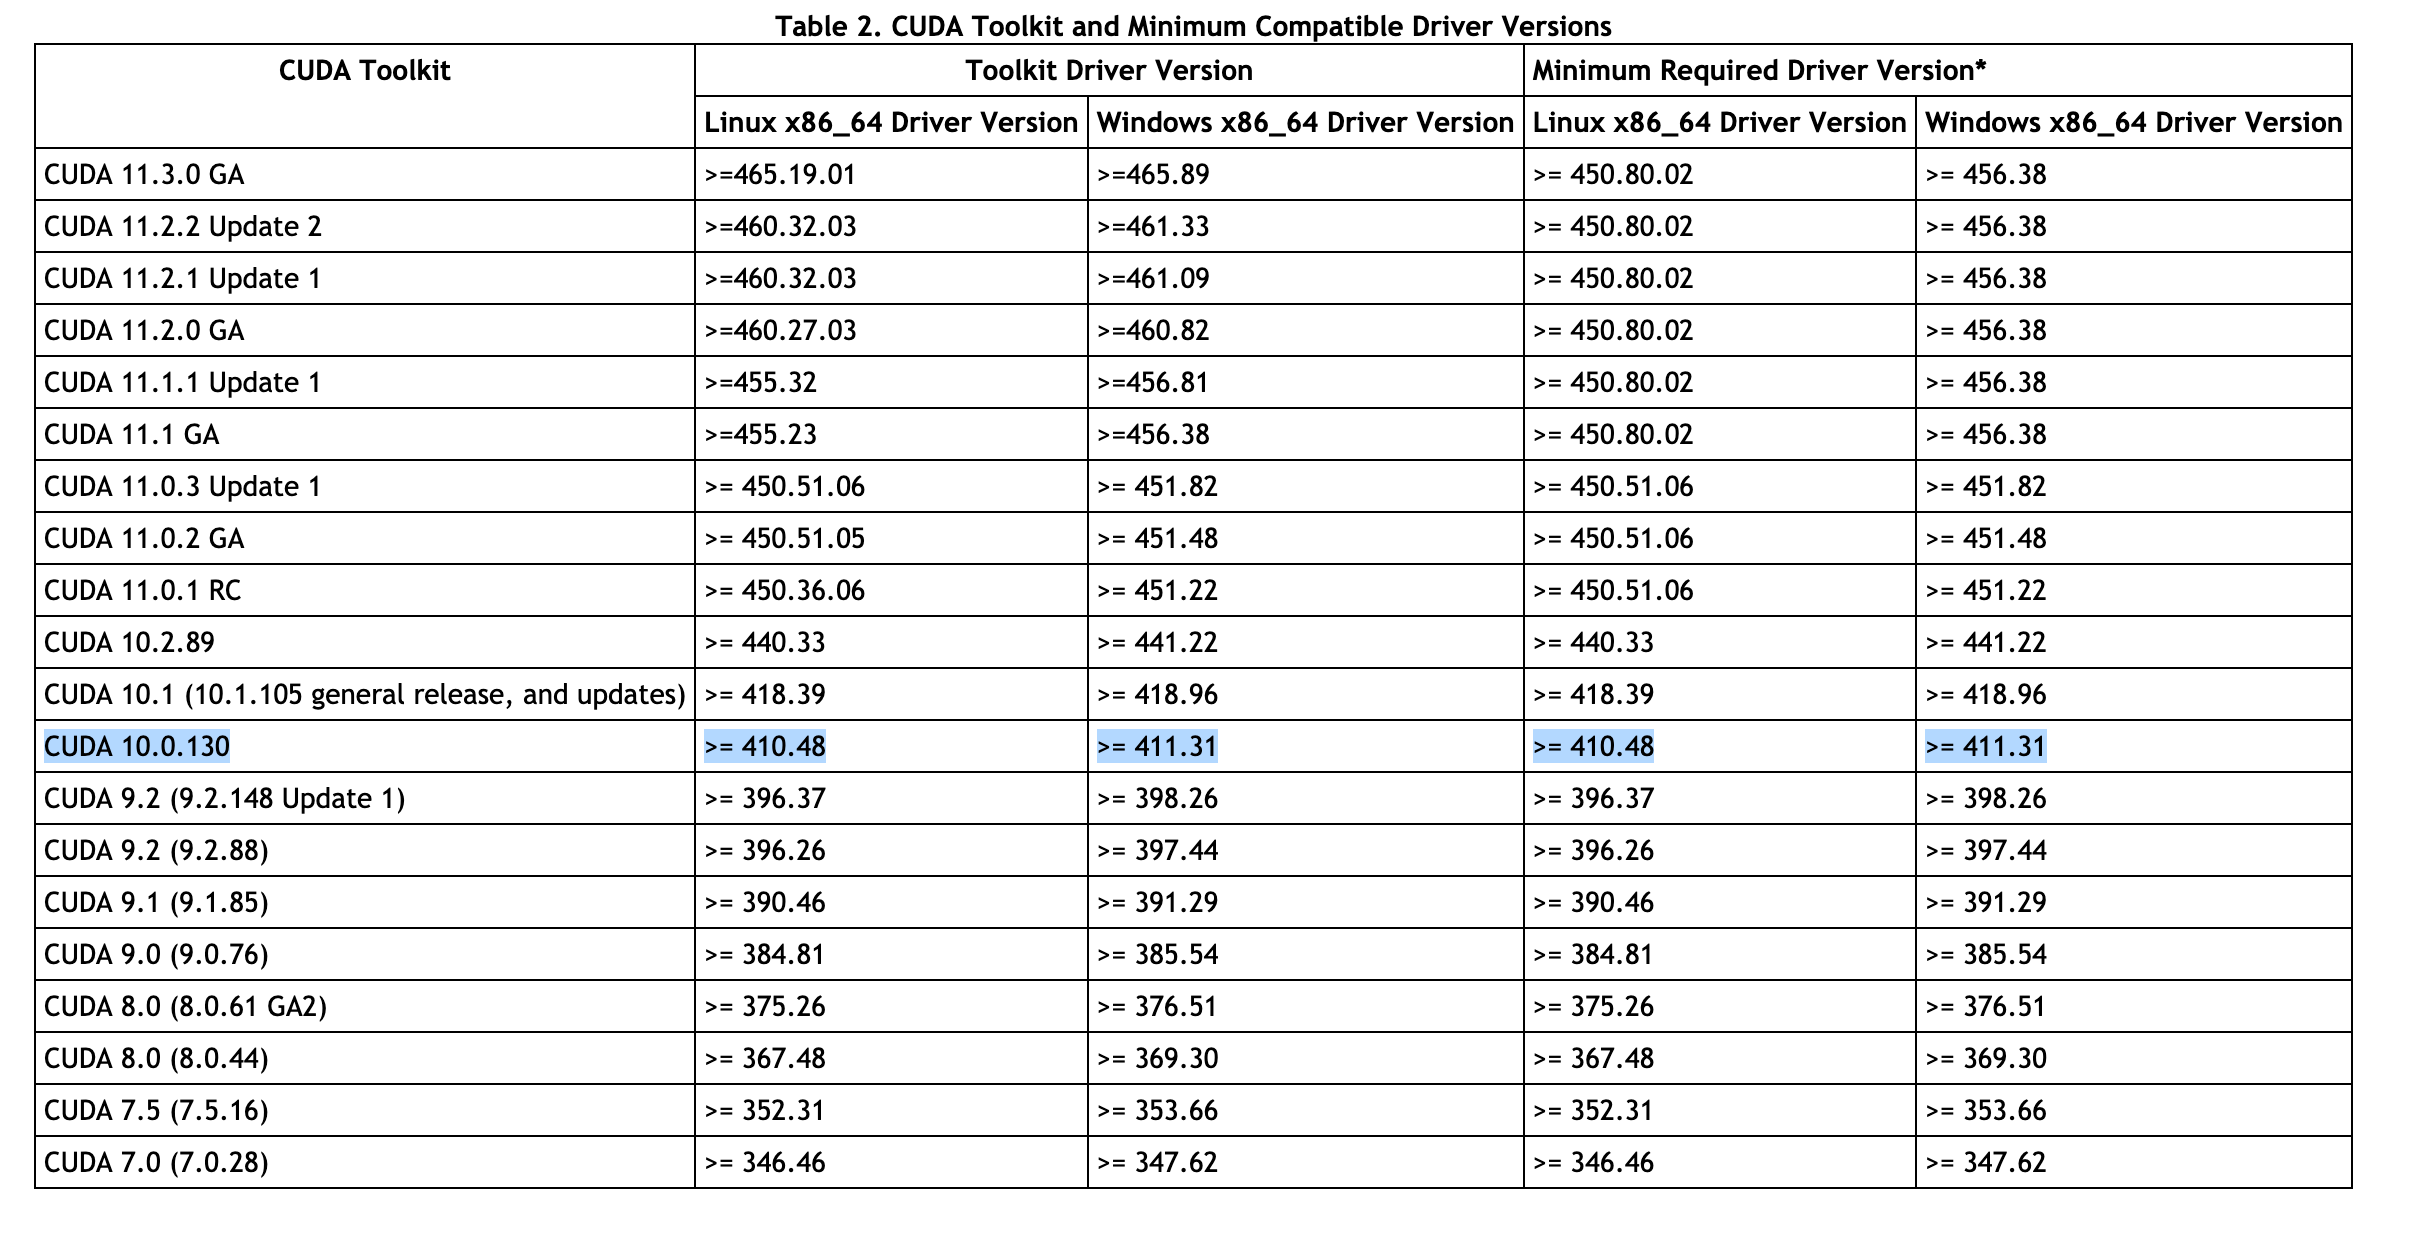
The Argus machine (as of the writing of this training, May 2021) currently has CUDA 10.0 and a GPU device driver 412.16 installed. See the blue highlighted text in the picture above. Note that the device driver (412.16) exceeds the minimum required (411.31) for CUDA 10.0.130.
IMPORTANT NOTE: There are a few ways that CUDA can get “out of sync” with the GPU device driver. One of the most common ways is when Windows 10 receives an update and the CUDA toolkit gets erased and/or damaged. Therefore it is important that users can validate the CUDA version and the GPU device driver in case issues arise.
Reaching the command prompt
To validate the version of CUDA and the device driver installed we will use the “command prompt”. The “command prompt” in Windows is similar to the “terminal” in linux and MacOS. It is a text-based window that allows commands to be entered and executed by the operating system.
To reach the “command prompt”, click on the Windows search bar in the bottom left of the screen next to the Windows icon and enter “cmd” (see the red circle in the picture below for more details).
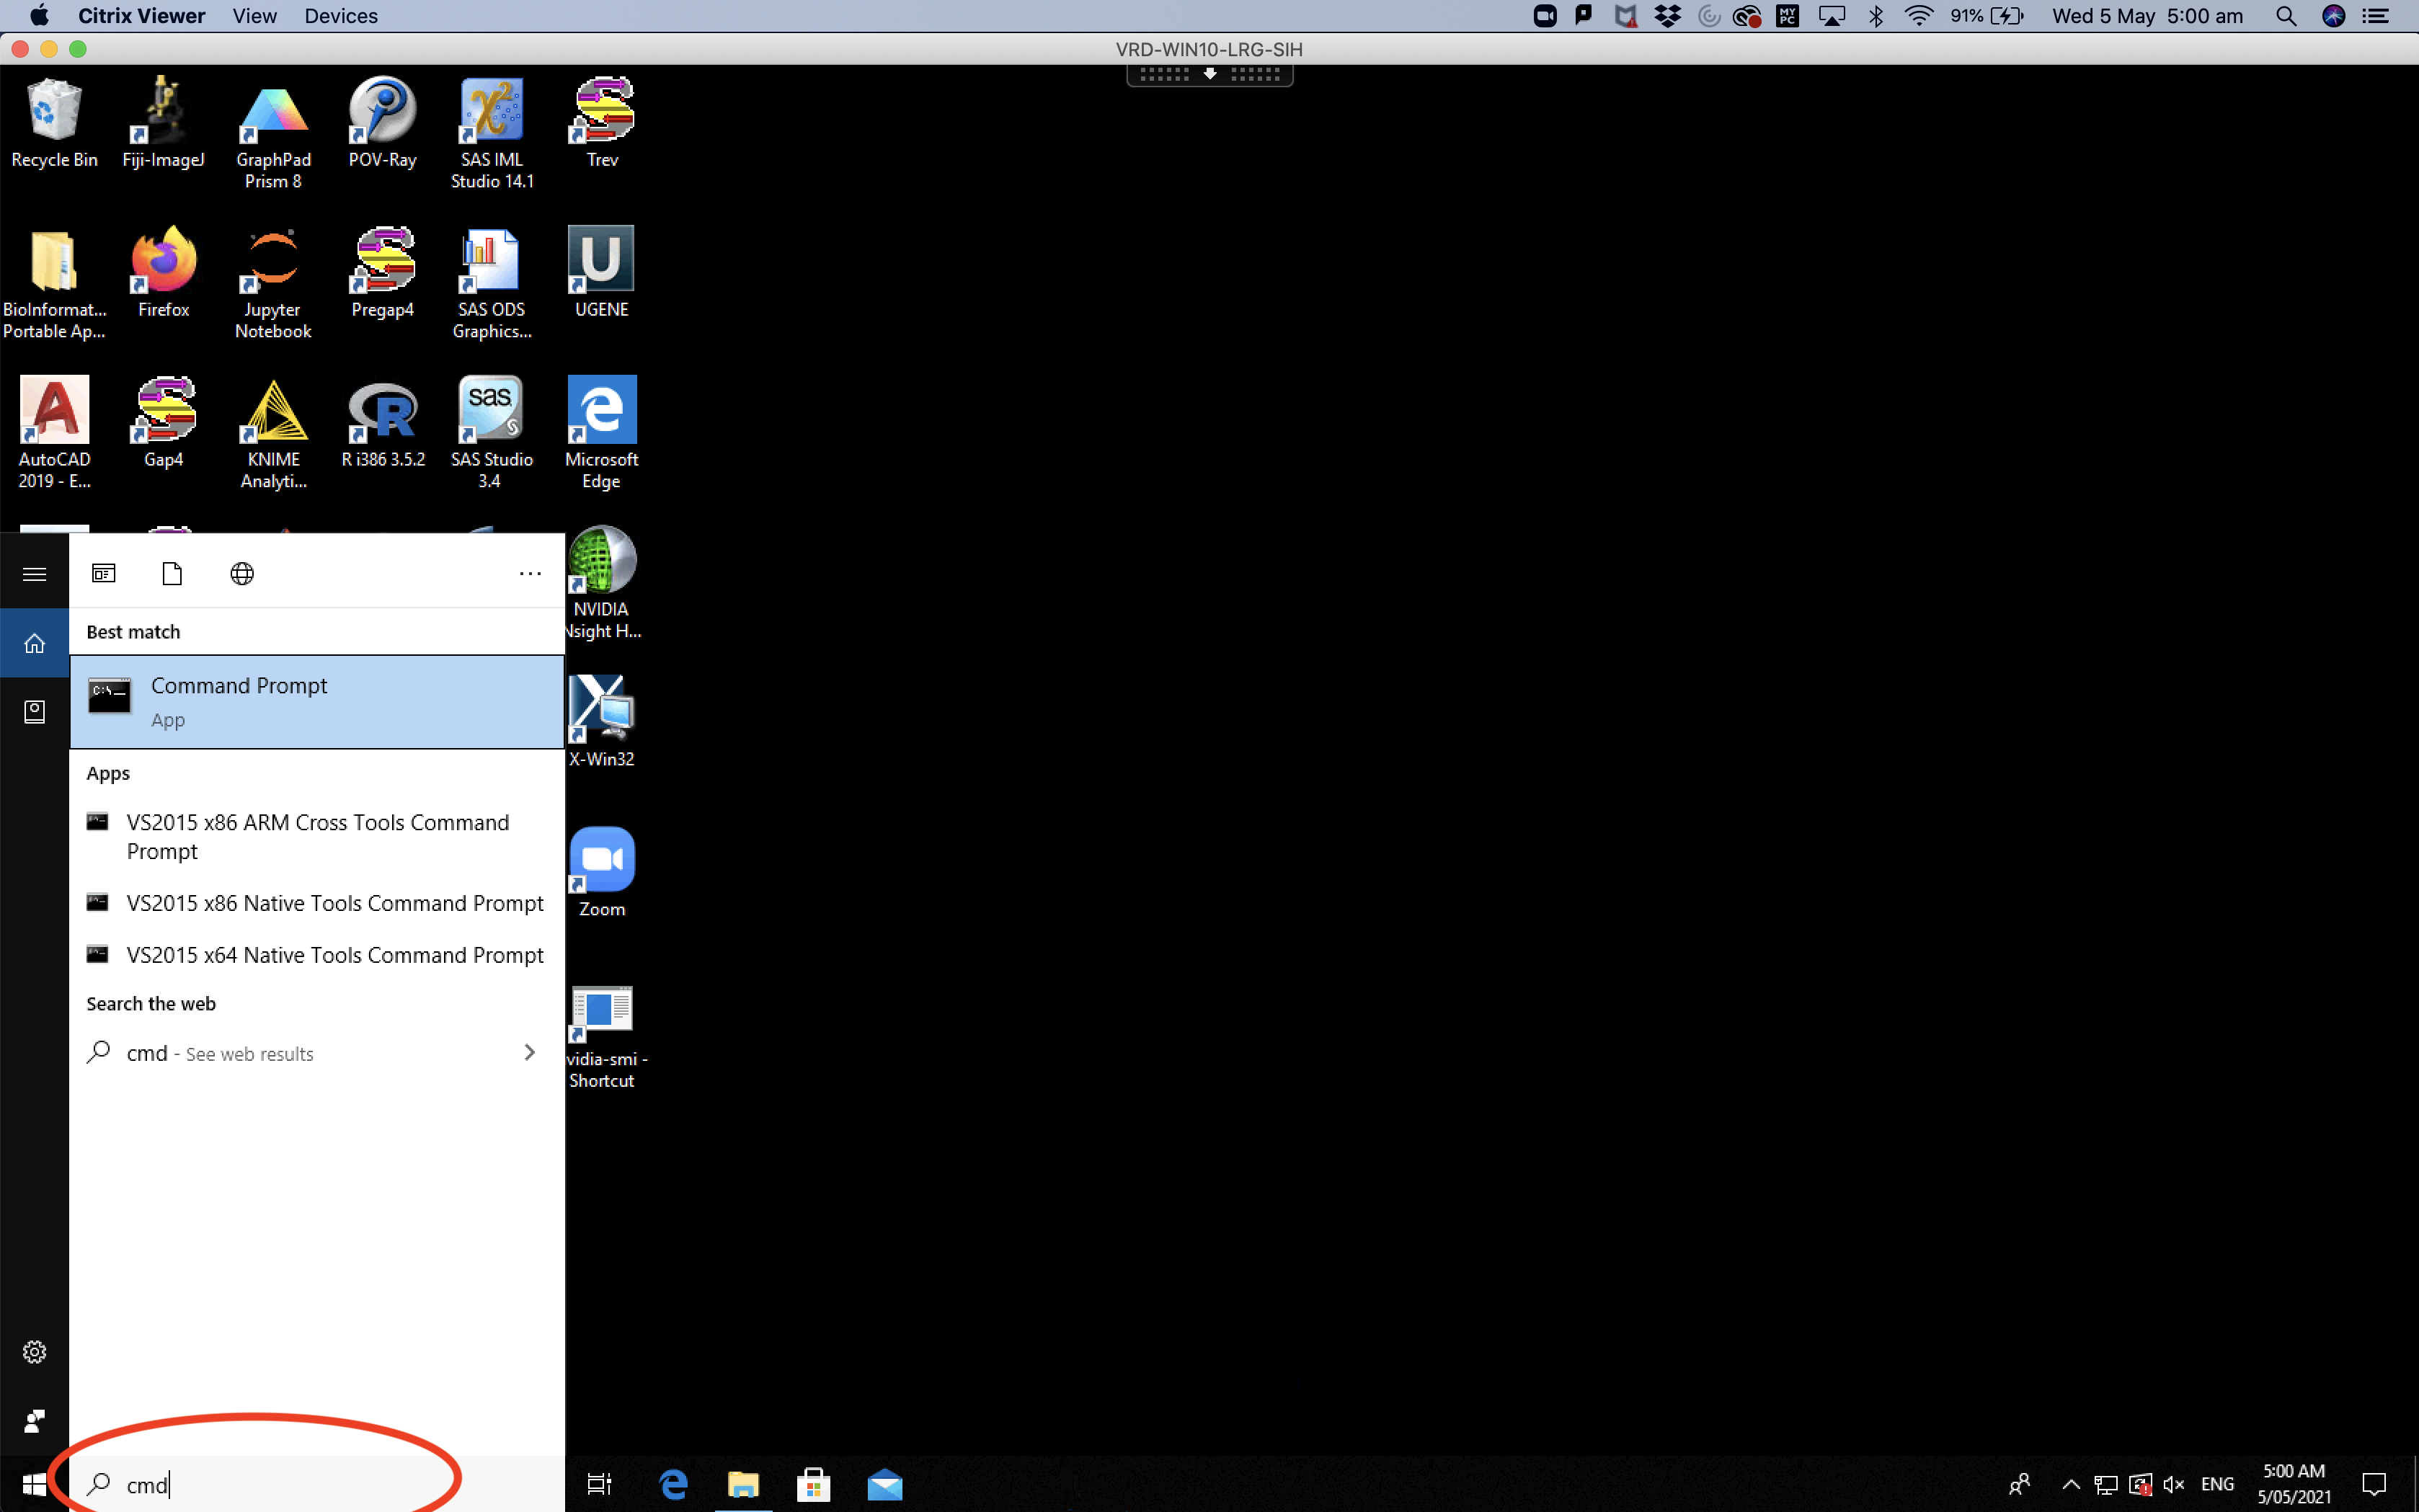
You can hit the “enter” key to open a “command prompt” window or click on the “Command Prompt” app listed at the top of the search list.
Checking what version of CUDA is installed
Once a “command prompt” window is open, you can validate the CUDA version installed by entering the command “nvcc –version” (see red circle in the picture below).
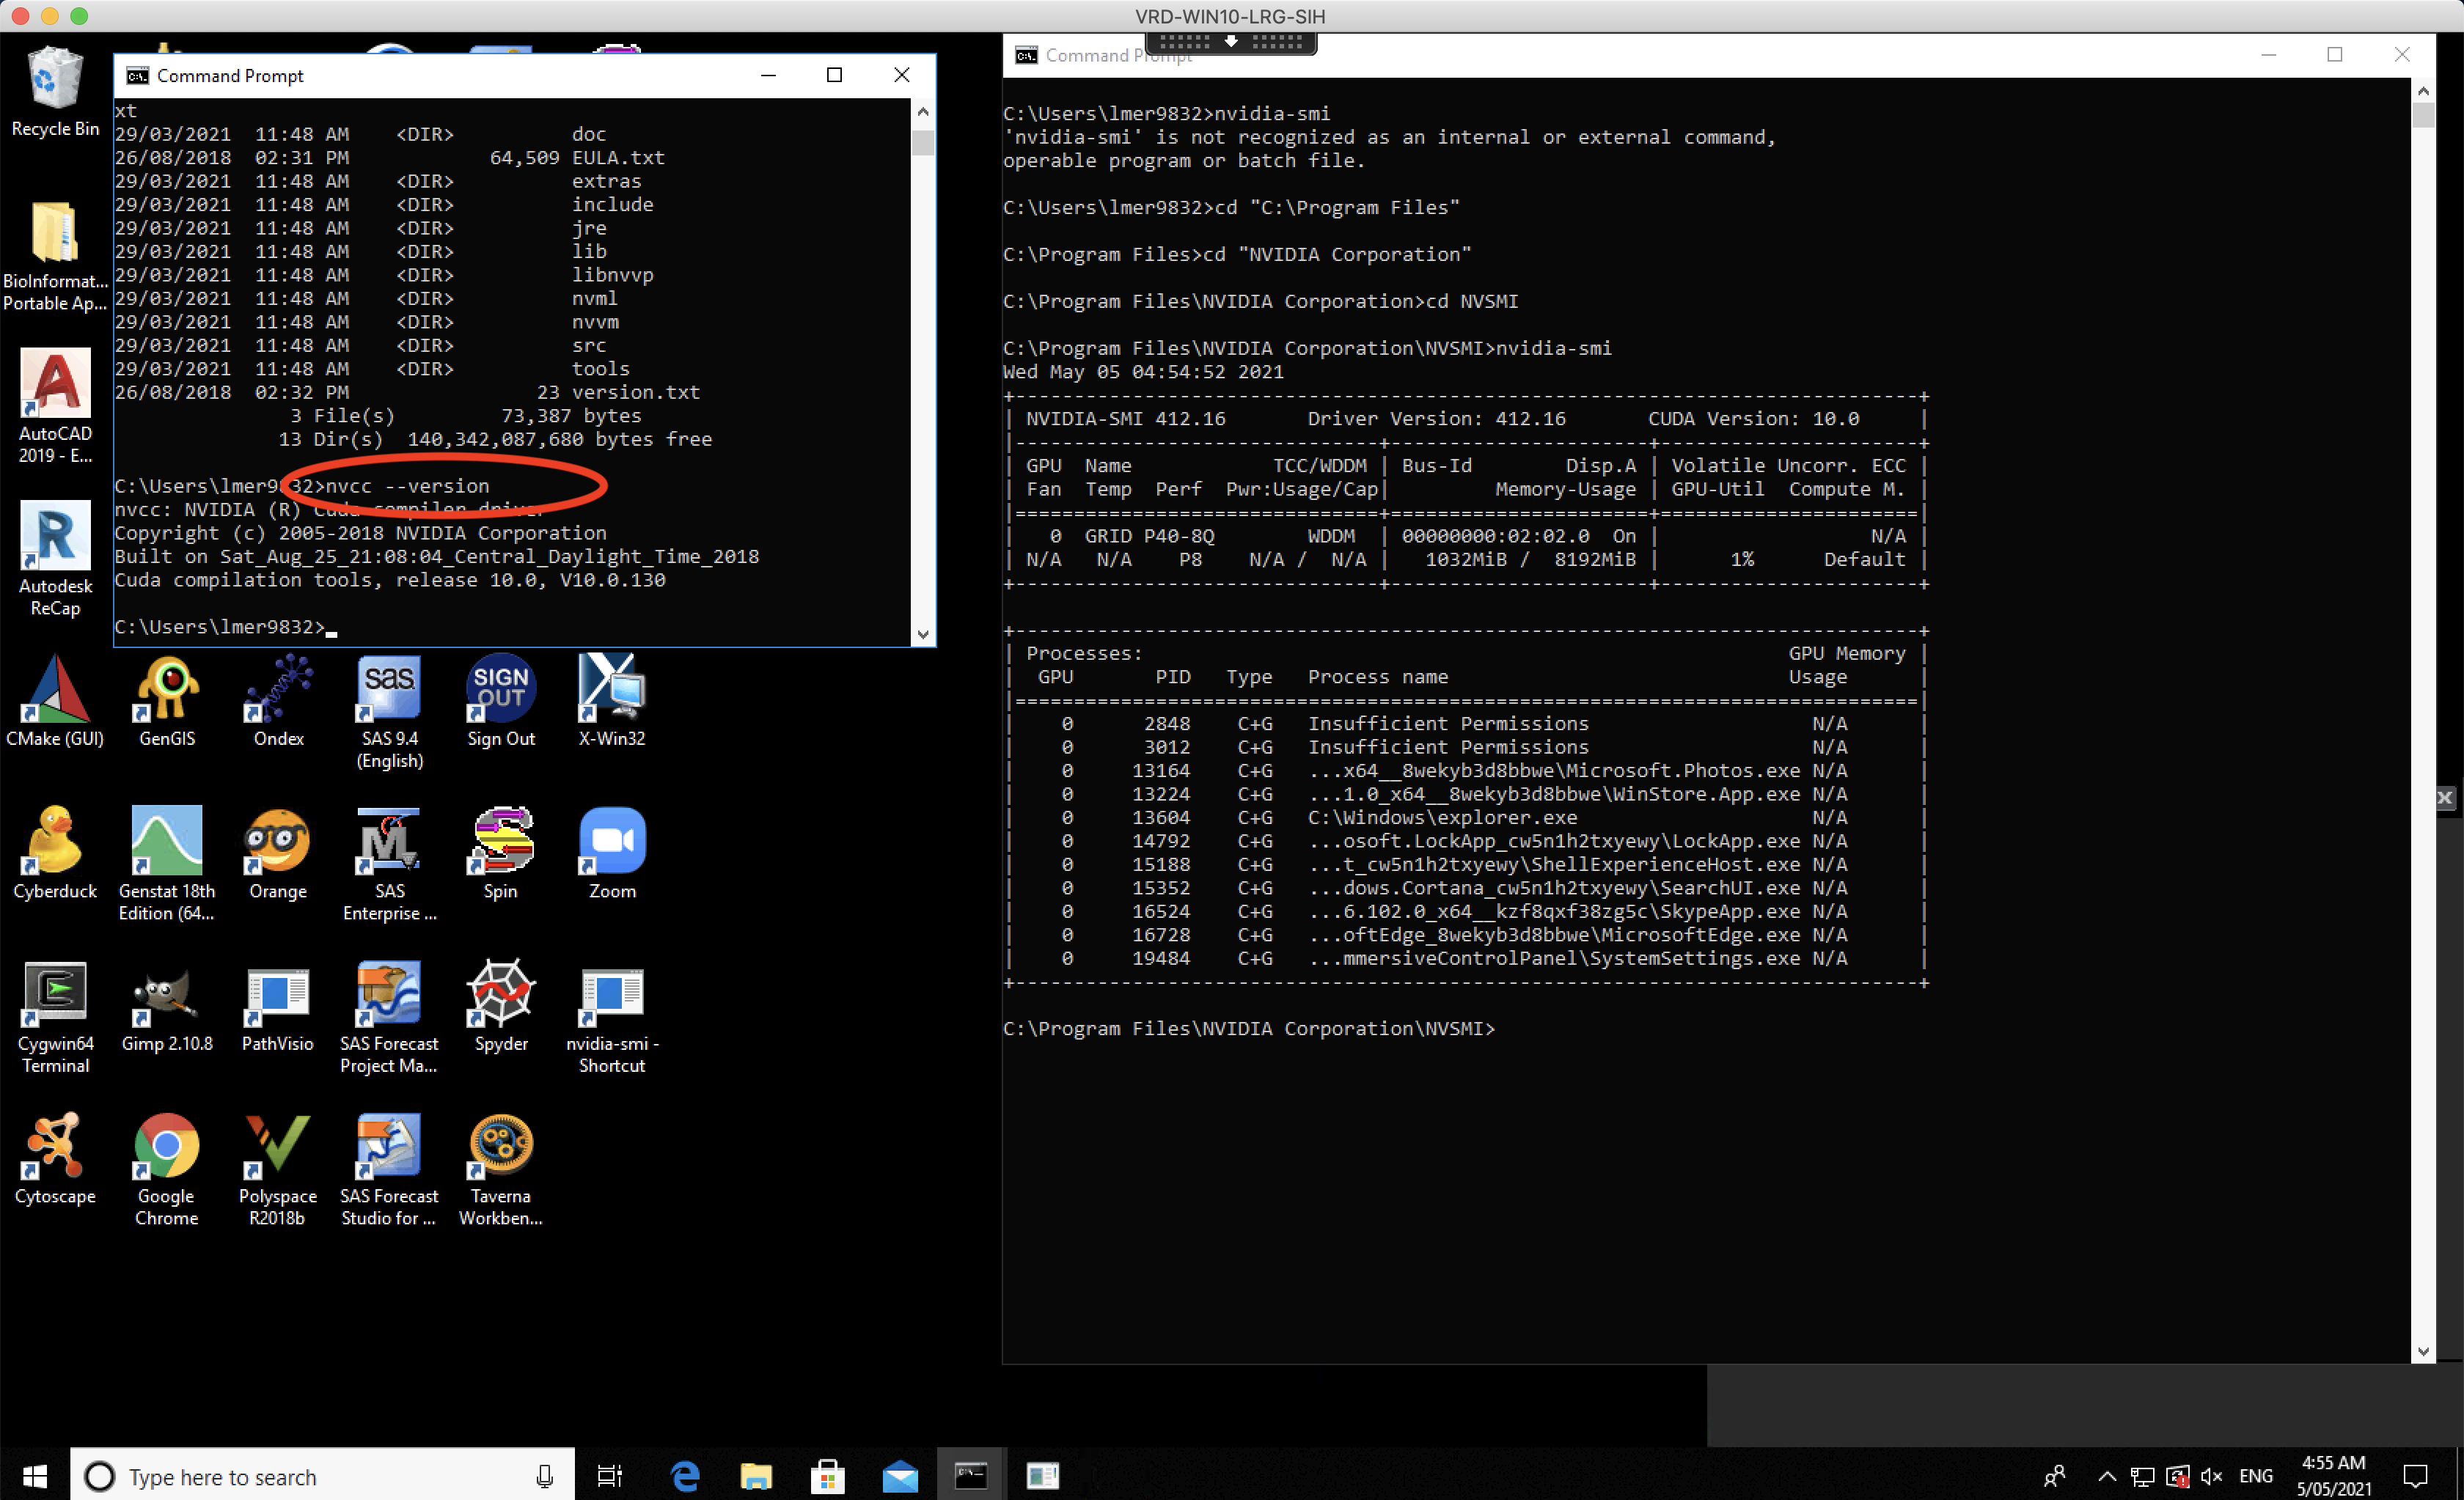
This command will return information including the CUDA version in the last line of text. In our example, we have “Cuda compilation tools, release 10.0, V10.0.130” which indicates that we have CUDA 10.0 installed.
Another way to confirm the CUDA driver is by entering the command “nvidia-smi”. This is the NVIDIA System Management Interface and reports information on the NVIDIA GPU that is installed.
Unfortunately, this command is not typically baked into the path for most installations. So you will have to find where it is located on your MS Windows machine. On our Argus machine, it is located in the “C:\Program Files\NVIDIA Corporation\NVSMI" directory.
Running the “nvidia-smi” command will also confirm that we are running CUDA 10.0. See the red circle in the picture below for more details.
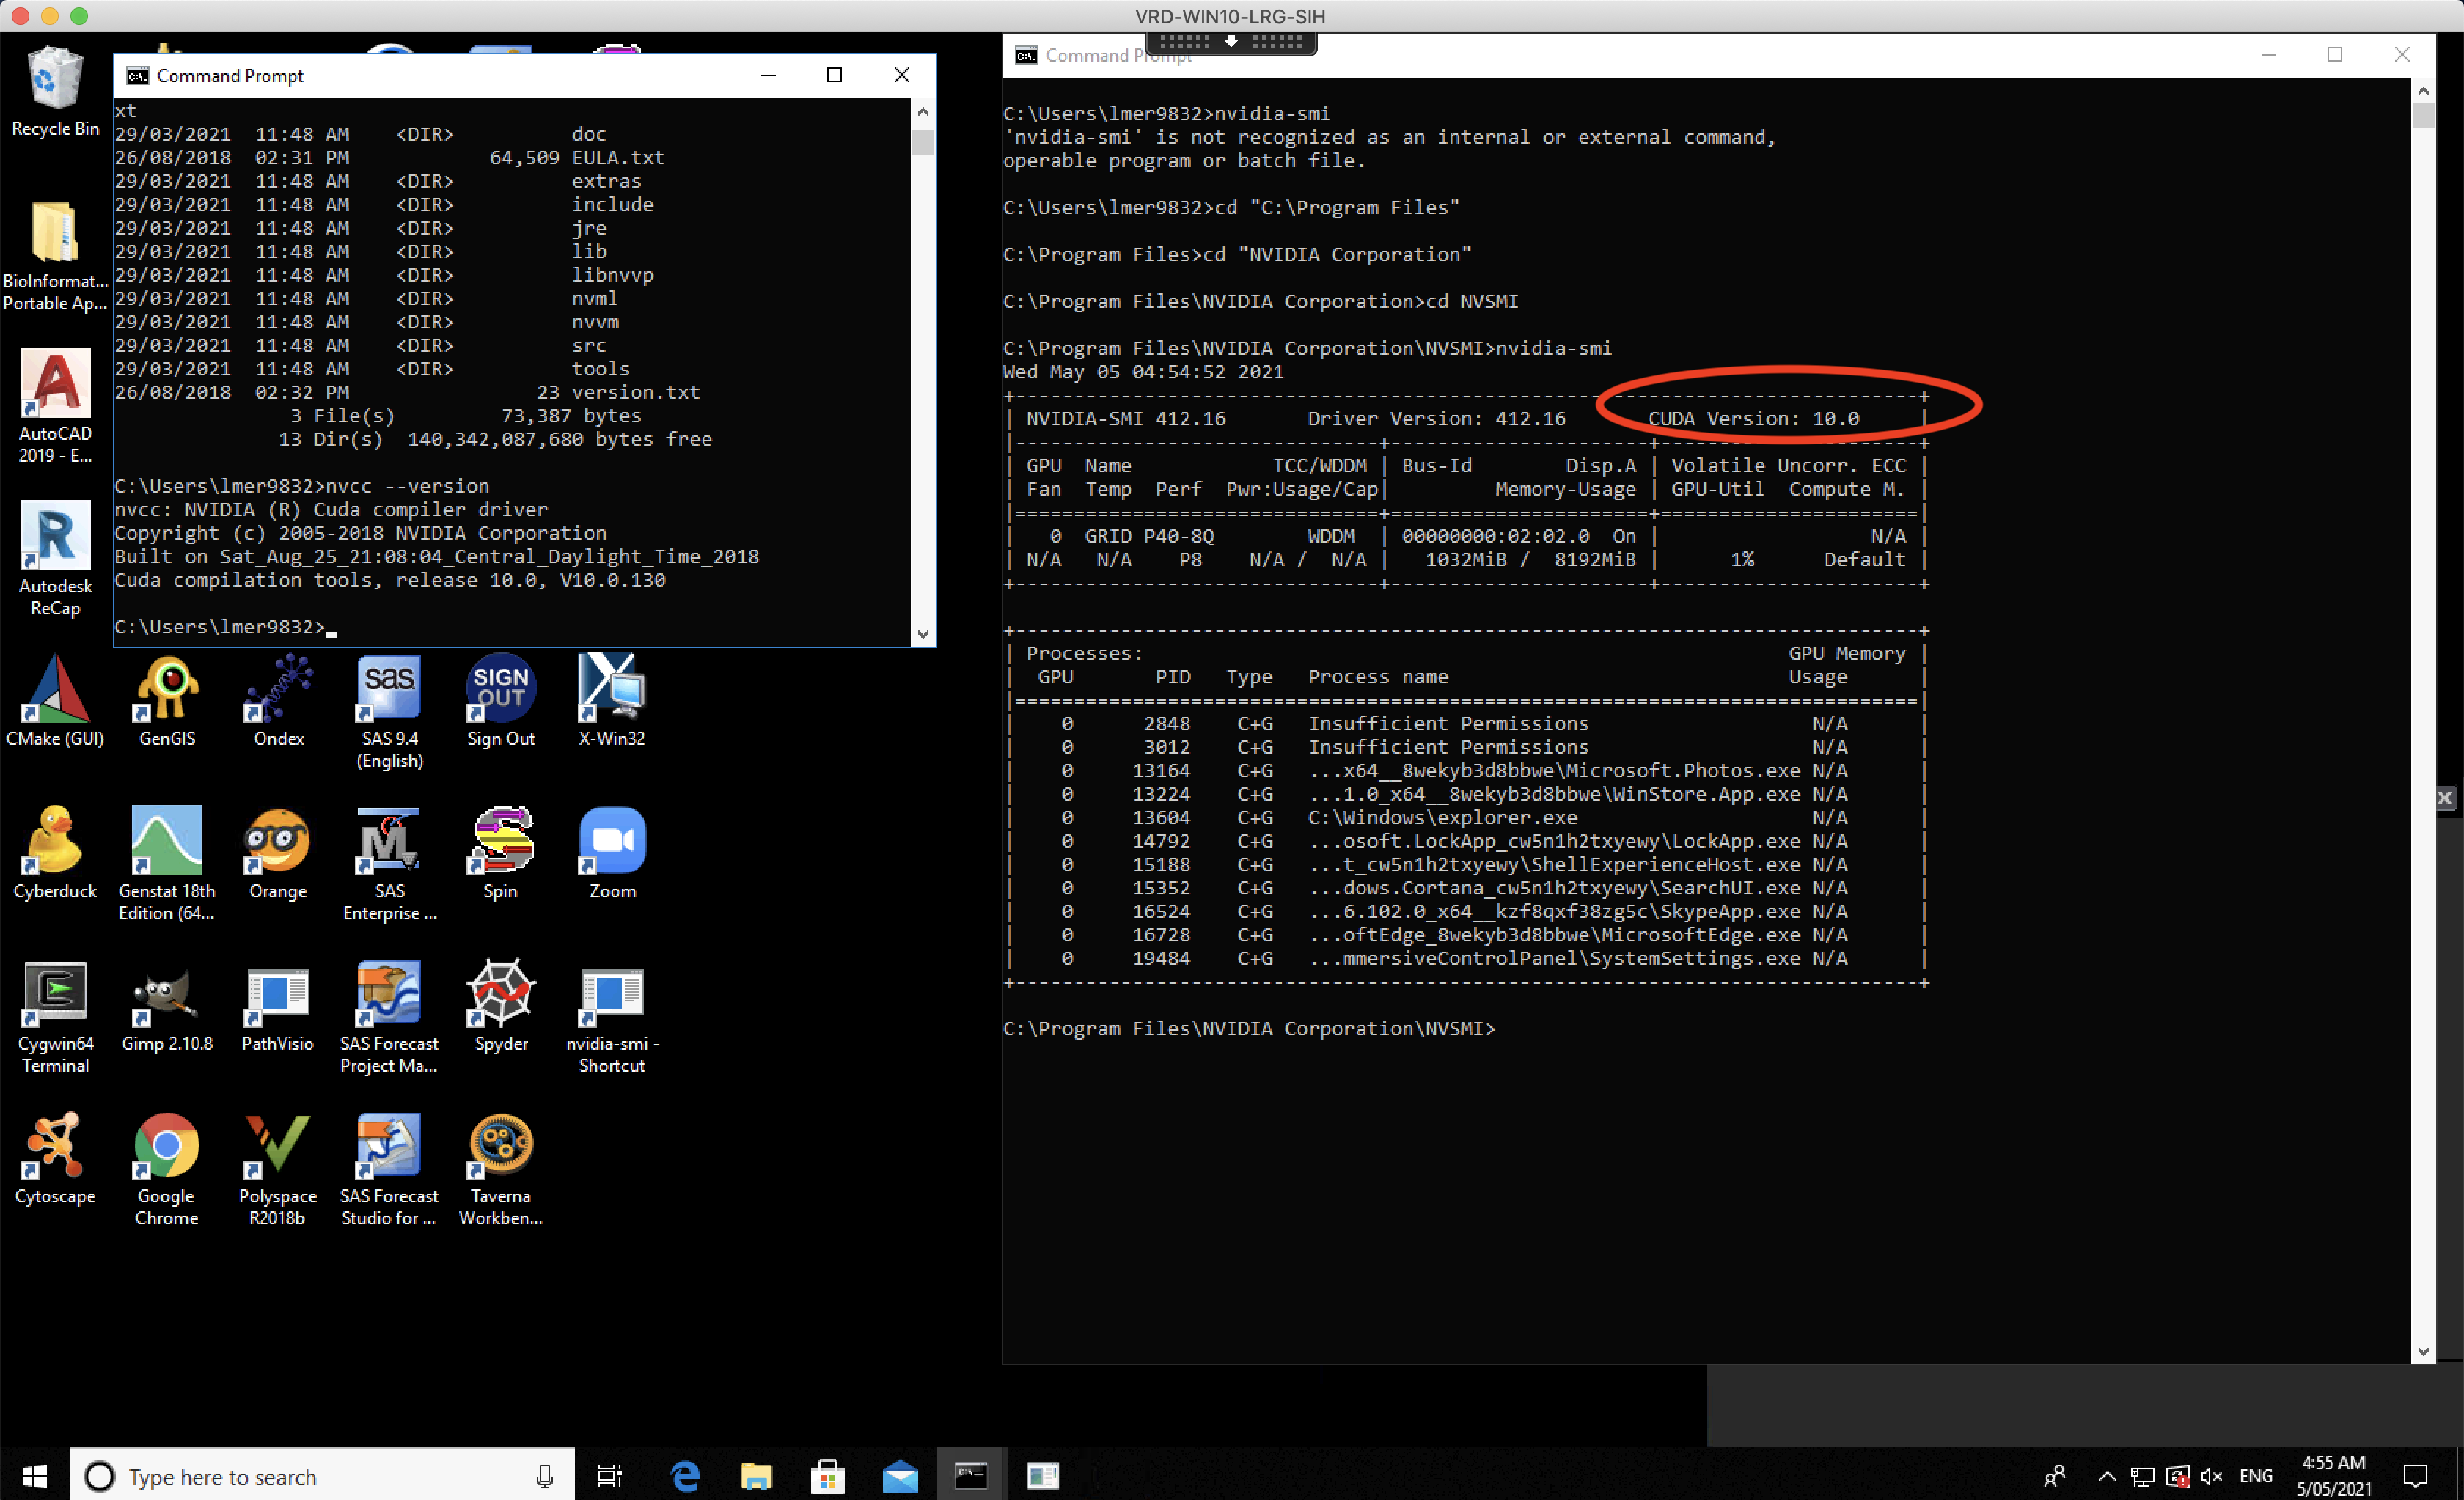
You may also notice that the “nvidia-smi” also reports the current GPU device driver. It is located to the left of the red circle in the picture above. For Argus, the GPU device driver is 412.16. Notice it exceeds the minimum required in the table above.
At this point we have confirmed the GPU device driver and CUDA version. The next section is another way to confirm the GPU device driver in use.
Checking what GPU device driver is installed
The most common way to check the GPU device driver is with the NVIDIA control panel. Although it is possible to validate the GPU device driver using the nvidia-smi command (see above) the NVIDIA control panel is a more standard and “official” method.
To reach the NVIDIA control panel look in the bottom right of the screen in the tool bar. This area is called the “systems tray” or the “notification area” and there is an upward caret which contains extra icons not shown. See the red arrow in the picture below.
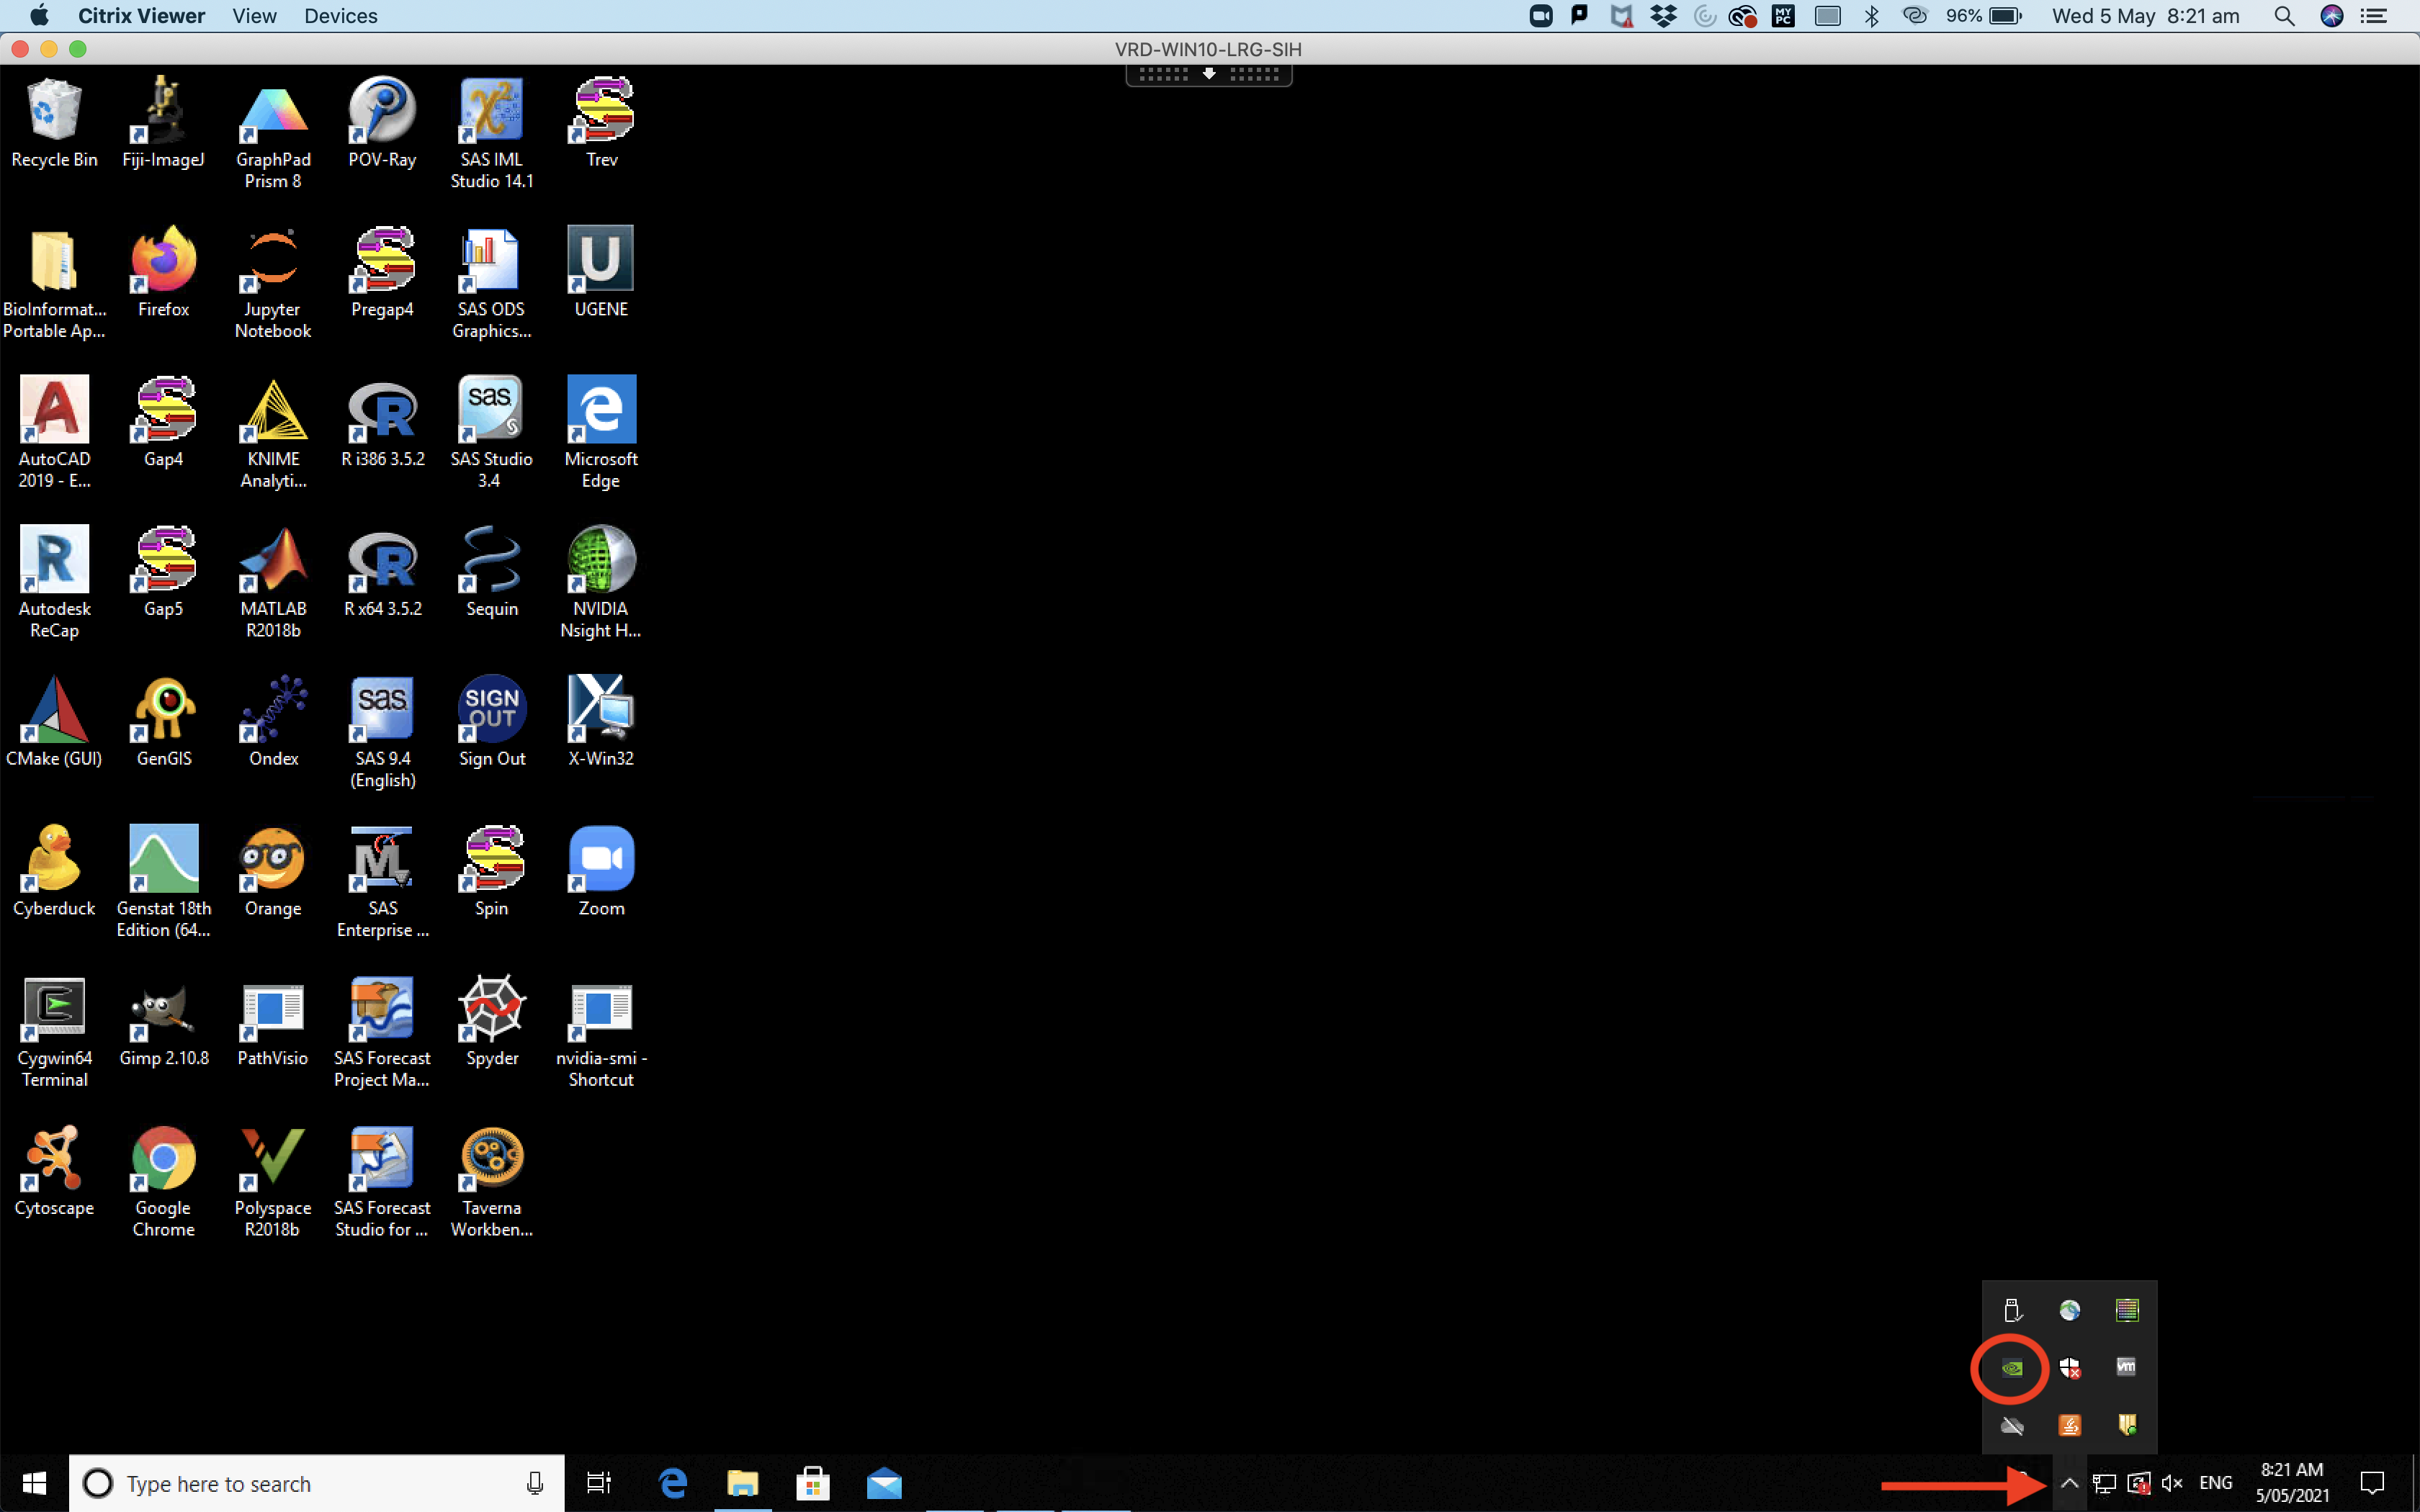
Once you click on the caret, you will see the extra icons available in the systems tray. Click on the “NVIDIA control panel” which is called “NVIDIA Settings” (see red circle in the picture above). This will open the NVIDIA control panel in a separate window (see the picture below, left most window labeled “NVIDIA Control Panel”).
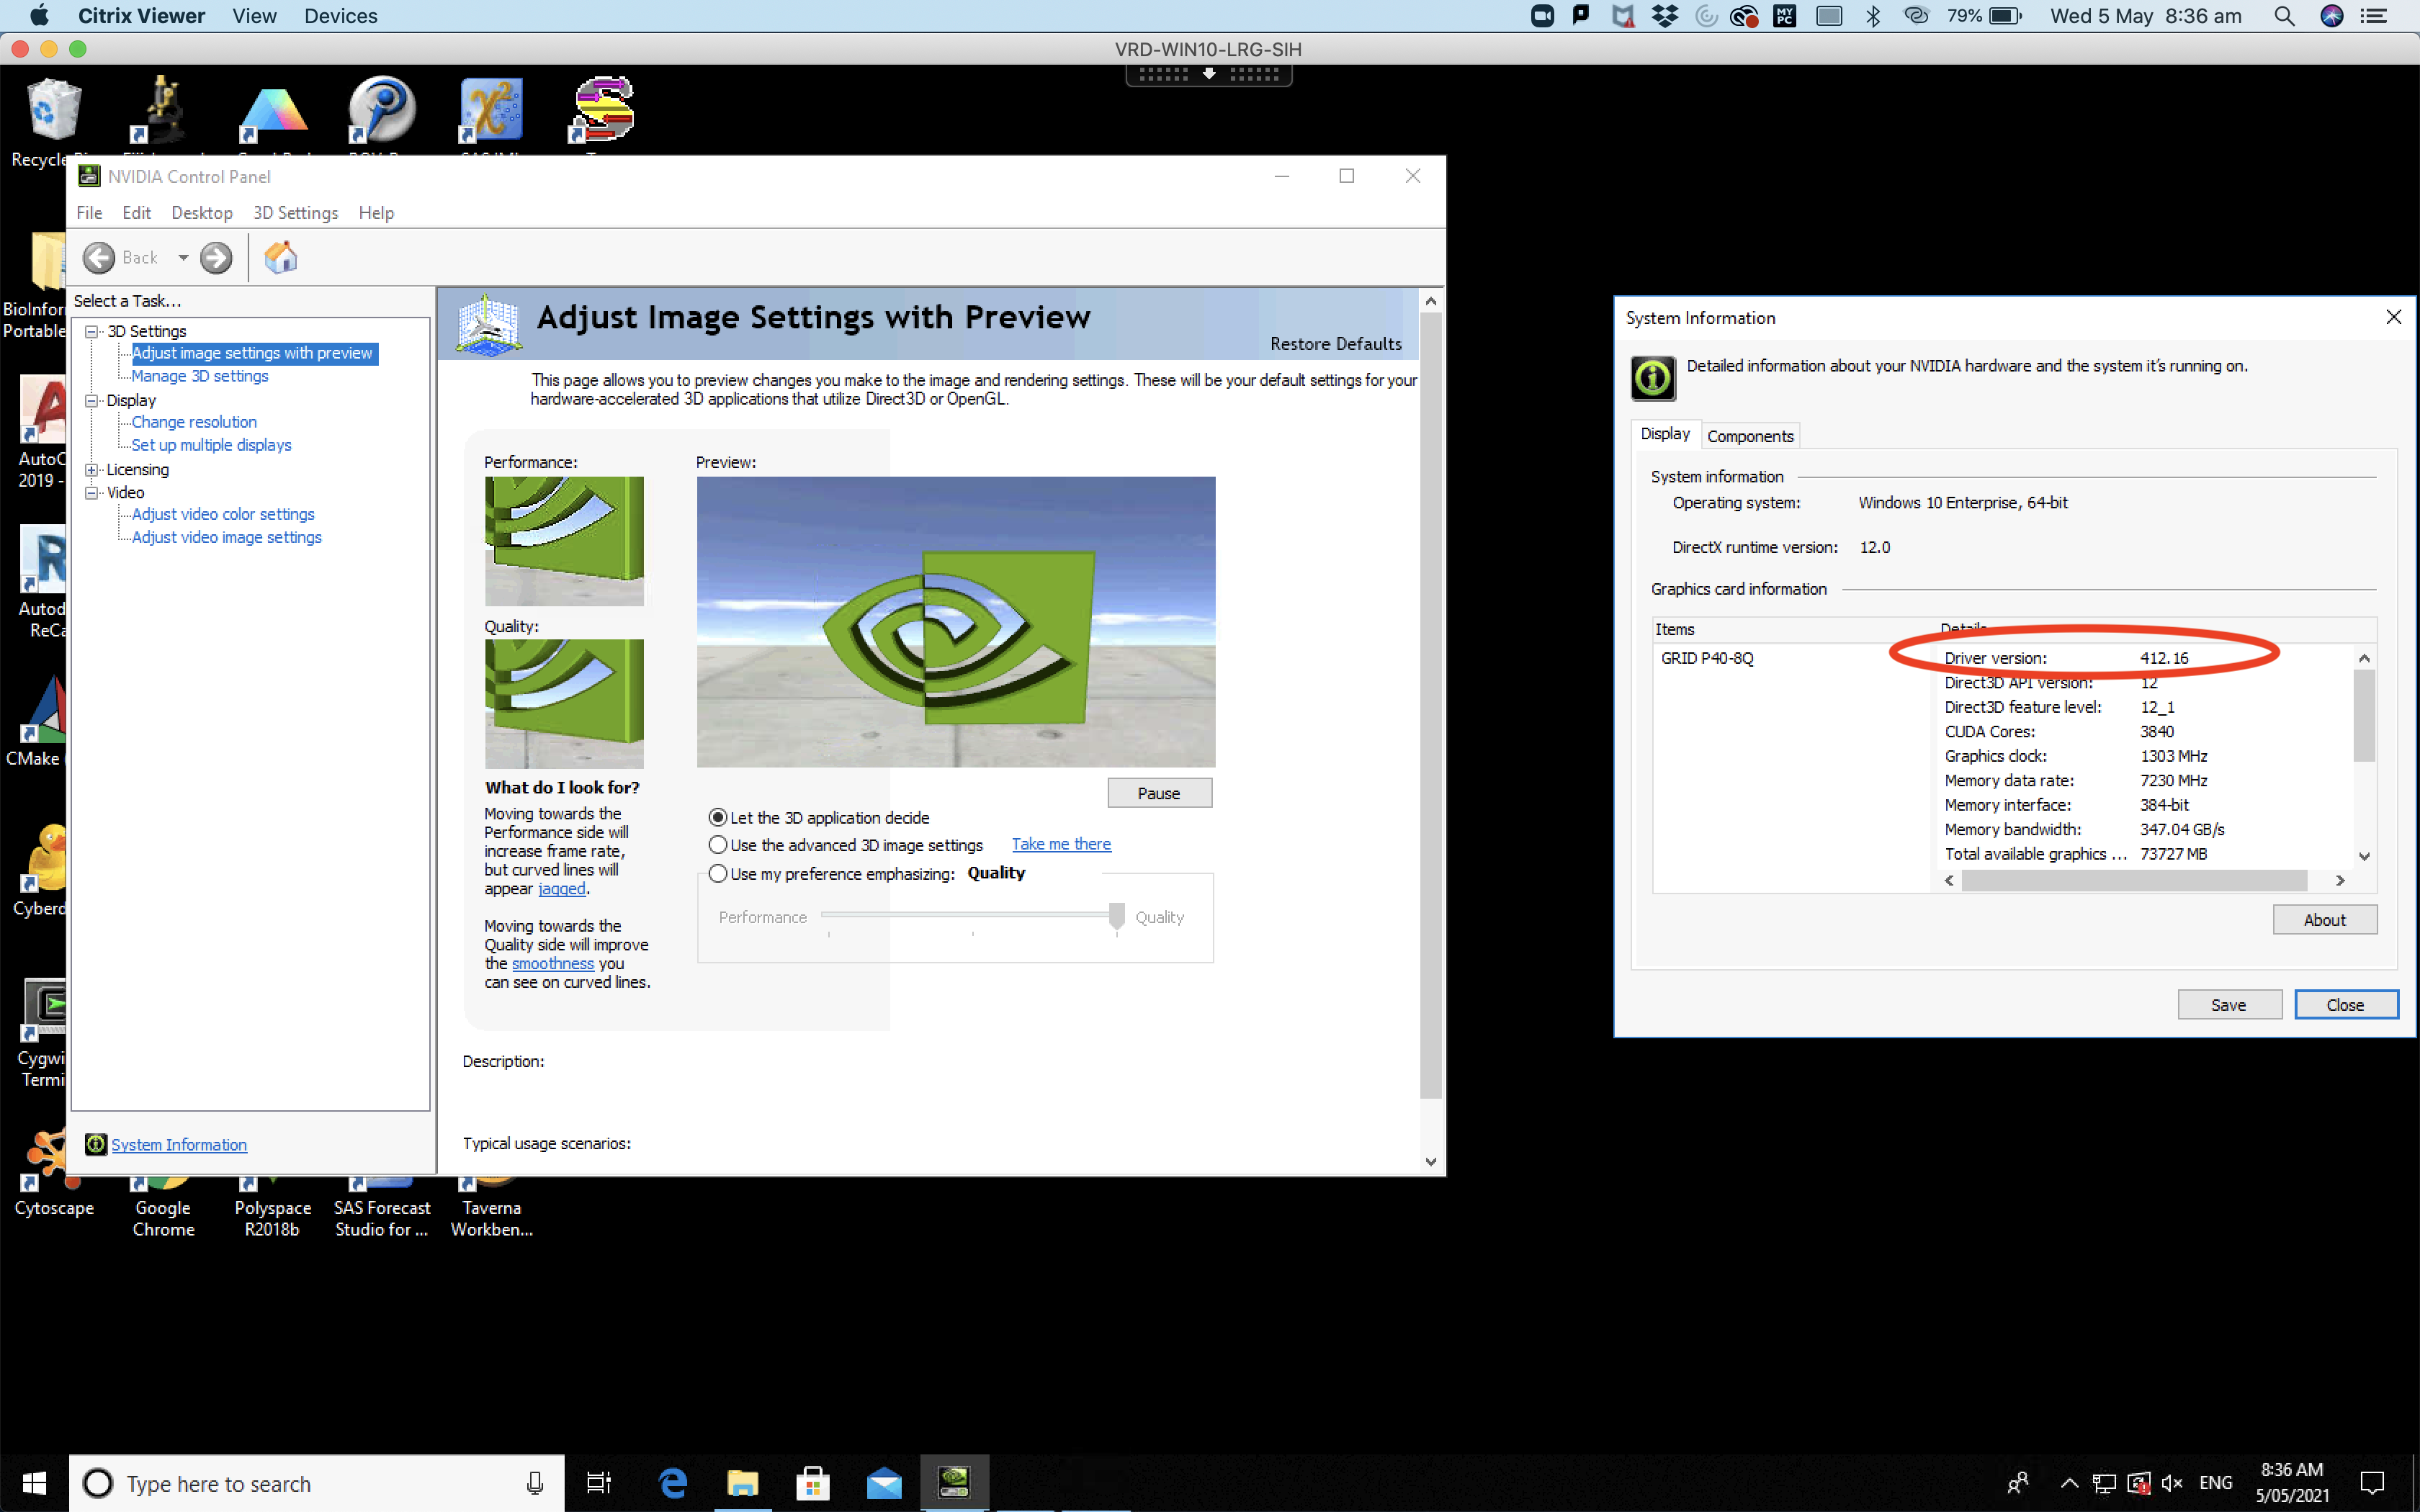
To reach the System Information in the NVIDIA control panel click on the “Help” then the “System Information” item on the help list and a new window will appear (see the right most window in the picture above labeled, “System Information”).
The GPU driver version will be listed next to “Driver Version” at the top of the list in the “System Information” window. See the red circle in the picture above.
The GPU Driver version for the Argus machine is 412.16 and you will also see the GPU type listed too. For the Argus machine this is GRID P40-8Q.
Using the table above, we can confirm that the GPU Driver (v412.16) and CUDA (10.0.130) are compatible.
Checking that Visual Studio is installed
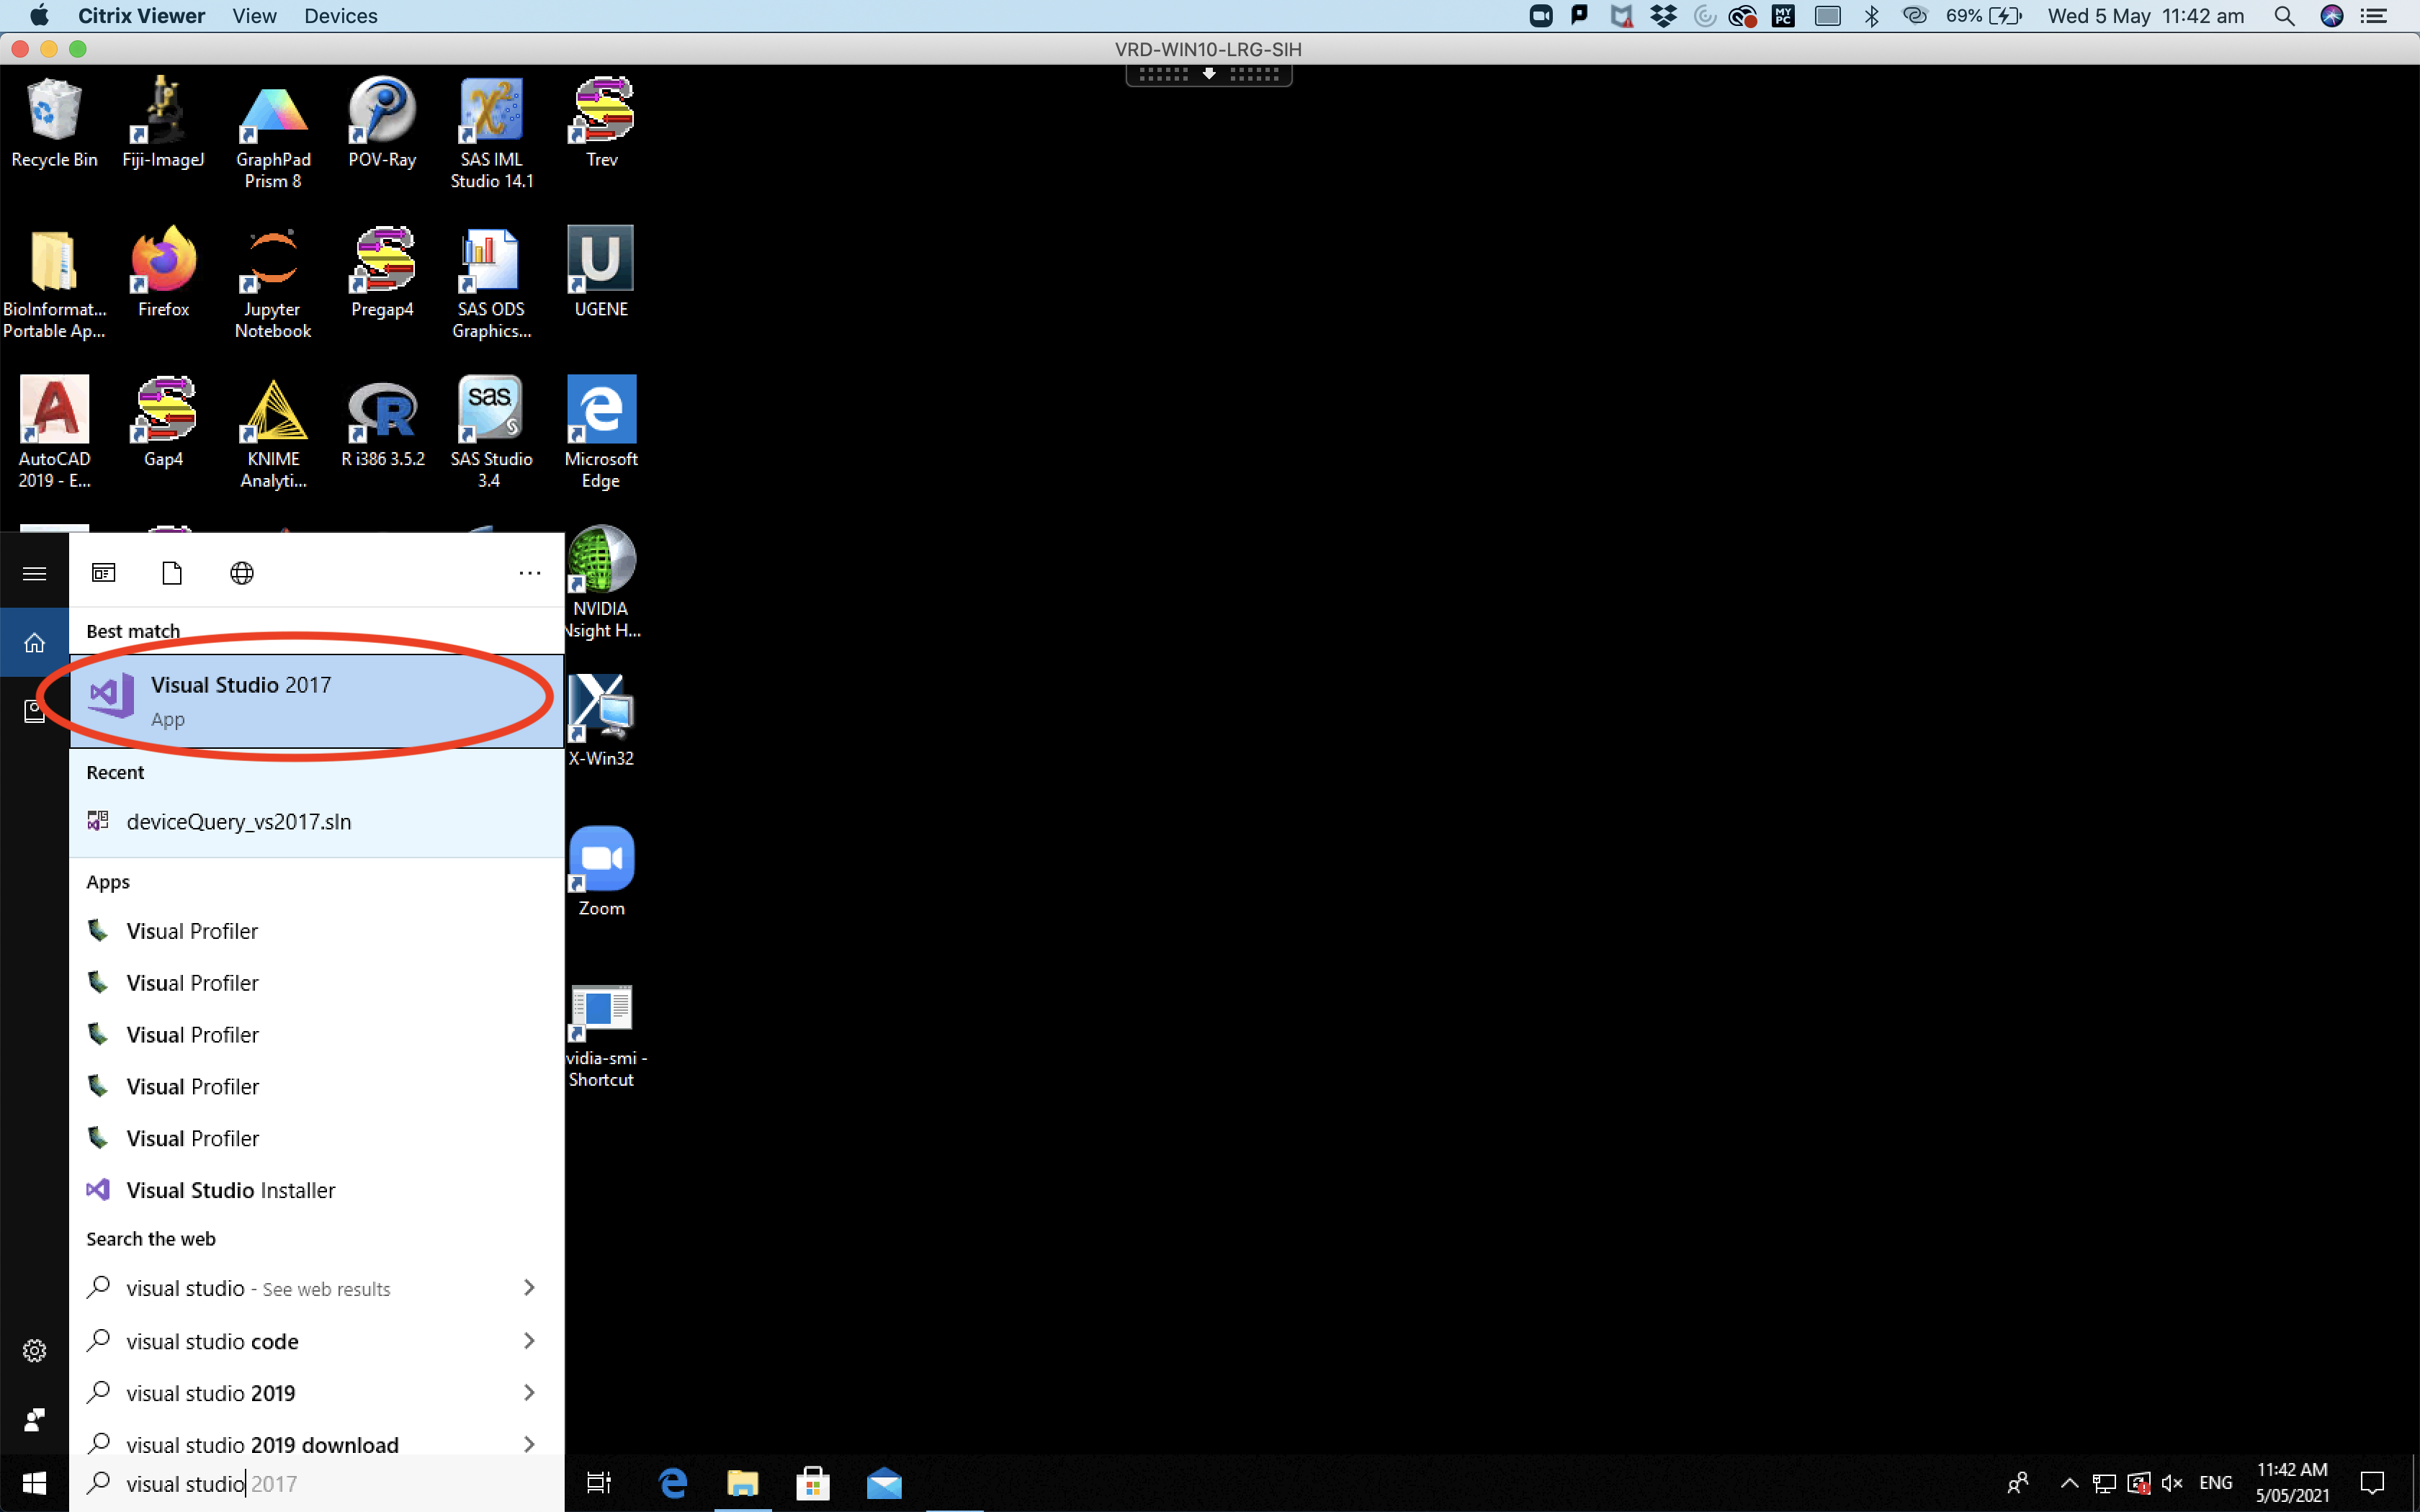
Hopefully at this point, you are starting to feel comfortable with the MS Win10 environment. So logging into Visual Studio should be easy. Go to the Windows search and type in “Visual Studio” and Visual Studio 2017 should appear at the top of the list results (Argus currently only has Visual Studio 2017 Community installed). See red circle in the picture below.
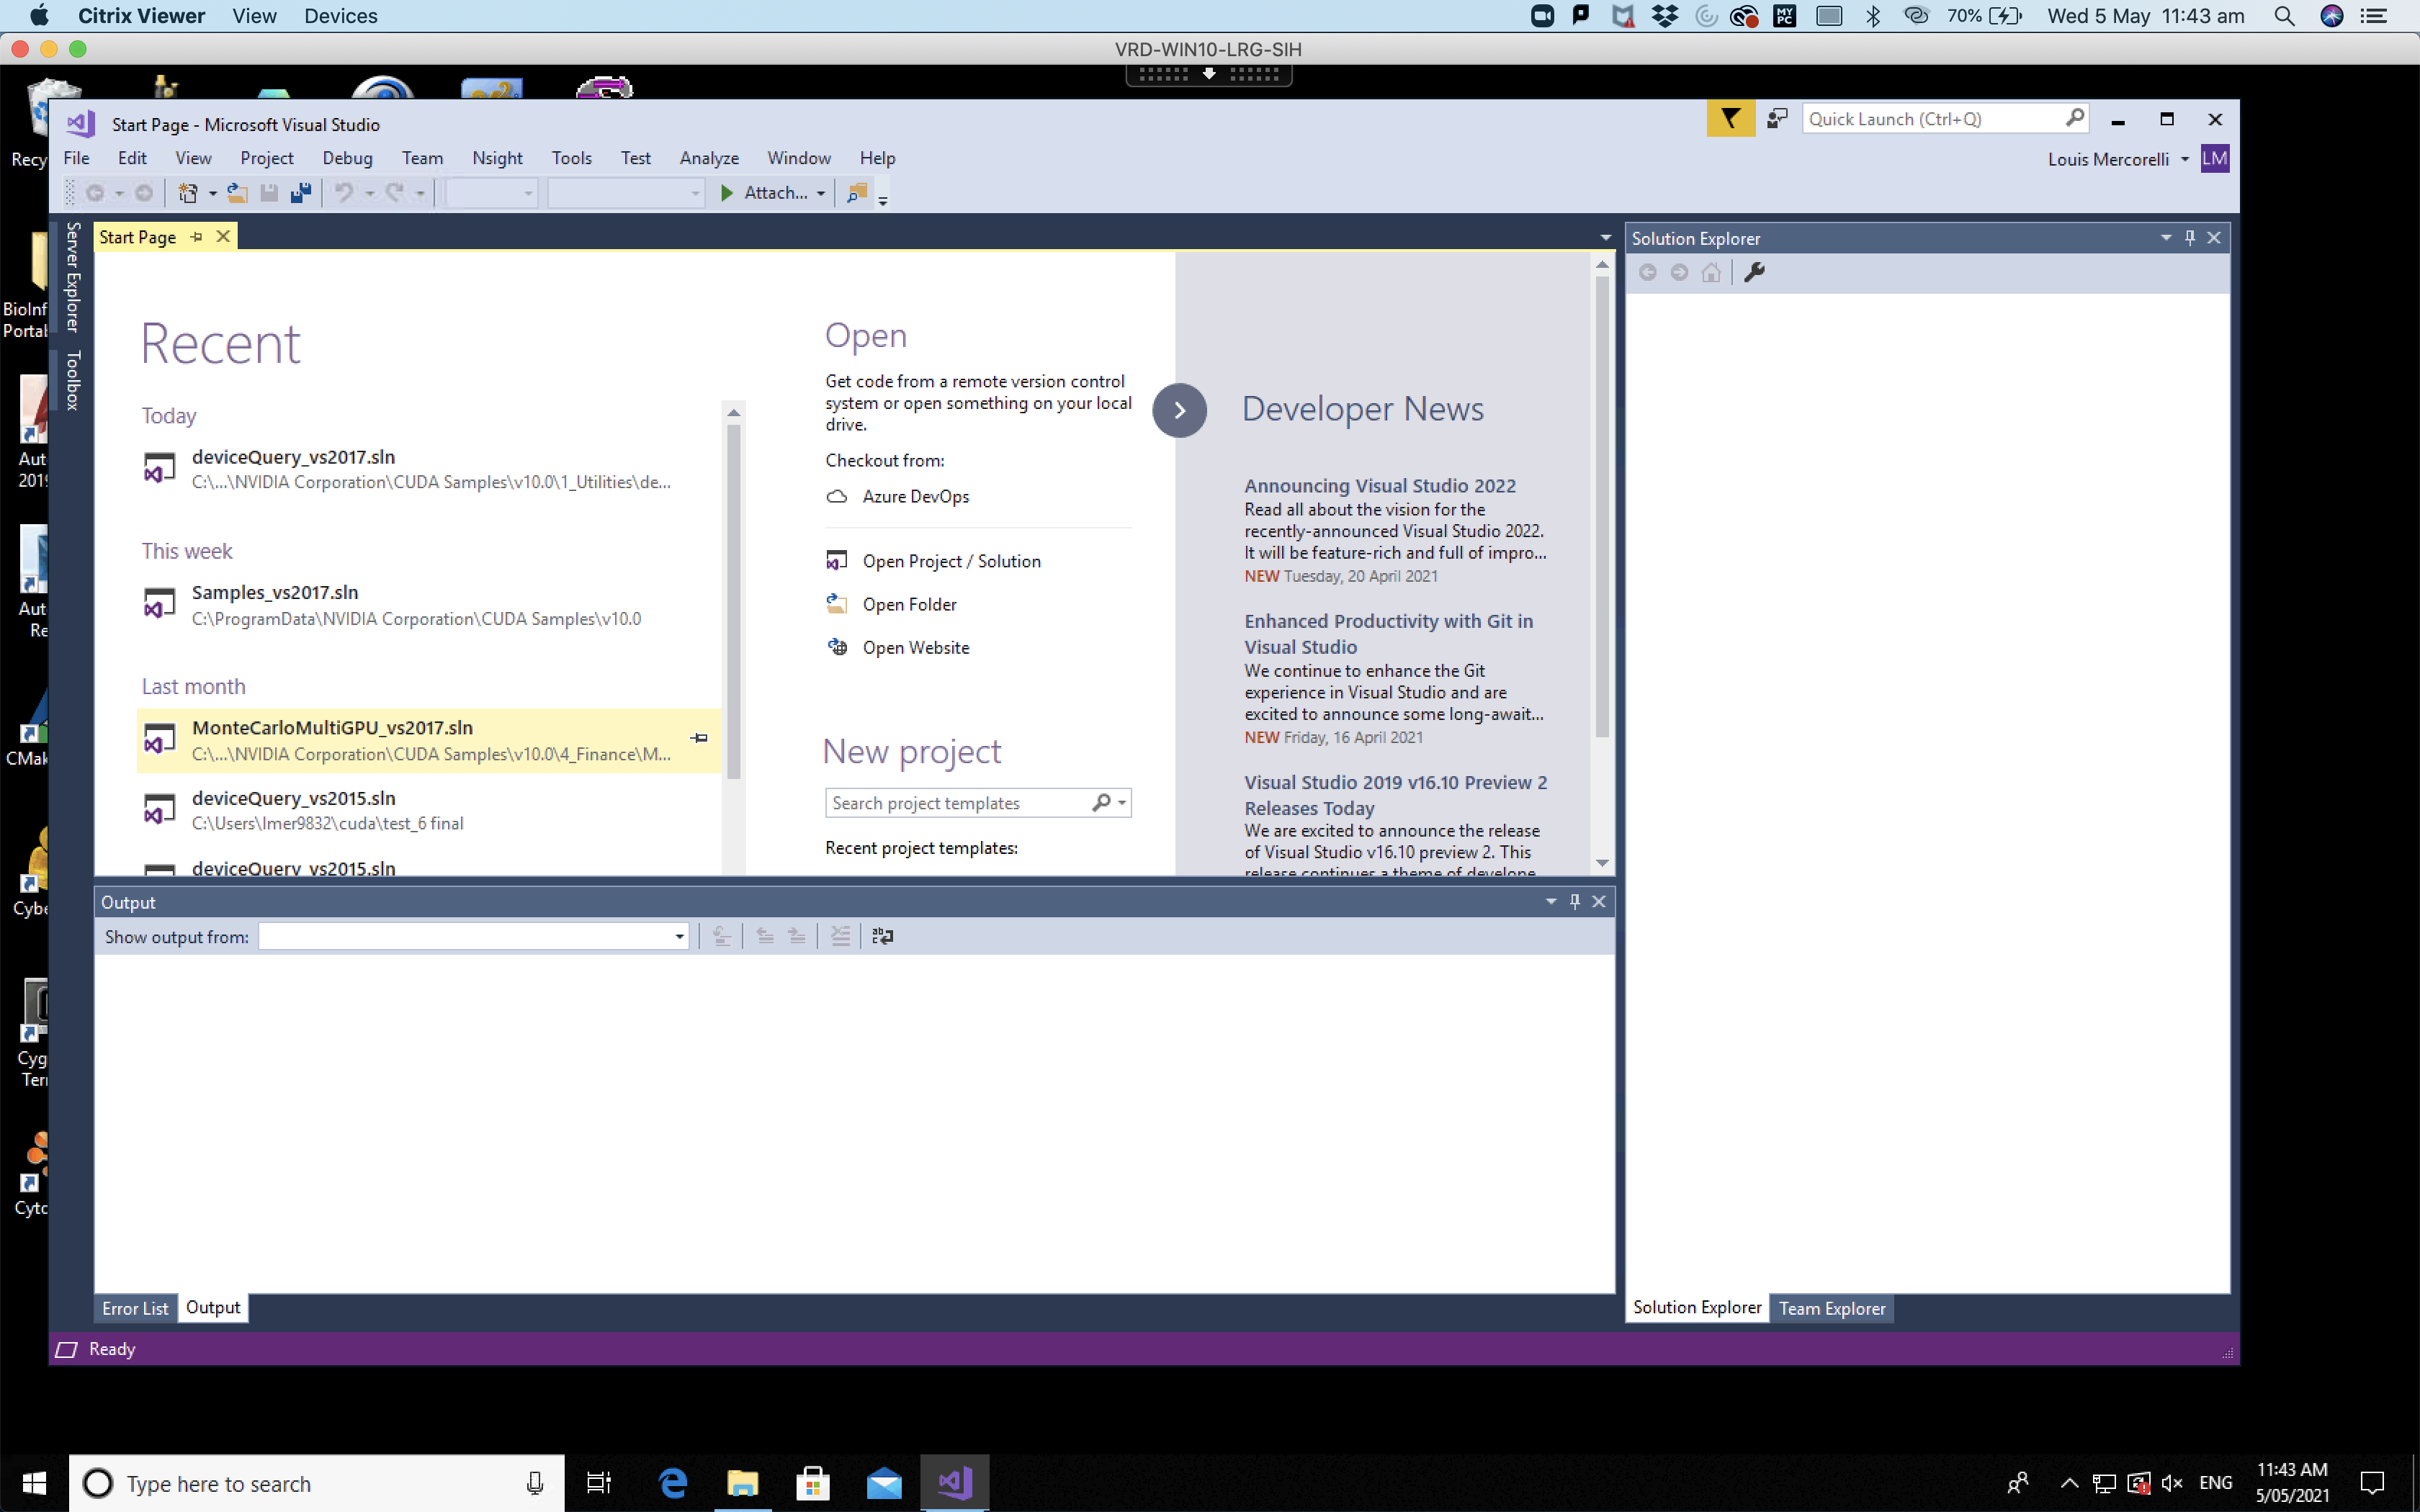
Click on the “Visual Studio 2017” app and Visual Studio should launch in a new window in centre of the screen (see picture below).
Key Points
Check GPU card is installed and working
Check CUDA is installed
Confirm CUDA and your GPU device driver are compatible
Check Visual Studio is installed