Introduction to GPU computing on HPC: GPU and SSH setup
If you want to follow along and complete the exercises on your local machine use these setup instructions.
If you only want to follow along using Artemis, all you need is an SSH client, as described below.
We will be using the Artemis Training accounts today (instructions detailed below.)
All the data/scripts used in this course is location on Artemis at /project/Training/GPUtraining (which you can access through the training accounts) or you can download the data directly from here
GPU Requirements
An CUDA capable GPU card. Artemis has NVIDA Tesla V100s with a compute capability of 7.0. The older generation on the training nodes are Tesla K40s with compute capability of 3.5. Generally code is forwards compatible, but not backwards compatible. So be sure to know what kind of GPU card you are testing and deploying on.
NVIDIA driver and CUDA local installation instructions
Windows 10
Install Visual Studio 2017.
Install the NVIDIA graphics driver and CUDA drivers. Download both from the NVIDIA download page.
Specific versions of tools working together for me are:
C compiler, installed with Visual Studio 2017, cl.exe
Microsoft (R) C/C++ Optimizing Compiler Version 19.16.27027.1 for x64
Nvidia cuda compiler (installed with the CUDA toolkit), nvcc
nvcc: NVIDIA (R) Cuda compiler driver Cuda compilation tools, release 10.0, V10.0.130
You may need to link the correct cl.exe and nvcc somehow. The way I achieved this was by launching the x64 Native Tools Command Prompt from the Developer command prompt shortcuts as listed here
https://docs.microsoft.com/en-us/cpp/build/building-on-the-command-line?view=vs-2019 and then I could run nvcc successfully.
Linux (Xubuntu 18.04)
Probably as simple as selecting the NVIDIA driver. Then installing the CUDA drivers for the driver/GPU combo. More info here https://informatics.sydney.edu.au/blogs/tf_on_linux/
Specific versions of tools working together for me are:
C compiler, gcc
gcc (Ubuntu 6.5.0-2ubuntu1~18.04) 6.5.0 20181026
and the Nvidia cuda compiler (installed with the CUDA toolkit), nvcc
nvcc release 9.0, V9.0.176
Mac OSX
If you have Mac product newer than about 2014 you probably don’t have a CUDA-capable GPU card. This was done by Apple for various reasons. Nevertheless, there are still drivers from NVIDA, and a few options with external GPUs. But don’t despair you can do the Artemis examples! And there are still plenty of high-level libraries that can work with OpenCL (as opposed to CUDA), see an example of Keras/TensorFlow here
Other Software
Matlab
I will be using Matlab 2018a locally and on HPC.
Python
I will be using Python 3.5 - further setup instructions are given in the Python example page.
Which version(s) to use?
Depends what features you need; if you need the latest then go with that. Different cards have different compute capability and different CUDA requirements. And these options bleed down the dependency list (also known as software stack). So if you don’t know, go for the latest stable release compatible over your software stack. Check your CUDA compatability here
There is an update for XXXX, should I get it? Maybe, but probably not. (Not while I am teaching you anyway.) This workshop is for scientific development of applications, chances are you will hack together some code and run it once, so we are not aiming to get this working on every GPU system in the world. Versioning is super important, and in my experience the number two cause of erros (number one is typos).
What about Containers?
Docker/singularity are great for simplifying the development environments, BUT they still require the underlying installitions of NVIDIA drivers for your specific GPU card, plus a version of CUDA that works with that combo!
For HPC work all you need is an ssh client as below…
Get a shell terminal emulator to connect to Artemis HPC
To connect to Artemis HPC, and follow this lesson, you will need a ‘terminal emulator’ program installed on your computer. Often just called a ‘terminal’, or ‘shell terminal’, ‘shell client’, terminal emulators give you a window with a command line interface through which you can send commands to be executed by your computer.
A. Linux systems
If you use Linux, then chances are you already know your shell and how to use it. Basically, just open your preferred terminal program and off you go! An X-Window server (X11) may also be useful if you want to be able to use GUIs; again, if you’re using Linux you probably have one, and if you don’t have one, it’s probably because you intentionally disabled it!
Connection to Artemis can be made via ssh by issuing the following command on the shell:
ssh -X <unikey>@hpc.sydney.edu.au
B. OSX (Mac computers and laptops)
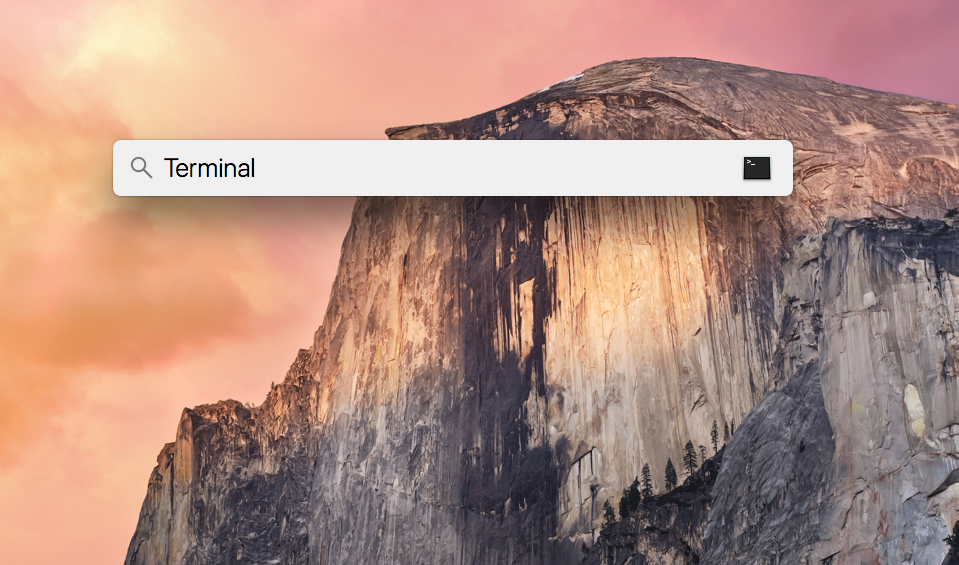
Mac operating systems come with a terminal program, called Terminal. Just look for it in your Applications folder, or hit Command-Space and type ‘terminal’. You may find that other, 3rd party terminal programs are more user-friendly and powerful – I use Iterm2.
We also recommend installing XQuartz, which will replace OSX’s native X-Window server. XQuartz has some extra features that may offer better performance when using GUI programs. You’ll need to log out and back in again after installing XQuartz in order for it to activate.
Connection to Artemis can be made via ssh by issuing following command on in the terminal:
ssh -X <unikey>@hpc.sydney.edu.au
C. Windows
If you’re using a Windows machine, don’t panic! You might not have used ‘CMD’ since Windows 95 but, rest assured, Windows still has a couple of terminal programs and shells buried in the Programs menu.
However, those aren’t going to work for us, as you’ll need extra programs and utilities to connect to Artemis, such as an SSH implementation. To use Artemis on Windows, you have a couple of options:
i. PuTTY (Recommended)
PuTTY, an SSH and telnet client, is a good simple option. However, note that PuTTY does not provide an X11 server, so you won’t be able to use GUI programs on Artemis with just PuTTY.
Head to https://putty.org and download PuTTY. You can install it to your computer, or just download the ‘binary’ and run it directly. Create a new session for use with Artemis as follows:
- Fill in the connection details:
- Host Name: hpc.sydney.edu.au
- Port: 22
- Connection type: SSH
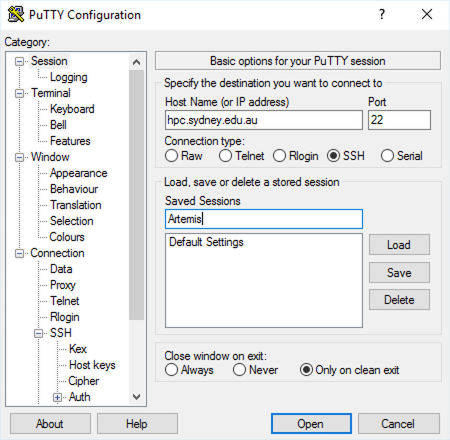
- Name this session “Artemis” and click ‘Save’
ii. X-Win32
X-Win32 is full-featured X-server and terminal emulator for Windows. USyd provides a license for it; however, the download link is restricted to staff so, students. Install, and follow the instructions on the USyd-ICT page to activate – you’ll need to be on the USyd network or VPN to do so.
iii. WSL and Ubuntu
Install Ubuntu or some other Linux distro on the Windows Subsystem for Linux see here for details. This one will give you a full suite of Linux functions and I like it for emulating Linux.
Off-campus access
If you’re attempting this training by yourself, or following on Zoom, off-campus then you’ll need to connect to the USyd internet network before you can connect to Artemis.
There are a couple ways to do this:
1. The USyd VPN
VPN (Virtual Private Network) is a protocol that allows you to tap into a local private network remotely. Follow USyd Service Now instructions on the Cisco Any Connect VPN. Once you’ve connected to the VPN, the above connection methods will work, just as though you were on-campus.
2. Use the Artemis Jump server
Artemis provides a ‘gateway’ server, called Jump, that allows connections from outside the University network, and is itself on the network. From the Jump server, you can then connect to Artemis directly. If using the Jump server, you will need to edit the host address used in the instructions above:
- Instead of hpc.sydney.edu.au use jump.research.sydney.edu.au
This will connect you to Jump, rather than Artemis itself. You can then connect to Artemis directly via SSH. See Episode 1 of the Introduction to Artemis HPC course.
Graphical login nodes
There is one final way to access Artemis, and that is using our graphical login nodes. These special are graphics-enabled login servers which host ‘NoMachine’, a kind of remote desktop service.
To use the graphical login nodes:
- Download and install the NoMachine Enterprise Client for your operating system. Please don’t download the client from NoMachine directly, as their current version may not work with Artemis.
- If you’re using MacOS, you need to install XQuartz.
- Download the glogin.nxs session file to your computer.
To connect:
- Double-click or run the glogin.nxs shortcut you downloaded (it will open NoMachine Client).
- A NoMachine window should start, asking for a username and password.
- Replace “YOUR_UNIKEY” with your UniKey, then enter your UniKey password in the password field, then click ‘OK’.
- A short while later, an Artemis terminal window should open.