Accessing NCI Gadi HPC
National Computational Infrastructure
NCI is a research-focused organisation that provides advanced computing, data storage, and data management solutions to support scientific research and innovation in Australia and beyond. NCI’s HPC systems are designed to handle complex computational tasks, such as simulations, data analysis, and modeling, for a wide range of scientific disciplines, including climate modeling, genomics, astronomy, and materials science. The University of Sydney provides its researchers with subsidised access to NCI’s infrastructure.
Resources
Set up your NCI Account
All new users must create their account through the NCI online self service portal. To create your account you will need the following information:
- Your Name
- Institutional email address (Gmail, Hotmail, etc. are not accepted)
- Mobile phone number
- Either:
- NCI project code of an existing project you wish to join
- A new project proposal to be assessed by a Scheme Manager to determine if they will grant your project time
Note that resources at NCI are allocated to projects and not to individual users.
Complete all steps below to set up an NCI account:
Click on ‘Sign up’ link on the NCI online self service portal:
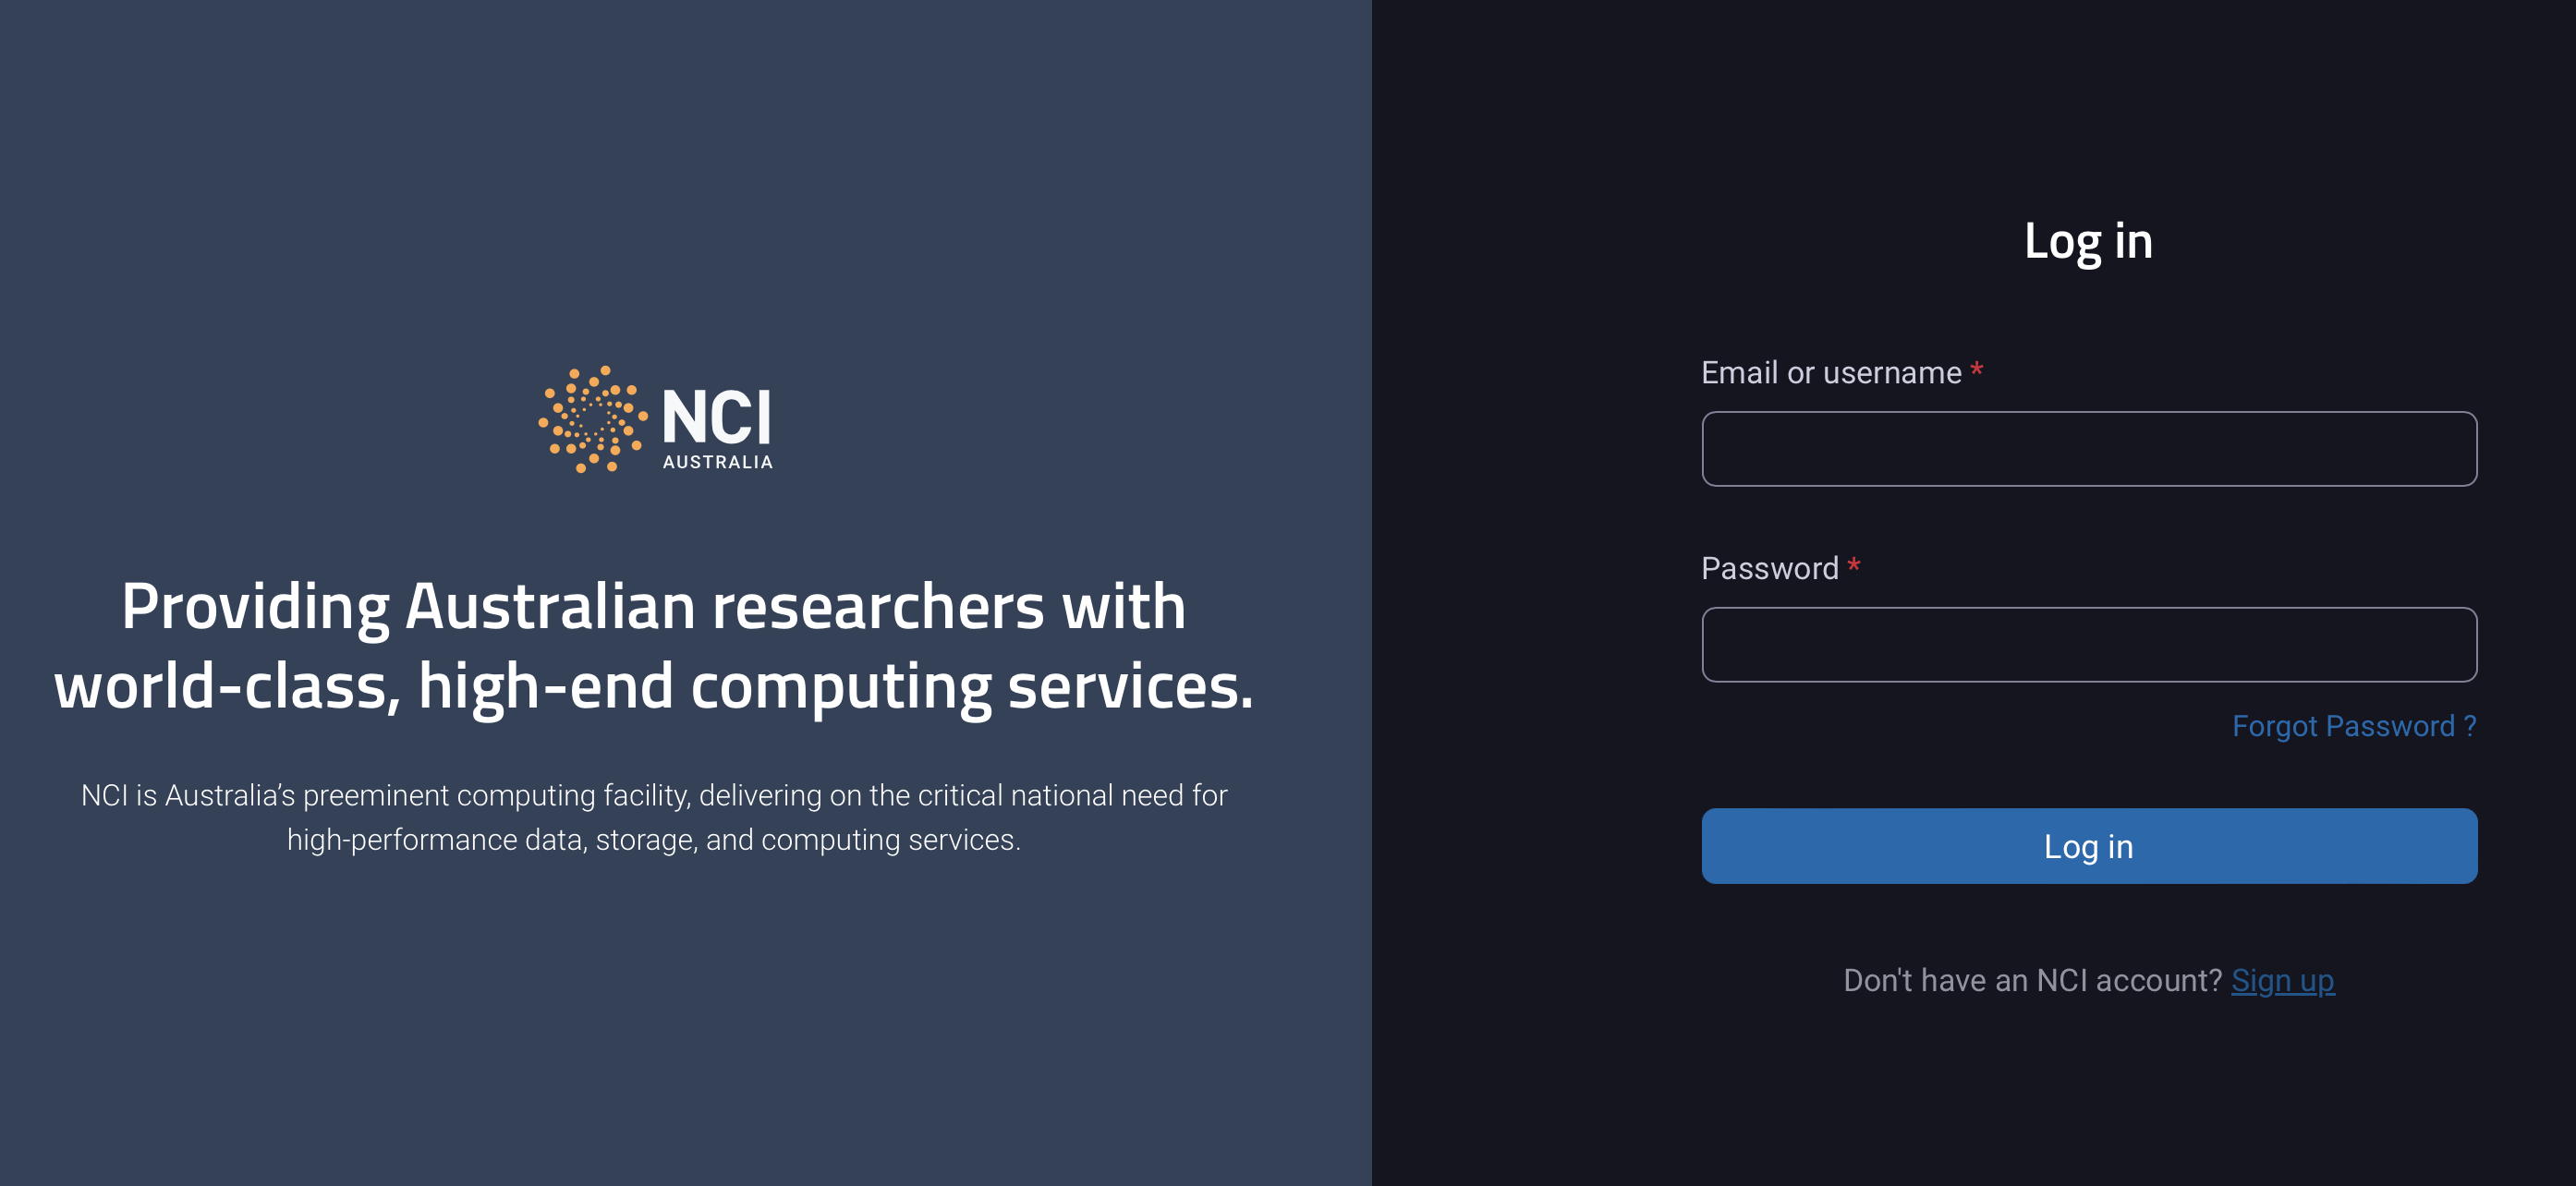
Accept the terms and conditions:

Provide your personal details:

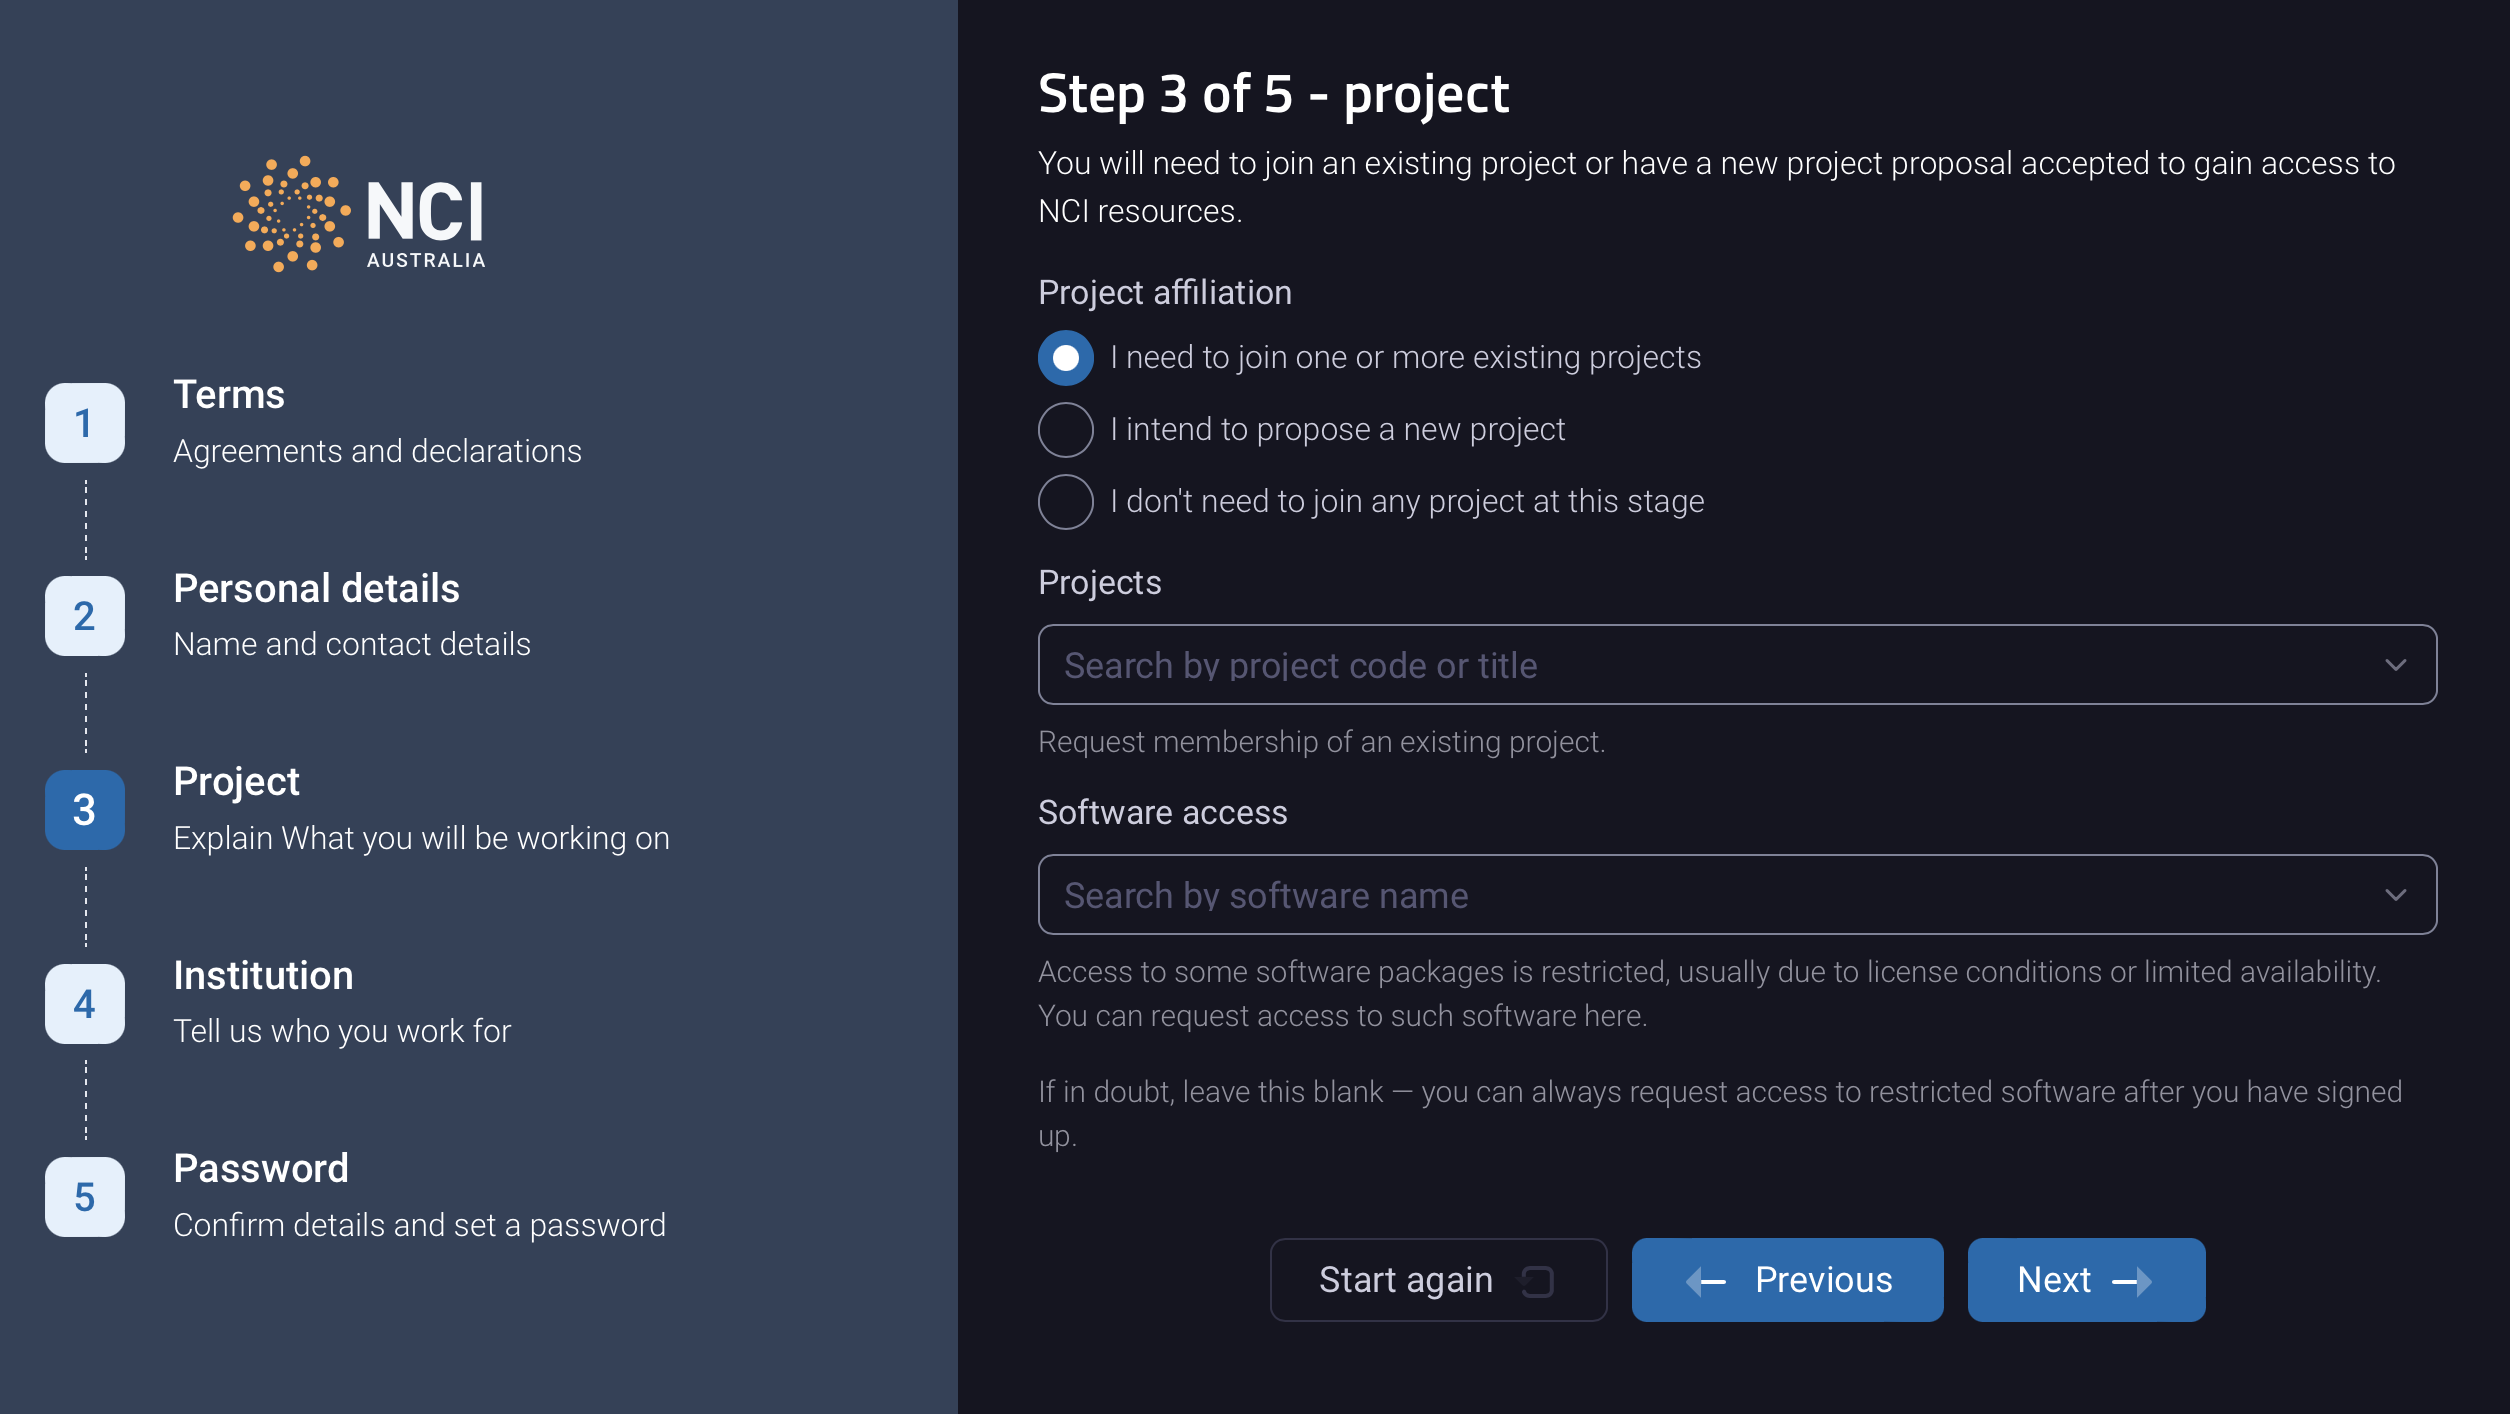
Provide details on the project you’ll be working on:
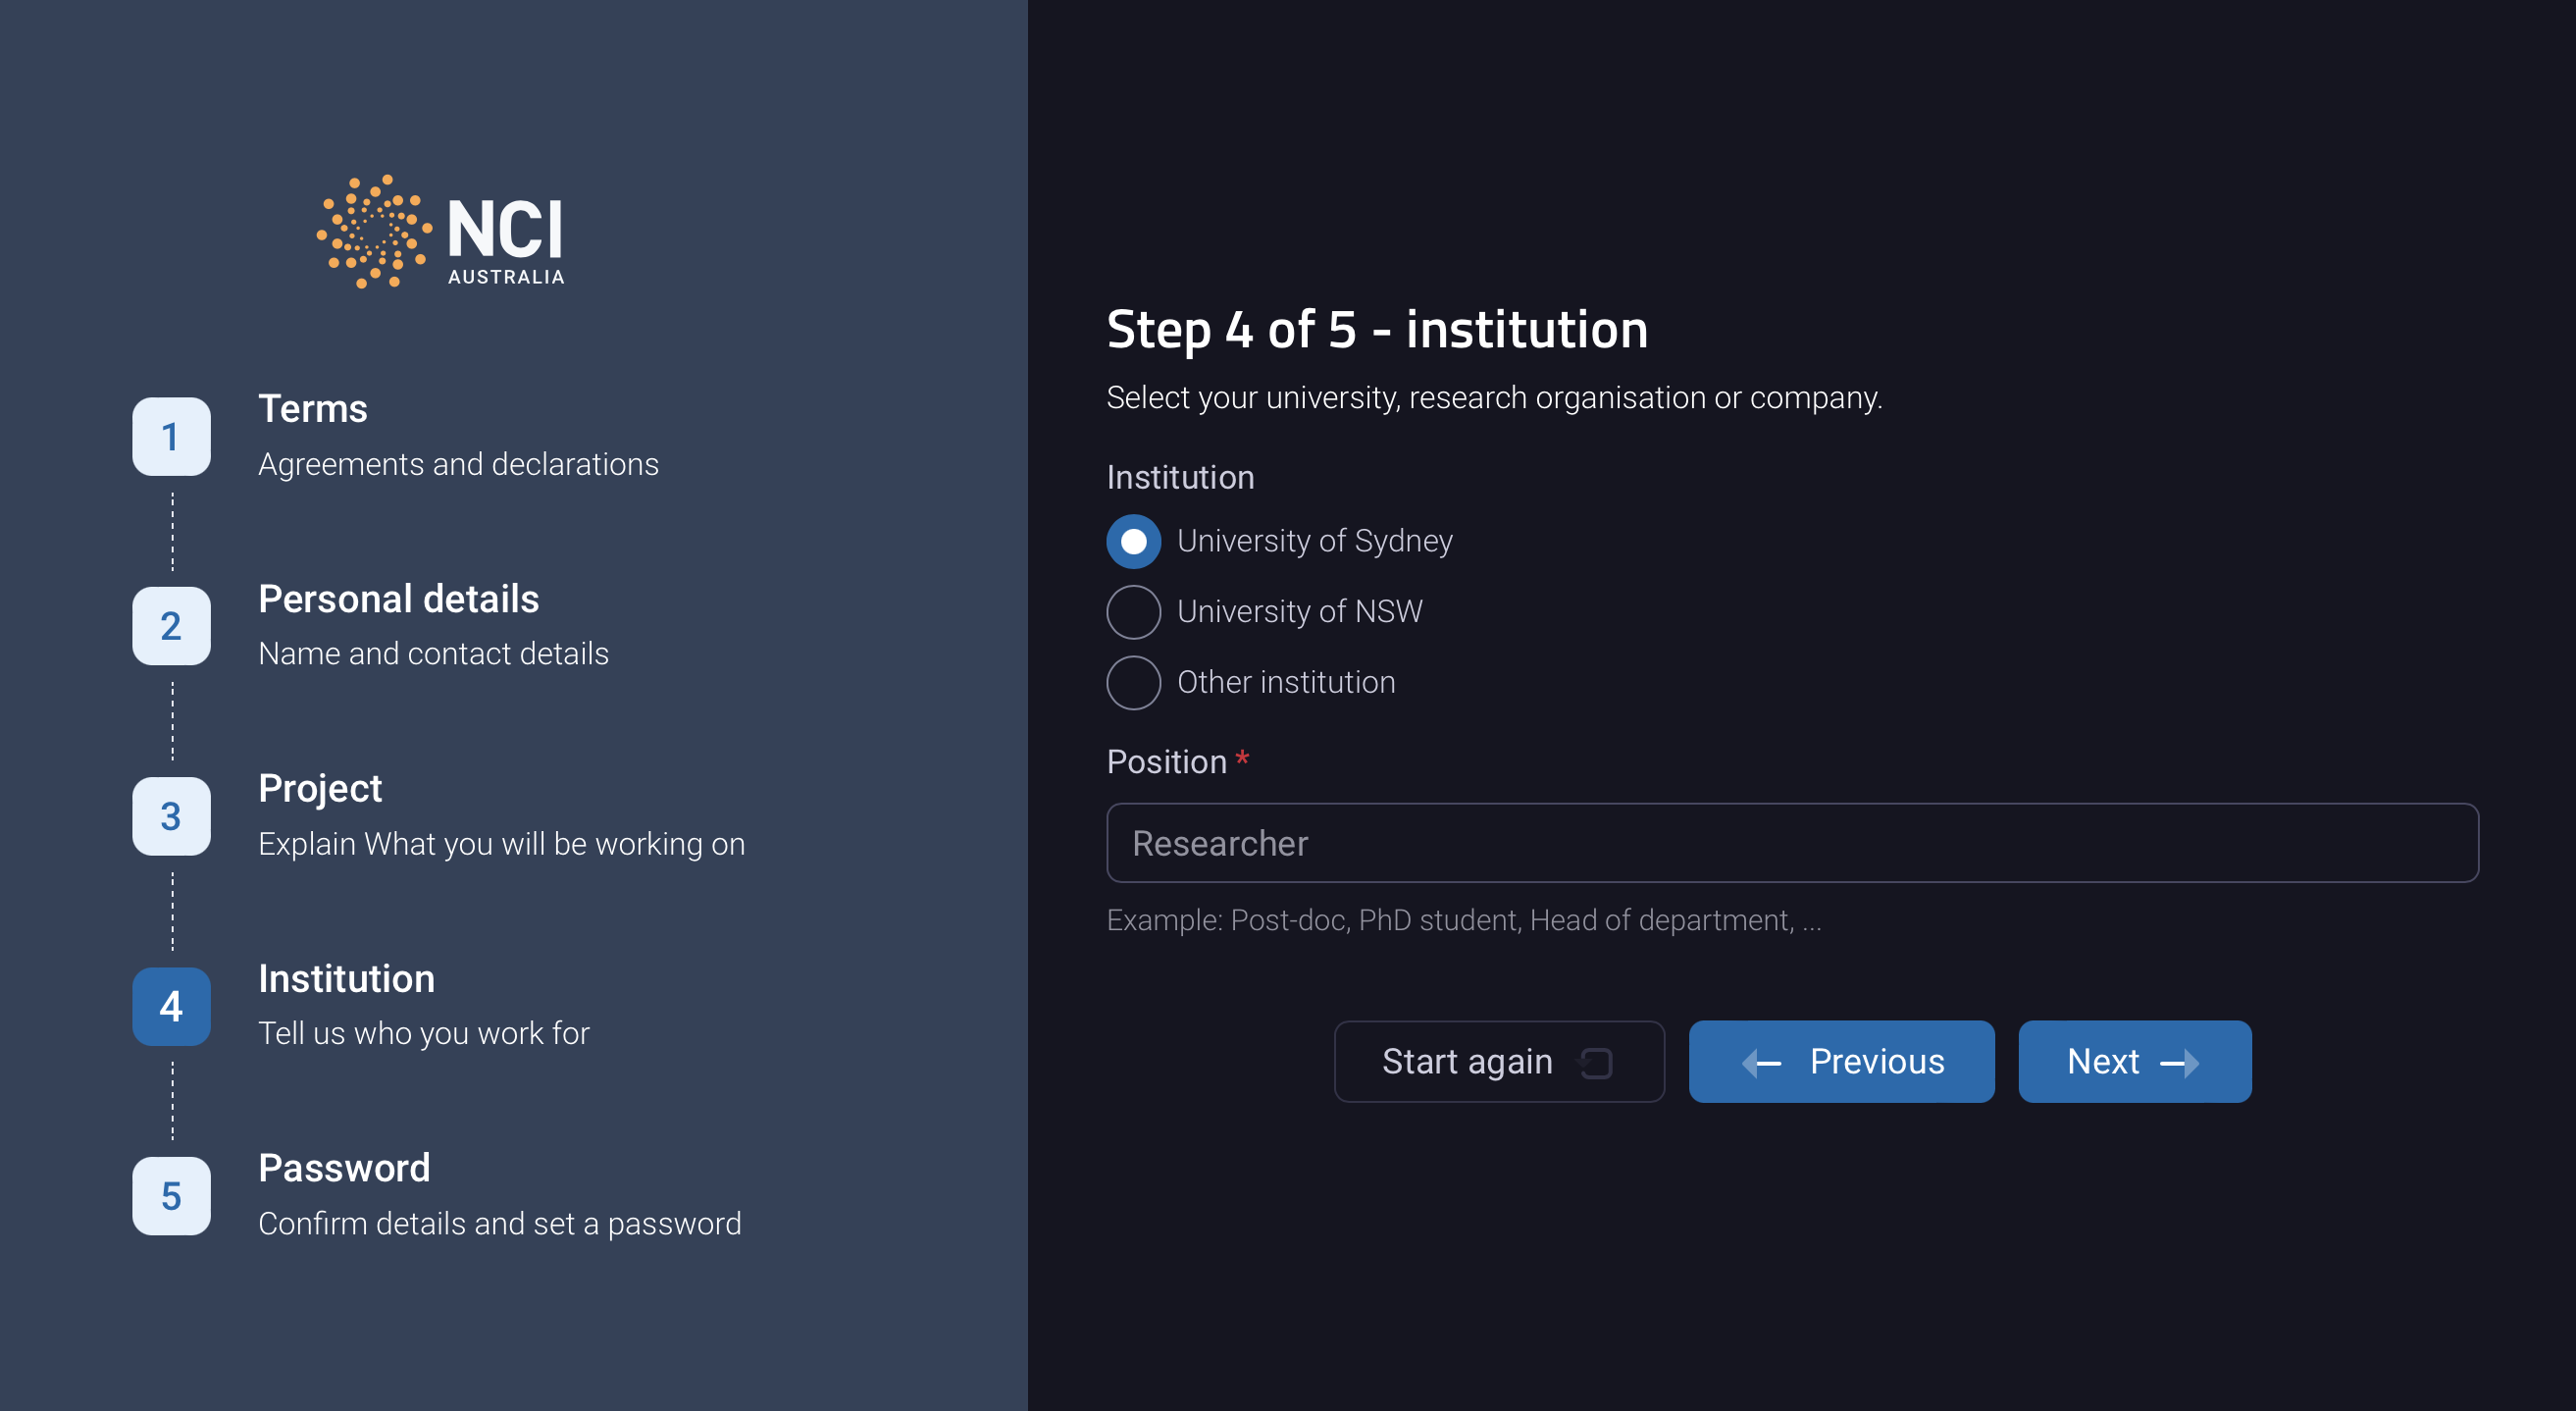
Select University of Sydney as you institution:
Your username will become active when a project Lead CI approves your request to join their project, or when a Scheme Manager approves your new project proposal. You will receive a confirmation email from the Mancini system when your username is activated.
Using a terminal application
Once you have been granted access to NCI you are able to access the platform. To do this, you will need to download a terminal application on your local computer or via NCI’s Australian Research Environment platform (ARE).
If you don’t have a terminal already or know what one is, it is used to provide a window with a command line interface through which you can send commands to be executed by the HPC remotely or your local machine. See here for instructions on downloading a terminal application for your computer.
Log into Gadi
You will need to access the Gadi HPC via the command line when using the Nextflow Tower service for a few purposes:
- To transfer data to and from the University of Sydney’s research data store
- To turn on the Tower Agent before running a workflow
Access to Gadi is via SSH to gadi.nci.org.au. This provides a Unix shell on one of the Gadi login nodes.
Open a terminal application and type the following command:
ssh abc123@gadi.nci.org.au Replace abc123 with your own username. Enter your password when prompted. If you can’t remember your password, you can reset it via Mancini. Navigate to your project space:
cd /scratch/ab01Replace ab01 with your project name.
Transfer your data to and from Gadi
To copy files to Gadi you should use the Gadi data mover queue and gadi-dm.nci.org.au. To transfer data from USyd’s RDS via a PBS job, you’ll need to set up ssh keys for passwordless transfer of datasets using the University of Sydney’s Artemis HPC.
Set up ssh keys
1. Generate SSH Key Pair on the Artemis HPC
Log in to the Artemis HPC and stay in your home directory:
ssh unikey@hpc.sydney.edu.auRun the following command to generate an SSH key pair without a passphrase:
ssh-keygen -t rsa -b 2048 -N ""Press enter when prompted, saving the key in ~/.ssh/id_rsa.
2. Set Appropriate Permissions
Ensure that your SSH key files have the appropriate permissions to maintain a secure environment:
Set permissions on your SSH key files using chmod command:
chmod 700 ~/.ssh
chmod 600 ~/.ssh/id_rsa
chmod 644 ~/.ssh/id_rsa.pub
Create the authorized_keys file to transfer to Gadi HPC:
cat ~/.ssh/id_rsa.pub >> ~/authorized_keysThen set permissions on this file with chmod:
chmod 700 ~/authorized_keys3. Transfer Public Key to Gadi
Now move your authorized_keys file to Gadi HPC. Start by logging into Gadi from the Artemis HPC CLI and provide your password when prompted:
sftp abc123@gadi-dm.nci.org.auReplace abc123 above with your NCI username.
If you don’t already have an .ssh directory in your home directory, you’ll need to create one:
mkdir ~/.ssh Move into the .ssh directory and transfer your authorized_keys file:
cd ~/.sshput authorized_keysThis will transfer authorized_keys on Gadi to your current directory. With sftp, it will look for the file relative to where you launched sftp. You can check where you are on Artemis using lls.
4. Set Up the Public Key on the Gadi HPC
Log in to the Gadi HPC via the data mover address:
ssh abc123@gadi-dm.nci.org.auAppend the transferred public key to the ~/.ssh/authorized_keys file using the following command:
cat /path/to/directory/id_rsa.pub >> ~/.ssh/authorized_keysSet appropriate permissions for the
~/.ssh/authorized_keysfile:chmod 600 ~/.ssh/authorized_keys
5. Test the setup
Logout using ctrl+z and test the sftp connection. You should not need to use a password:
sftp abc123@gadi-dm.nci.org.auThis completes the setup. Now you can log in to the Gadi HPC from the Artemis HPC without entering a password each time. Be sure to handle your private key securely, especially since it is not passphrase protected.
Copying files from RDS to Gadi
Using a PBS job to transfer data transfer between Artemis HPC and NCI’s Gadi HPC using scp or rsync is a good practice. Below is a simple example of a PBS script that you might run from Artemis to transfer data to Gadi HPC:
#!/bin/bash

# Transfer files from Gadi to RDS by submitting this job on Artemis
# Must have ssh-keys set up for passwordless transfer

#PBS -P SIH
#PBS -N transfer
#PBS -l walltime=24:00:00
#PBS -l ncpus=1
#PBS -l mem=40GB
#PBS -W umask=022
#PBS -q dtq

nci_username= #specify your nci username
source_host=${nci_username}@gadi-dm.nci.org.au
source_path= #specify path to data to be transferred
destination_path=/rds/PRJ-SIH/FromGadi #specify path of where you'd like to upload data

while [ 1 ]
do
  echo Transferring ${source_host}:${source_path}/${dir} to ${destination_path}
  rsync -rPvz -L --append-verify ${source_host}:${source_path}/${dir} ${destination_path}

done