How to transfer data to and from the Persistent volume claim
In this section we will describe methods of transferring data between the Research Data Store (RDS) and Gadi. For now, while we await the implementation of Globus for fast and efficient transfer to and from your Persistent Volume Claim (PVC), we will describe an interactive method for transferring data using a JupyterLab environment in the Run:ai web interface. In the future we will include instructions for copying data using the Run:AI CLI at the command line.
Here we assume you already have set up a project and have some Persistent Volume Claim (PVC) storage available.
Interactive data transfer to/from RDS from a web-browser
You can easily transfer data between your Persistent Volume Claim (PVC) and RDS from inside the Run:ai web browser interface. We have set up an environment called interactive_dt for you to do this.
To run the interactive_dt environment from a template:
Log into the Run:ai dashboard at gpu.sydney.edu.au and use Okta to login with your credentials via the “CONTINUE WITH SSO” sign in option.
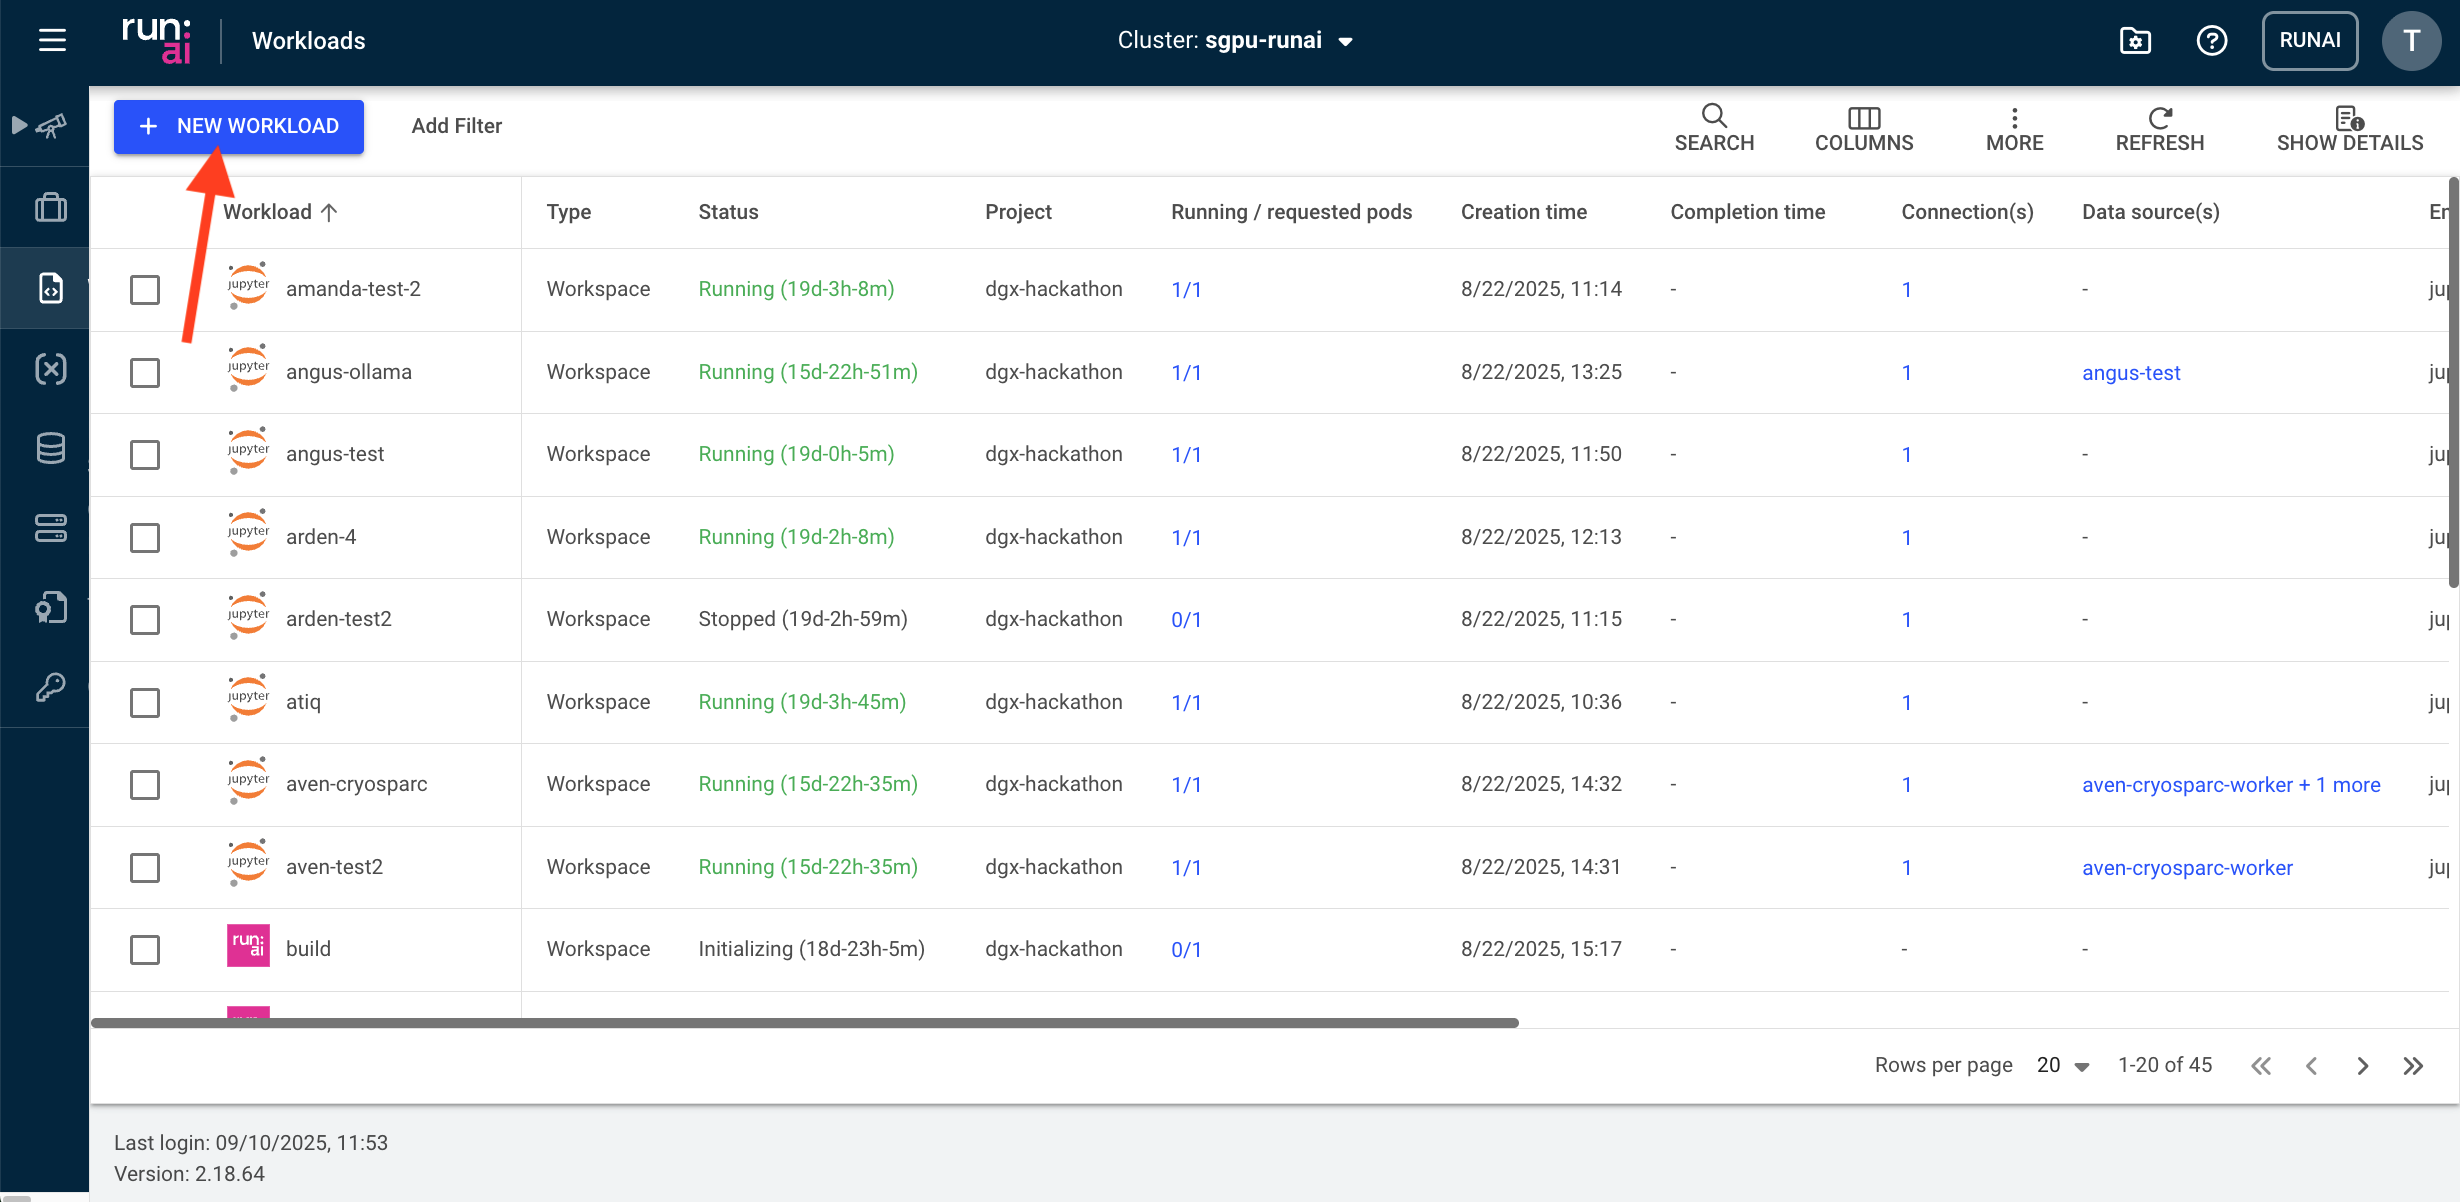
Click ‘workloads’ in the left panel and then the blue ‘new workload’ icon in the top left of the workloads screen and select ‘workspace’.
Select your project from the projects available and select the
interactive-data-transfertemplate and give your workspace a name before clicking with your mouse cursor on CONTINUE.If you have selected the
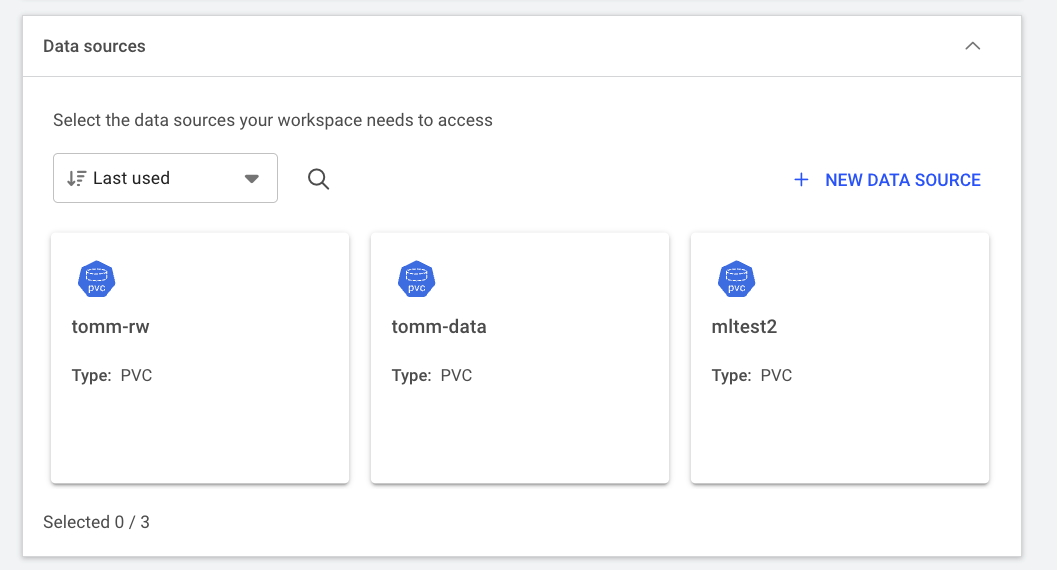
interactive-data-transfertemplate, you should now have pre-populated the requiredinteractive-dtenvironment and thedata-transfercompute resource fields on the following page. You can double check this now.Expand the
Data sourcesbox and select the PVC associated with your project from the list.
- When you are happy with everything, click CREATE WORKSPACE and your data transfer environment will be created. When this is provisioned click the CONNECT icon above the list of workloads.

- You will again be prompted for your Run:ai login and your newly created JupyterLab session will appear in a new tab in your browser. Select the ‘Terminal’ app there.
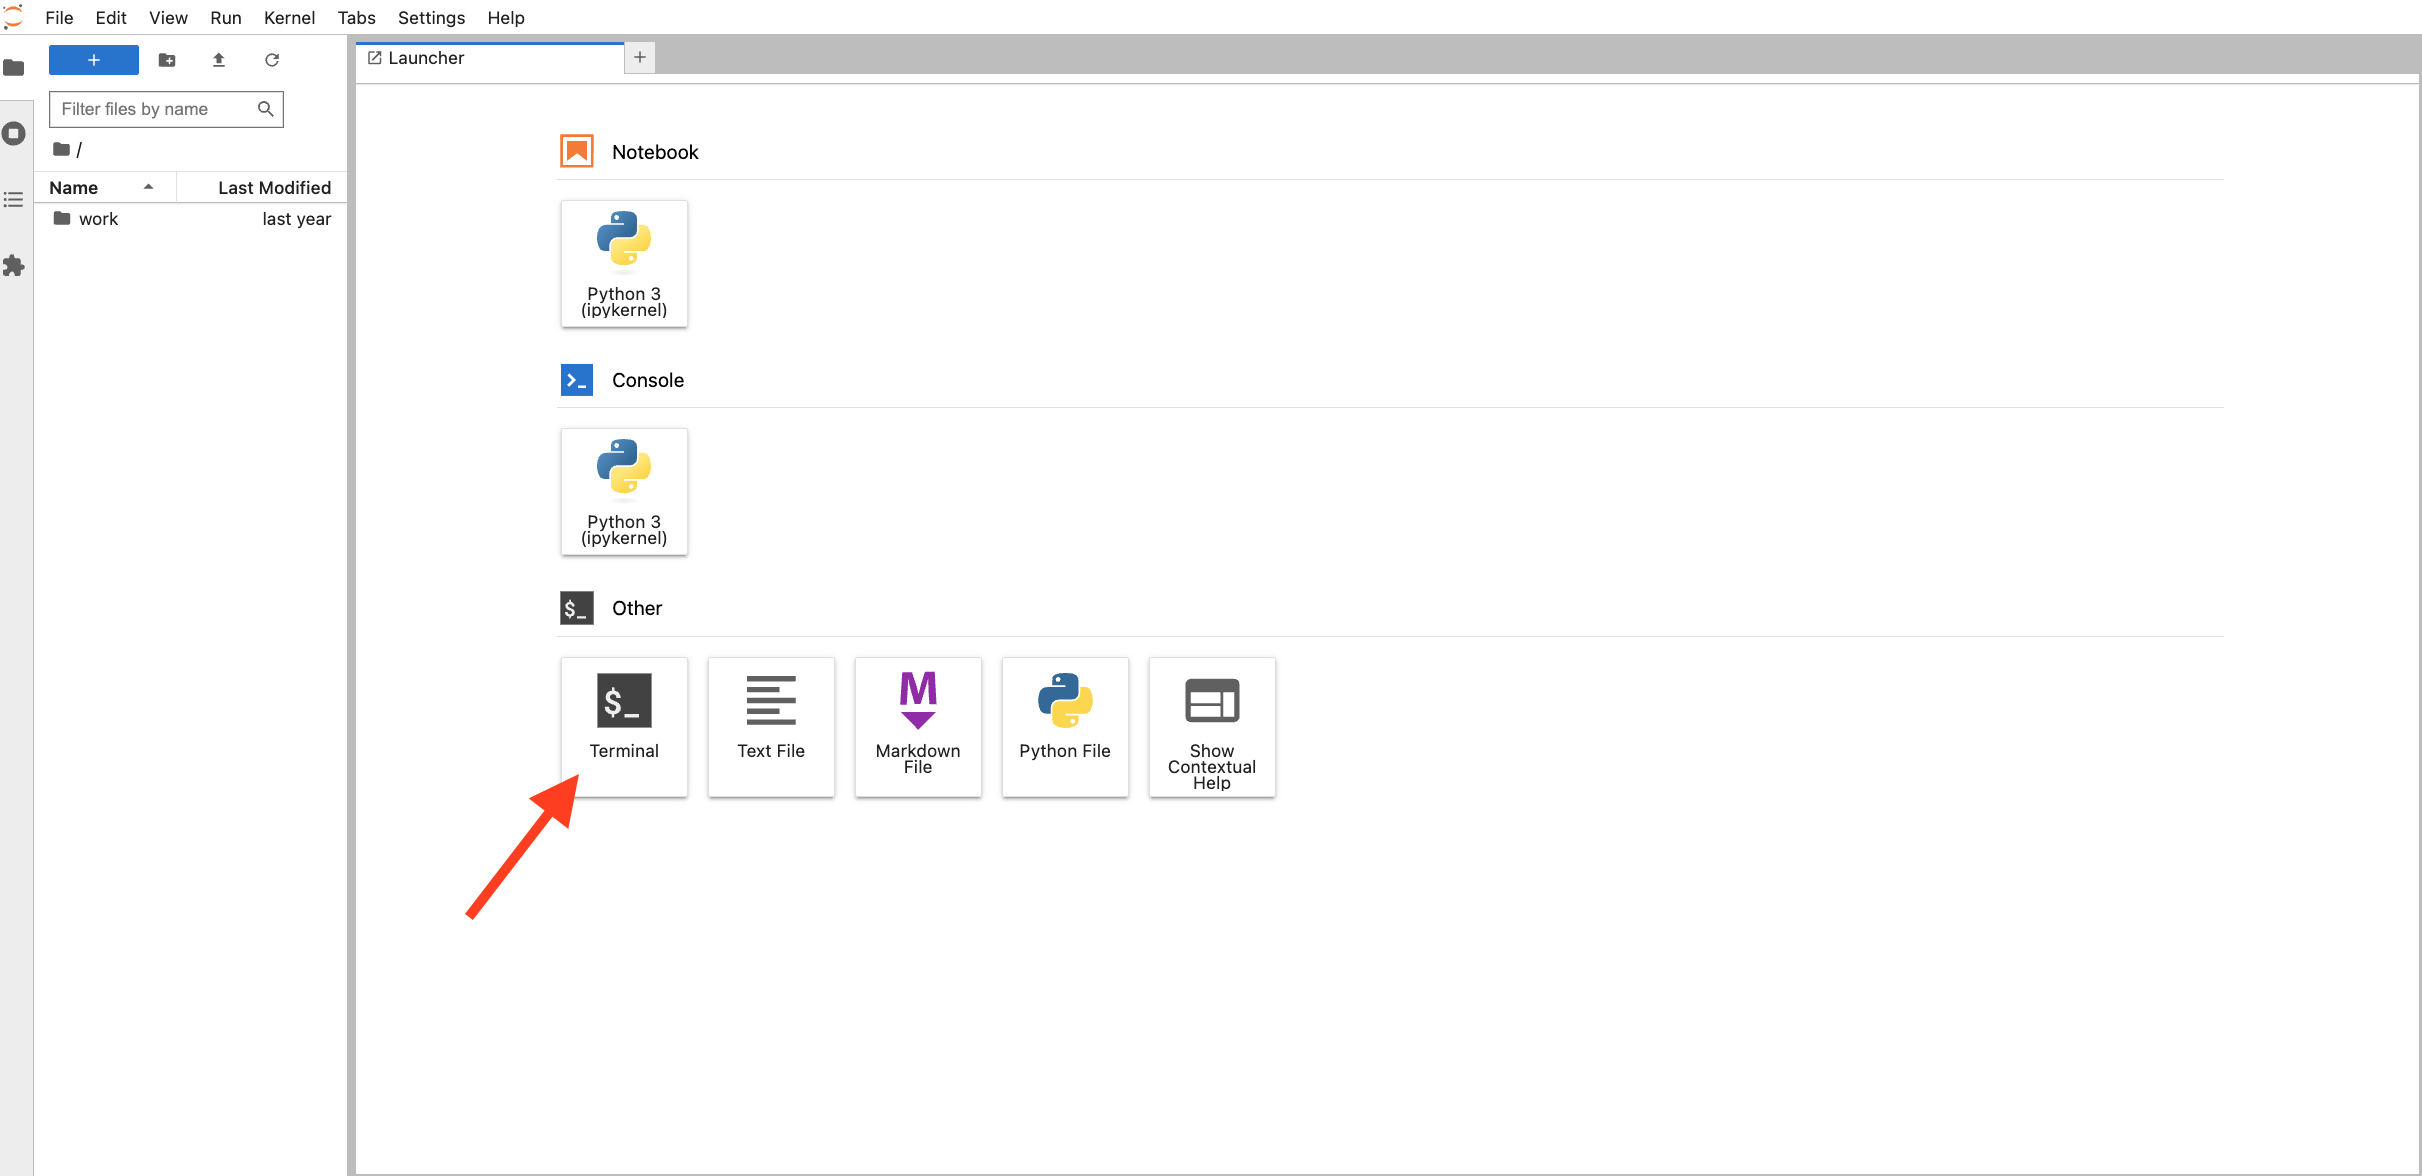
- In the open terminal app you can now use the rsync command to copy data to/from your project space in RDS.
To copy data from RDS to the DGX, you can type the following into the open terminal:
Be sure to replace everything in brackets < > with values specific to the data you are trying to copy as follows:
<your_unikey>: Your University of Sydney unikey, usually in the form abcd0123.
<rds_project>: The name of the project you have on DashR with data stored in RDS.
<path_to_project_data>: The location of your storage directory under your project on RDS. (e.g. my_project_data/my_project_data_for_dgx/)
<pvc_mount_point>: The location your PVC has been mounted (this is established when your PVC is provisioned). (e.g. /scratch)
<path_to_pvc_data>: The path of the data you have stored on the PVC. (e.g. my_dgx_data/workflow_output/)
rsync -rlctP <your_unikey>@research-data-int.sydney.edu.au:/rds/PRJ-<rds_project>/<path_to_project_data> <pvc_mount_point>/<path_to_pvc_data>After you execute this command, you will be prompted for the password associated with your unikey to establish a connection to RDS.
To copy data from the DGX to RDS, reverse the order of source and destination in the above command:
rsync -rlctP <pvc_mount_point>/<path_to_pvc_data> <your_unikey>@research-data-int.sydney.edu.au:/rds/PRJ-<rds_project>/<path_to_project_data> The above rsync will also perform integrity checking using a checksum, comparing the original and copied files to make sure they are identical.
During file transfer, for larger files, you can close the browser and leave things running in the background. You can then reconnect to check its status by logging back into the web UI at gpu.sydney.edu.au.
Until we have correct user IDs and group IDs for your unikey and project set up in the PVC and the running workflow, you will need to update the permissions of the mounted PVC as root to be able to read/write files from there. To do this:
- Change to root
sudo su- Use chmod to set read and write for all on your mounted PVC space
chmod -R 666 <PVC_mount_point>You must do these steps BEFORE running the rsync command above.